The post DIY – Reusable makeup remover pads appeared first on Caspar.
]]>So we prepared one creative DIY project to make your skincare routine more pleasant – reusable makeup remover pads. All you need is a little time and fabric scraps.
Your skin will definitely thank you, and you will also help to protect the environment.
How to make reusable makeup pads?
Things you’ll need:
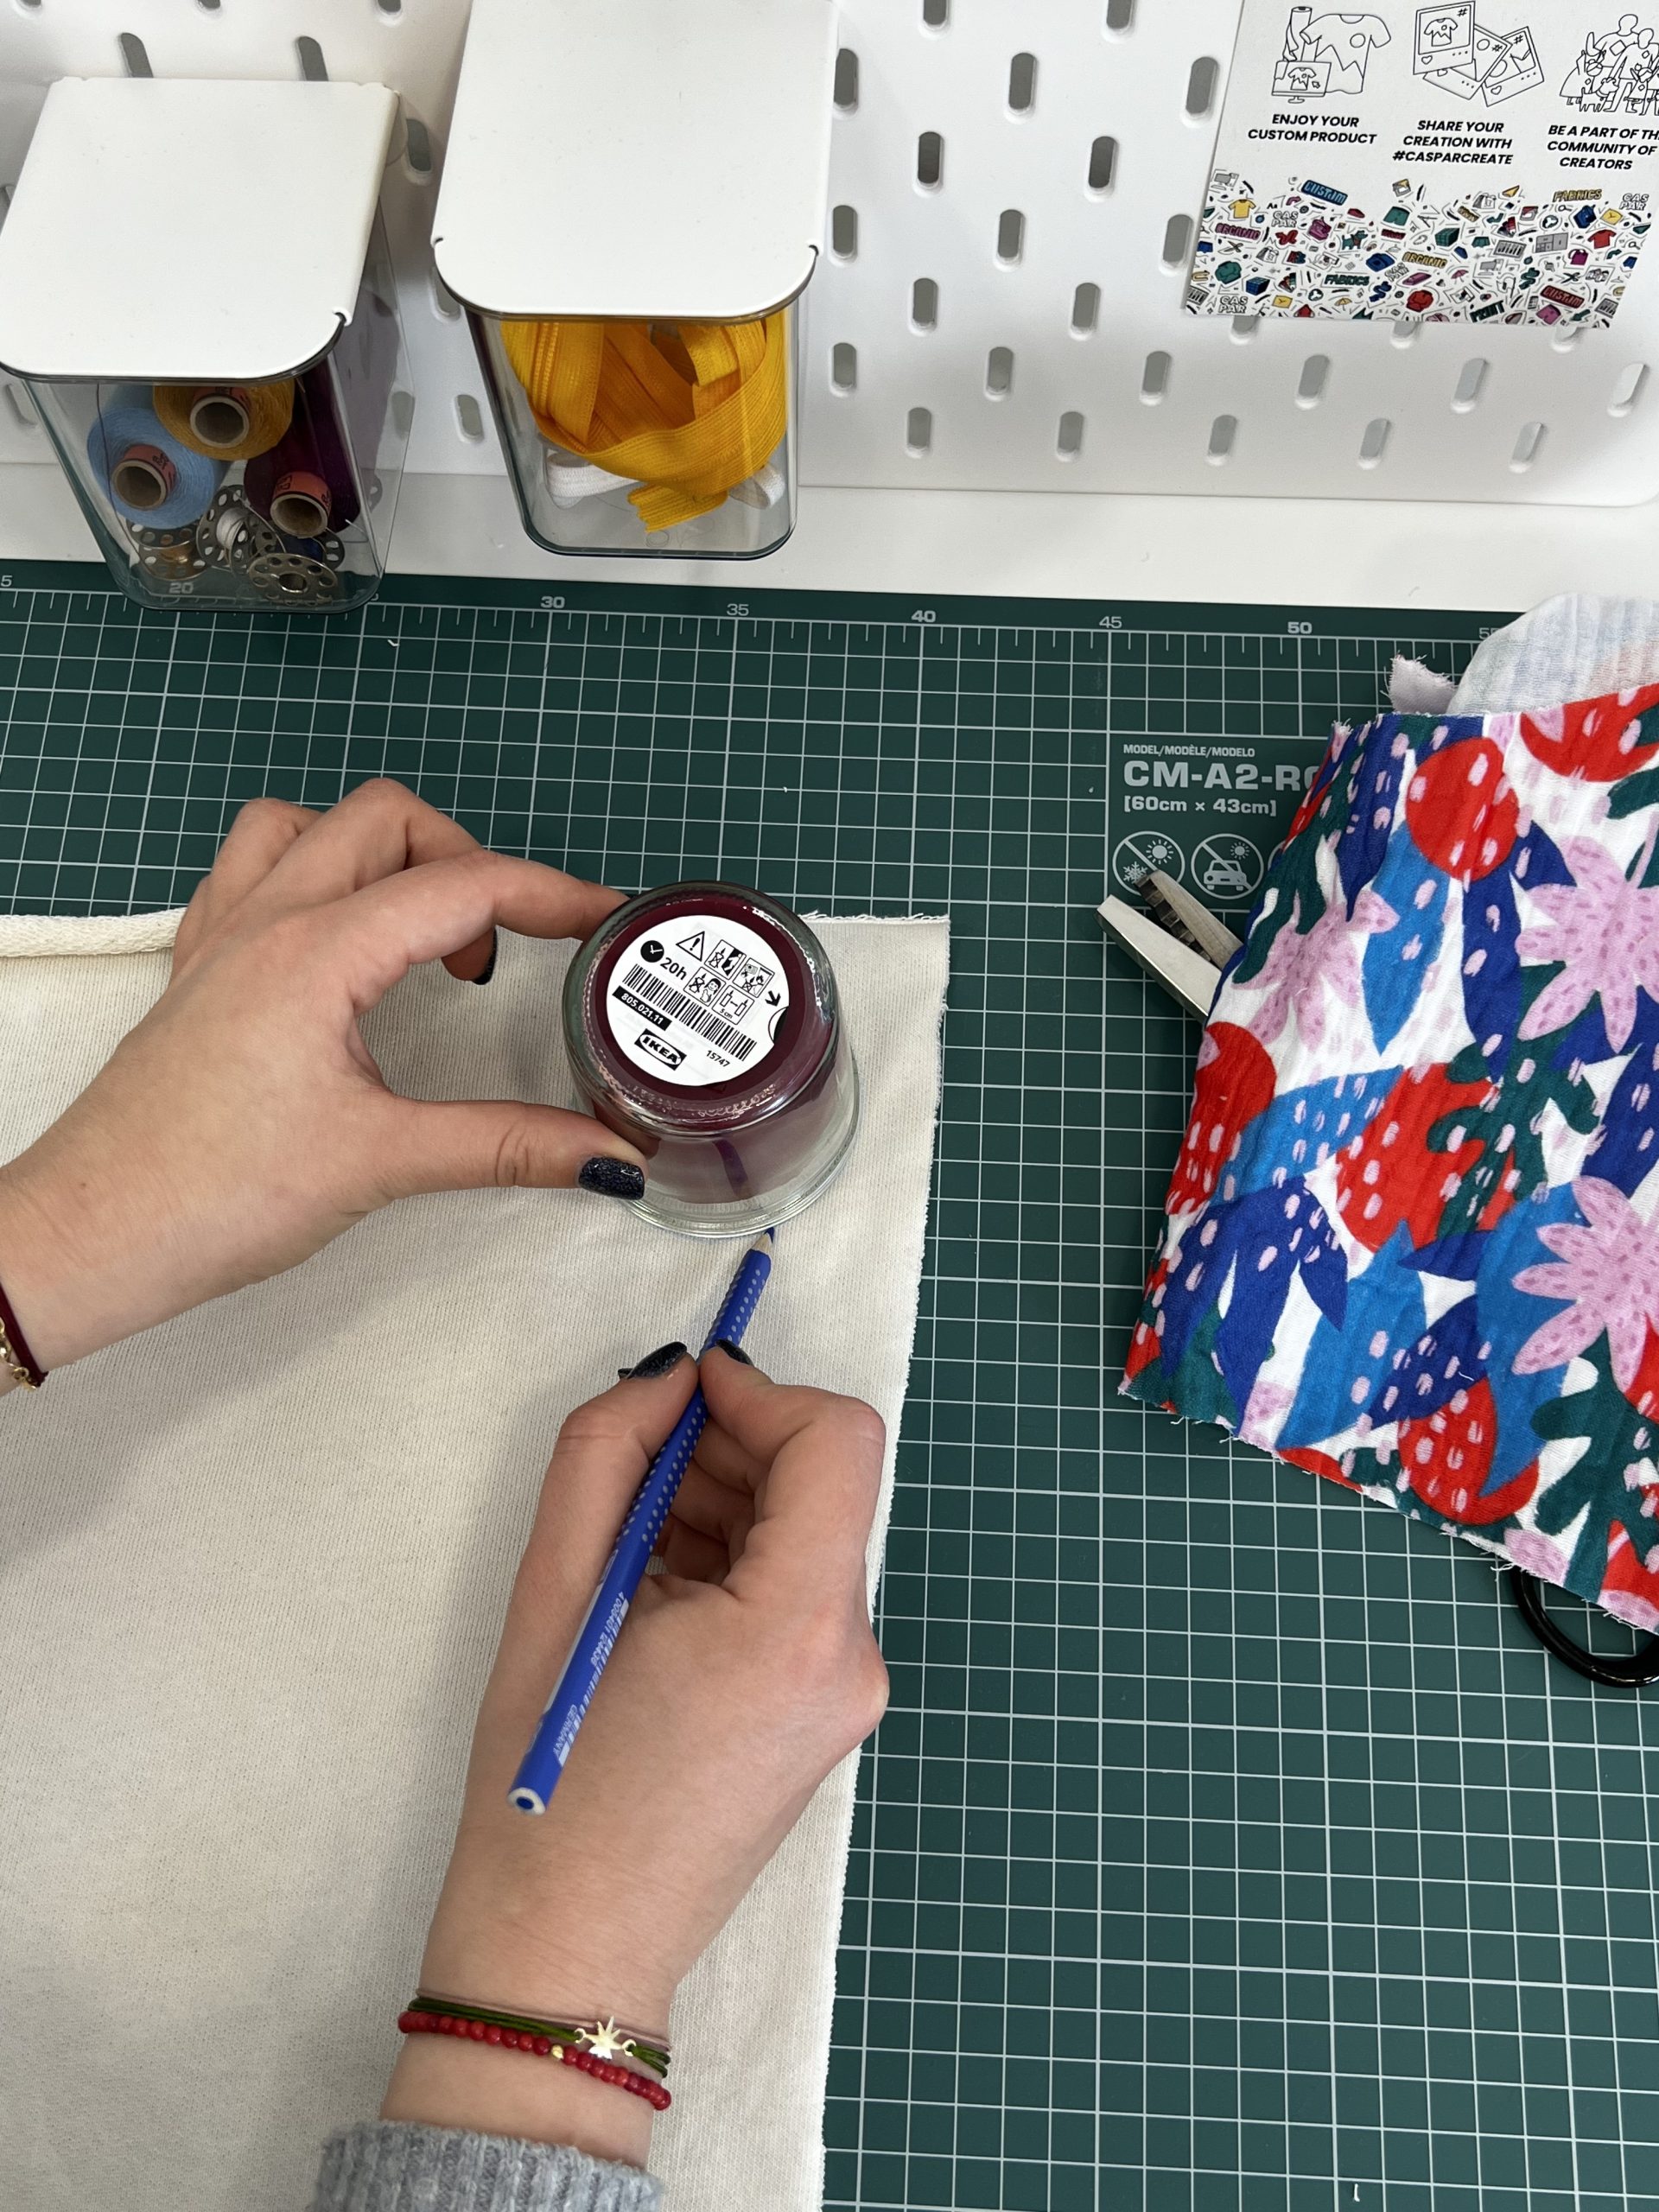
- Small candle jar or a cup
- Fabric scrap – we used Muslin Fabric
- Old towel
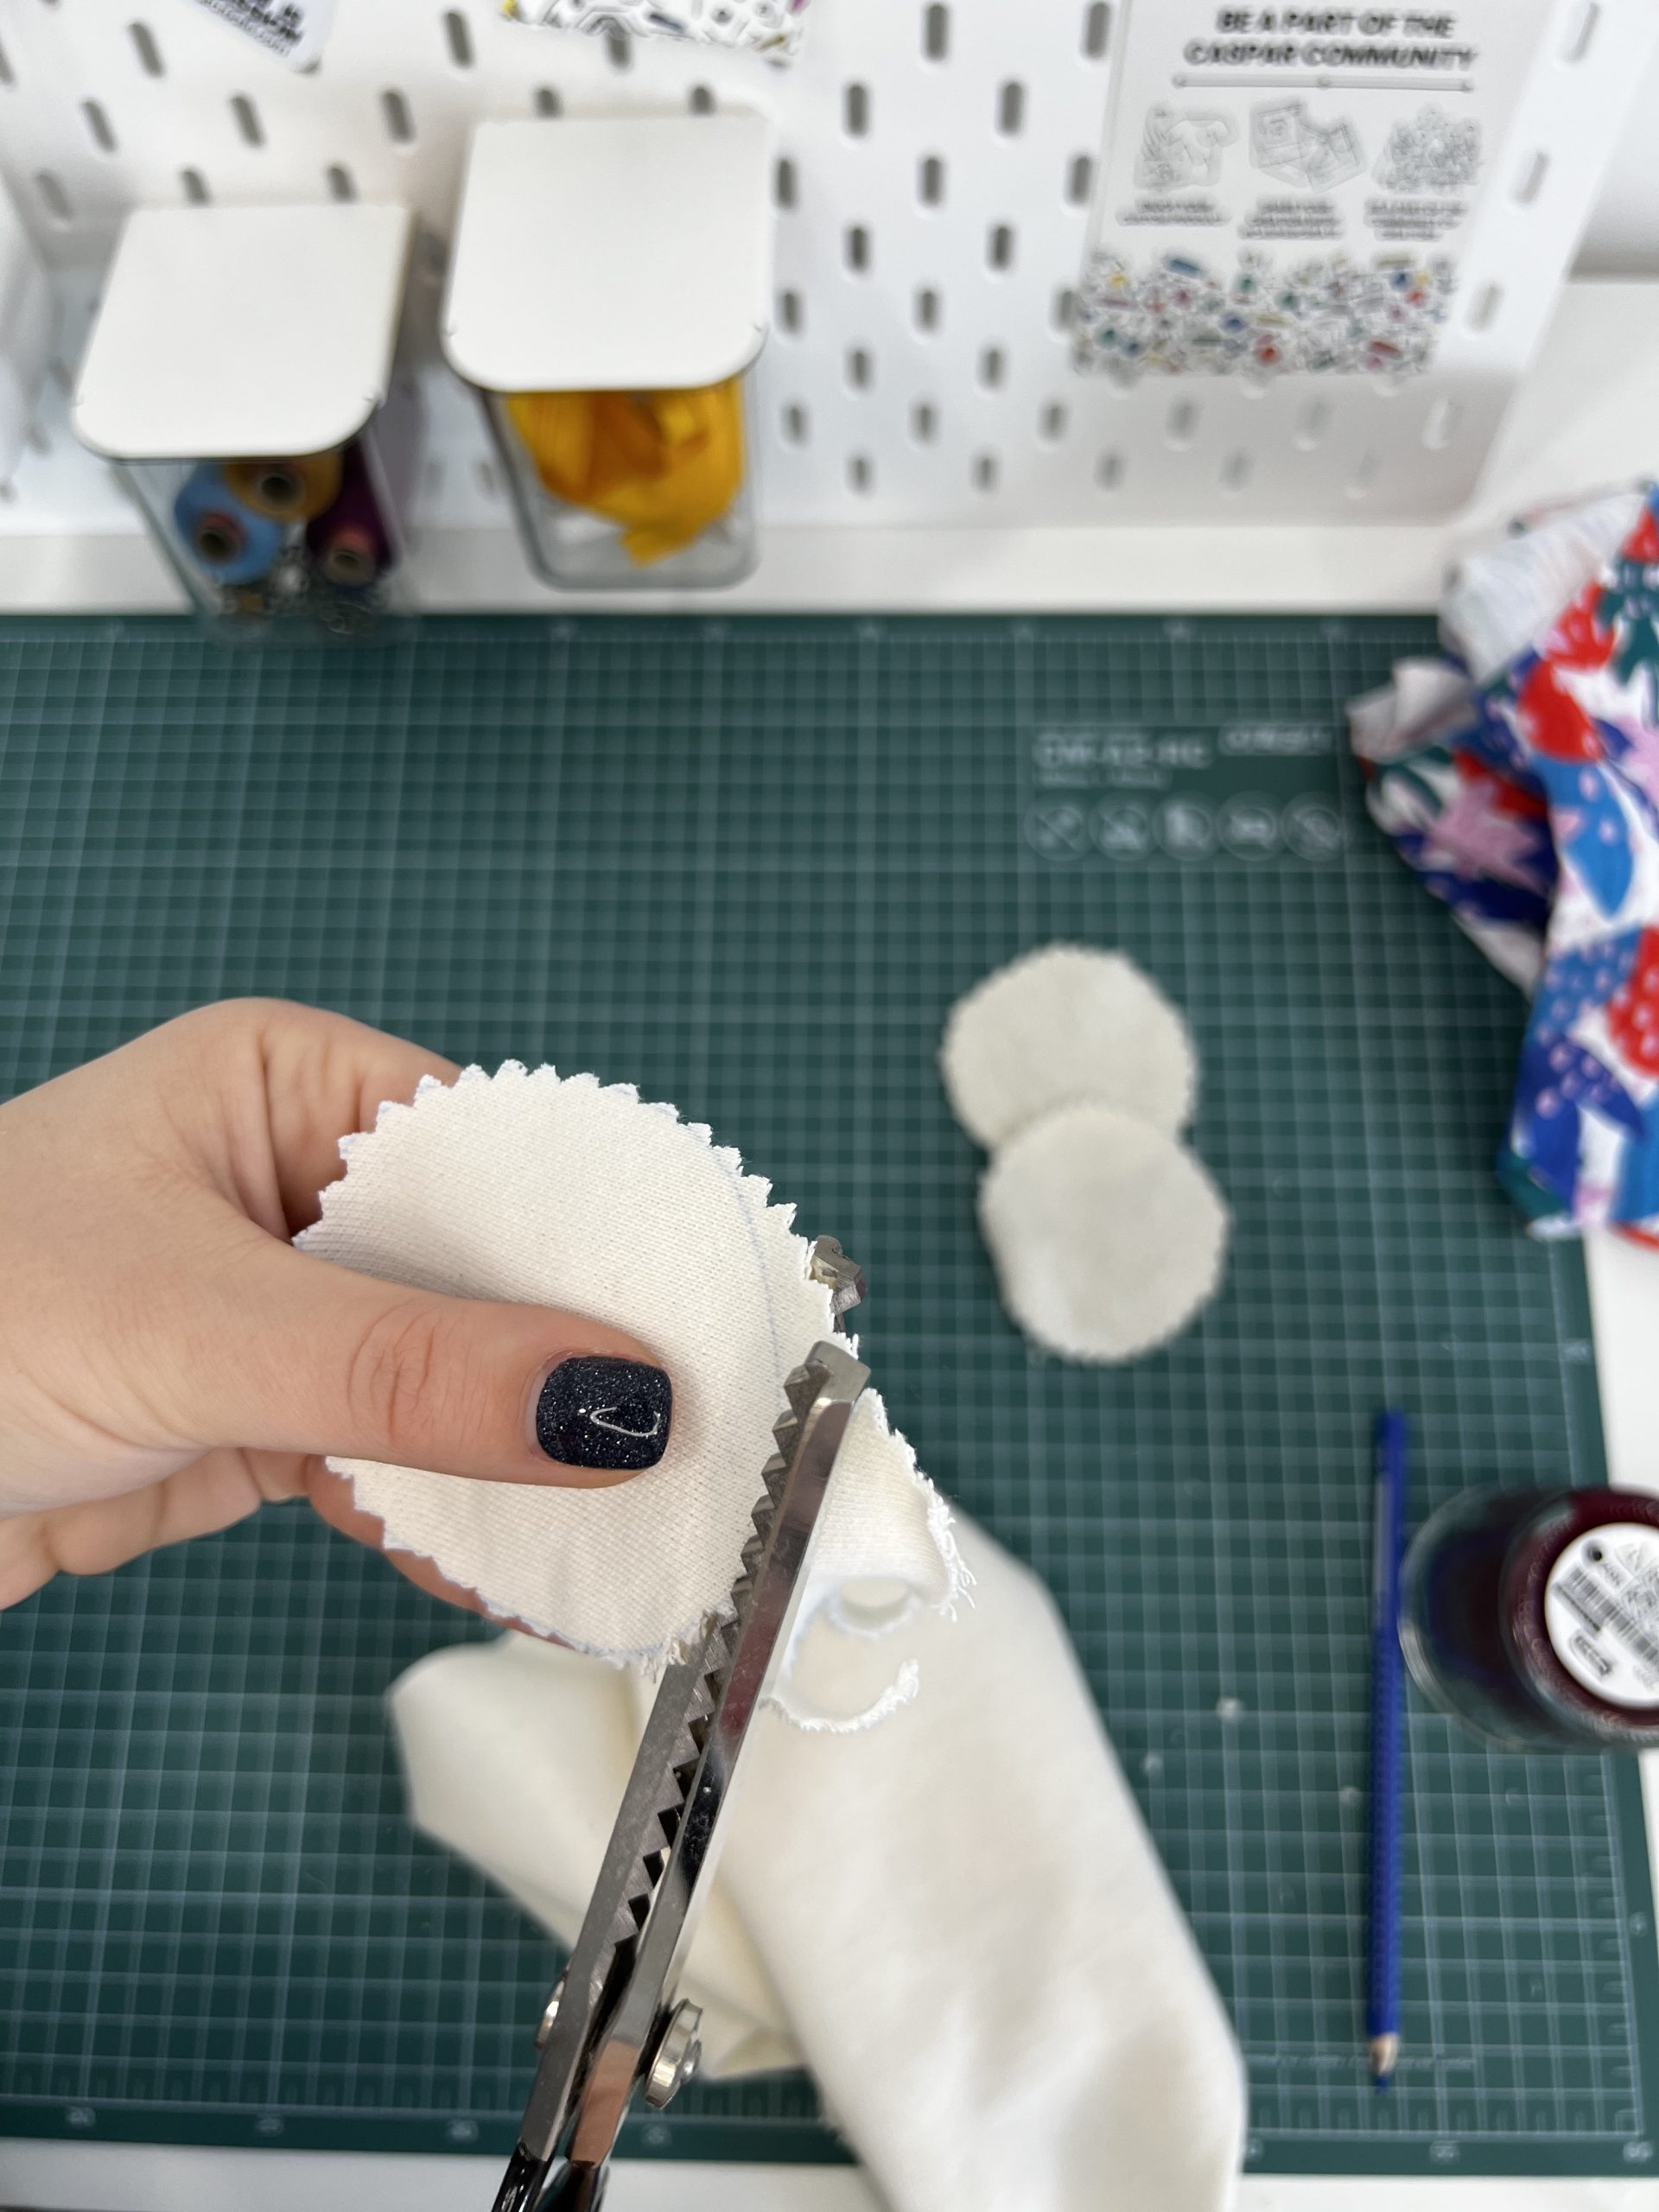
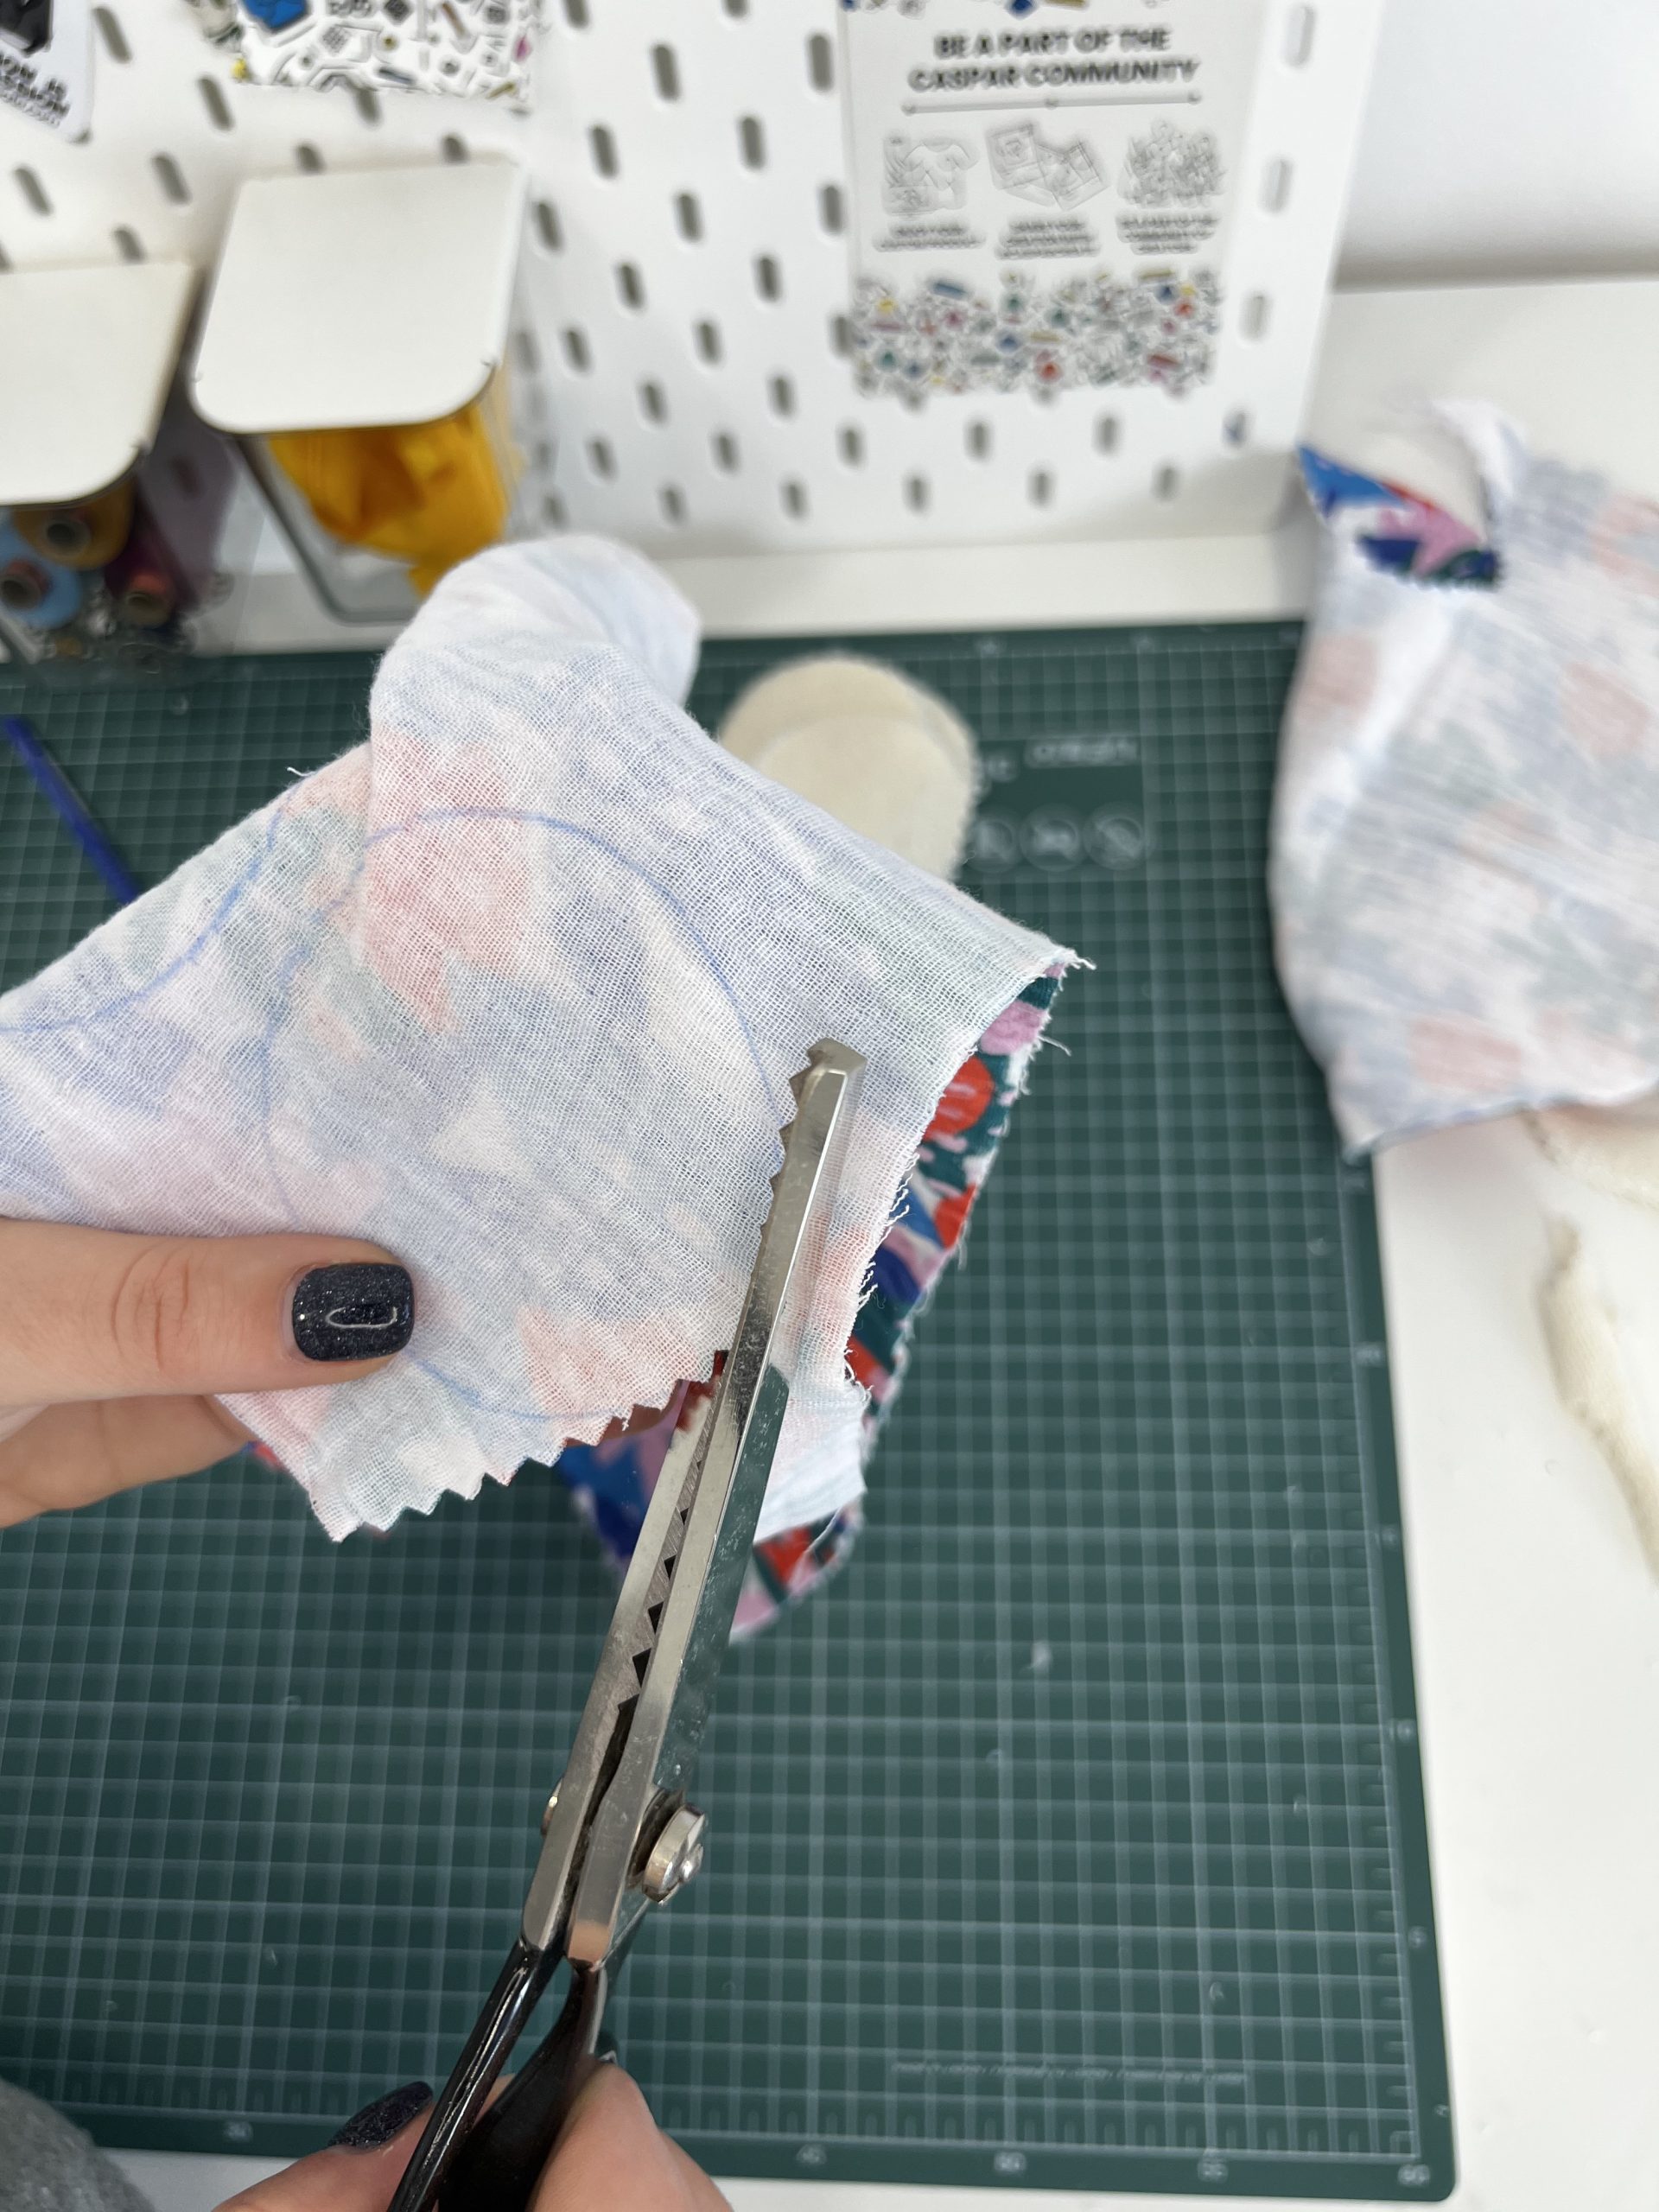
- Zig zag scissors
- Pencil
- Sewing machine
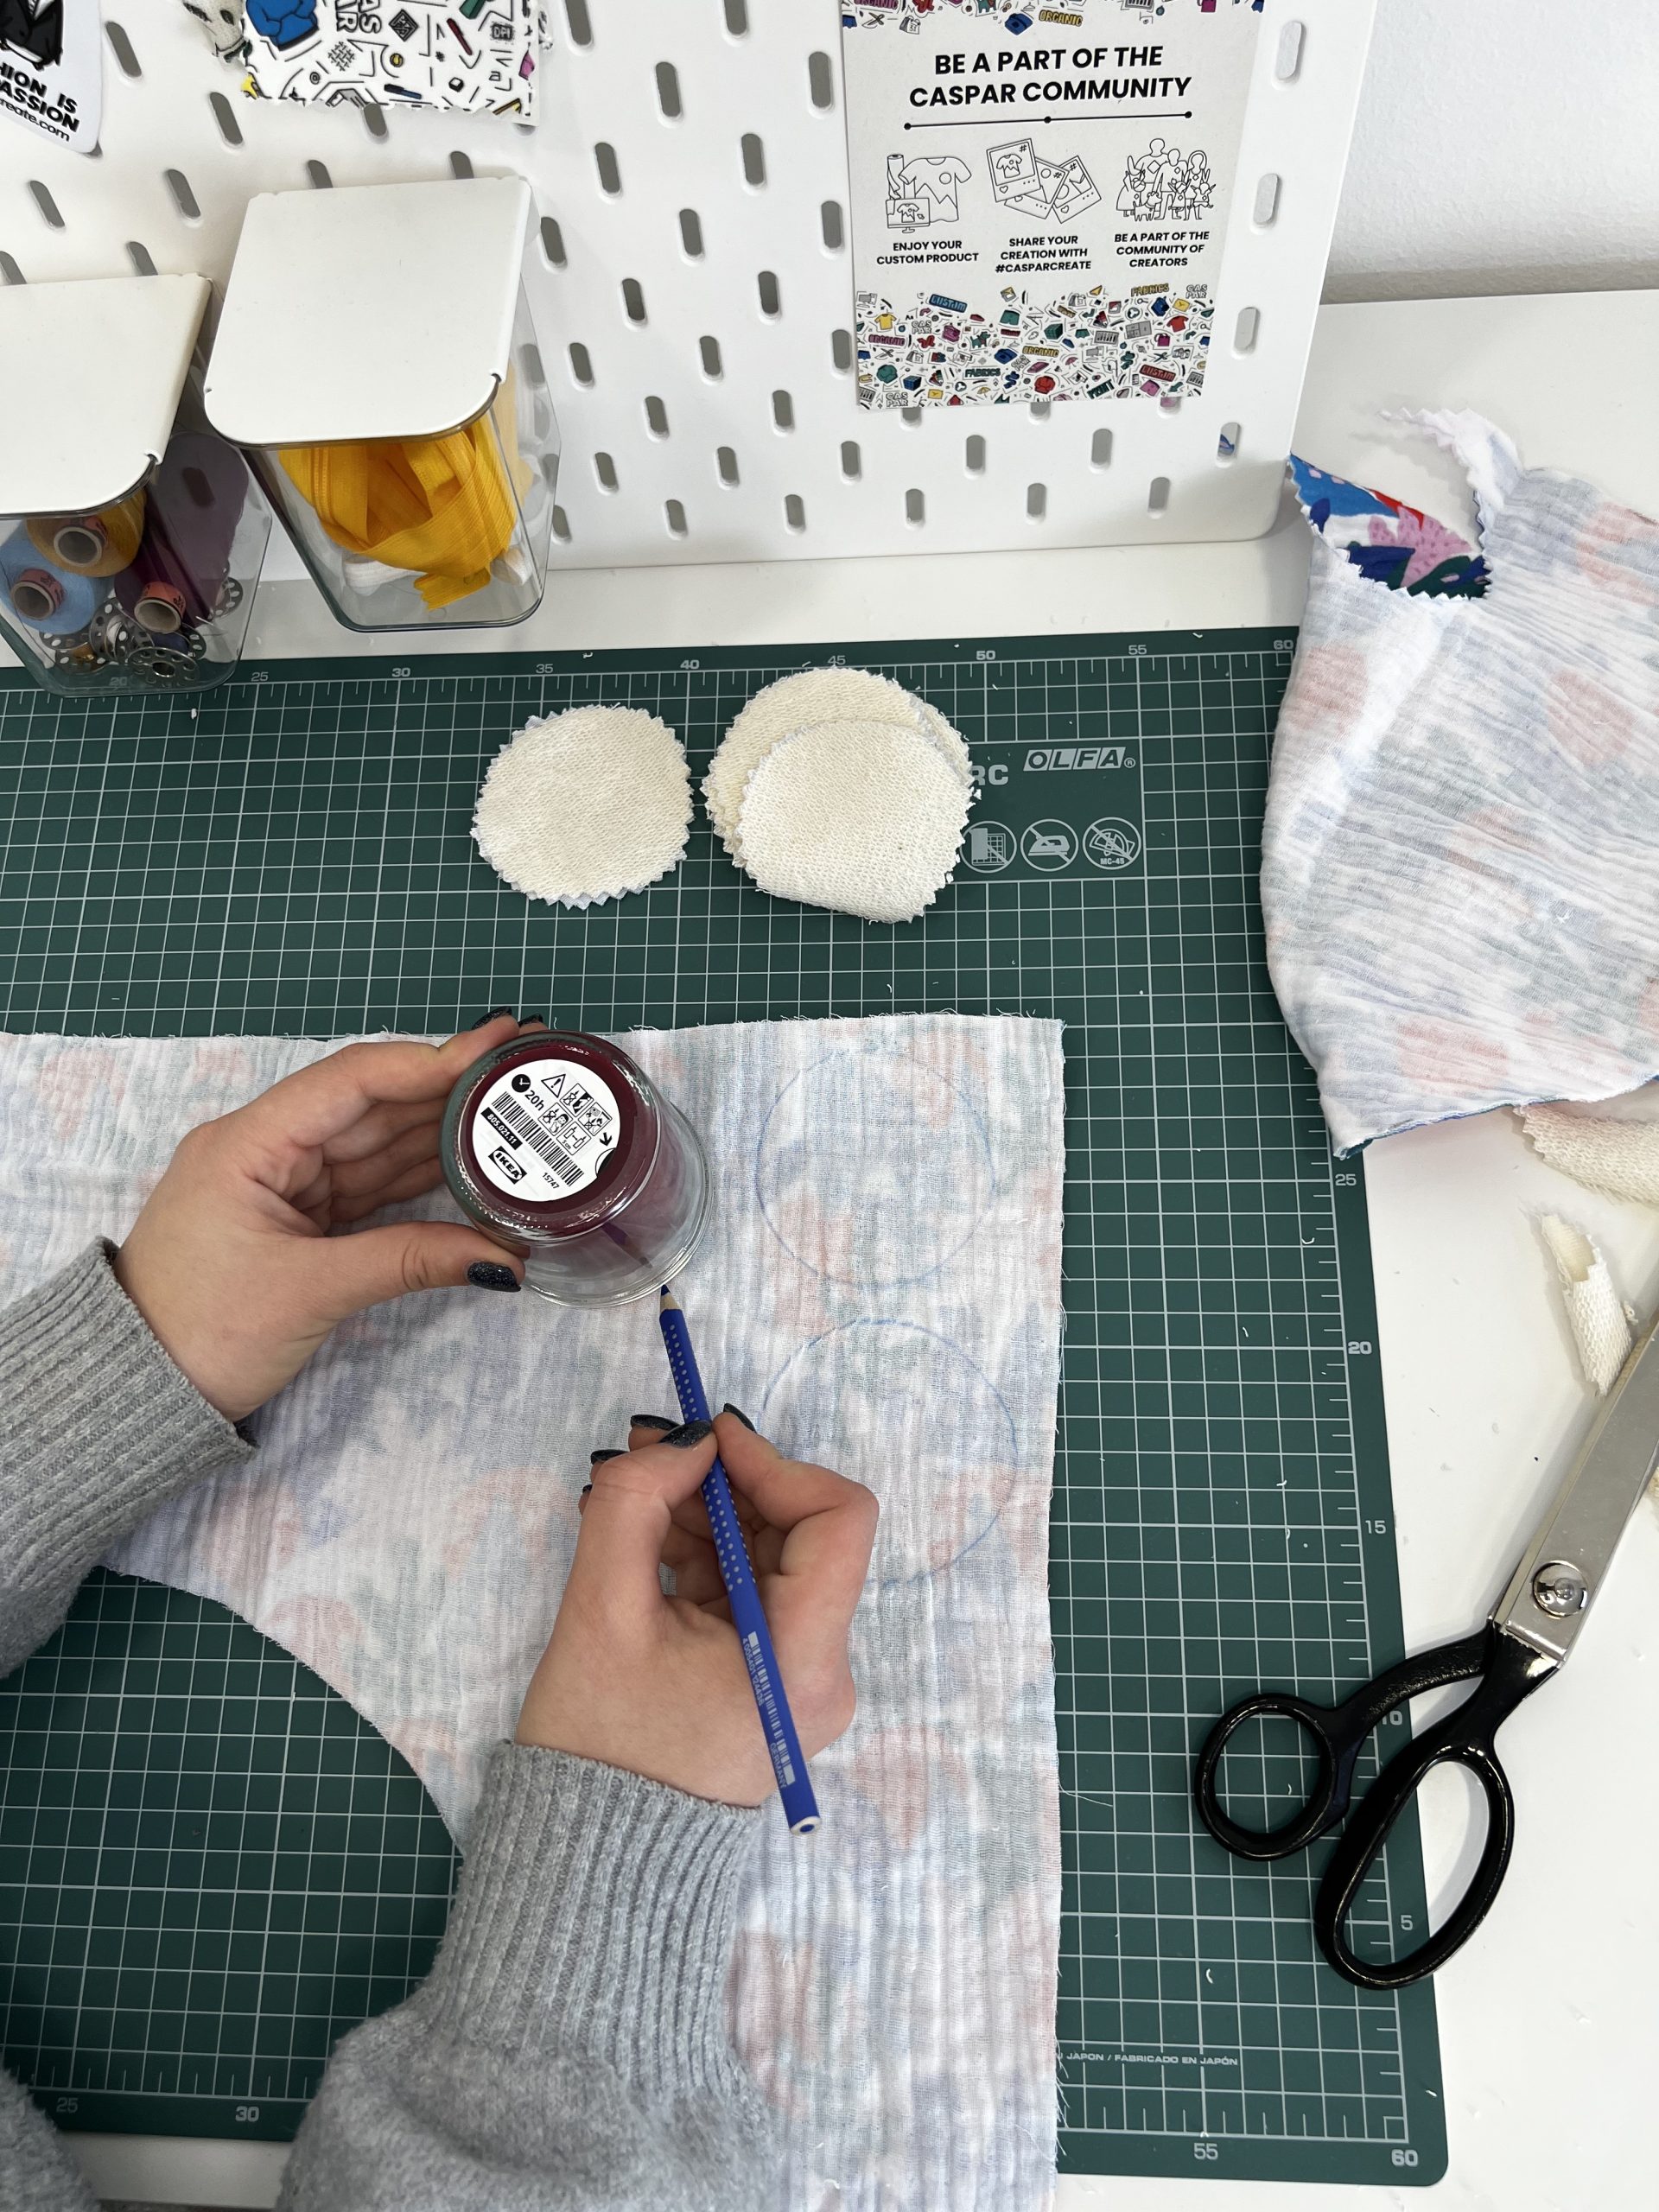
Step 1:
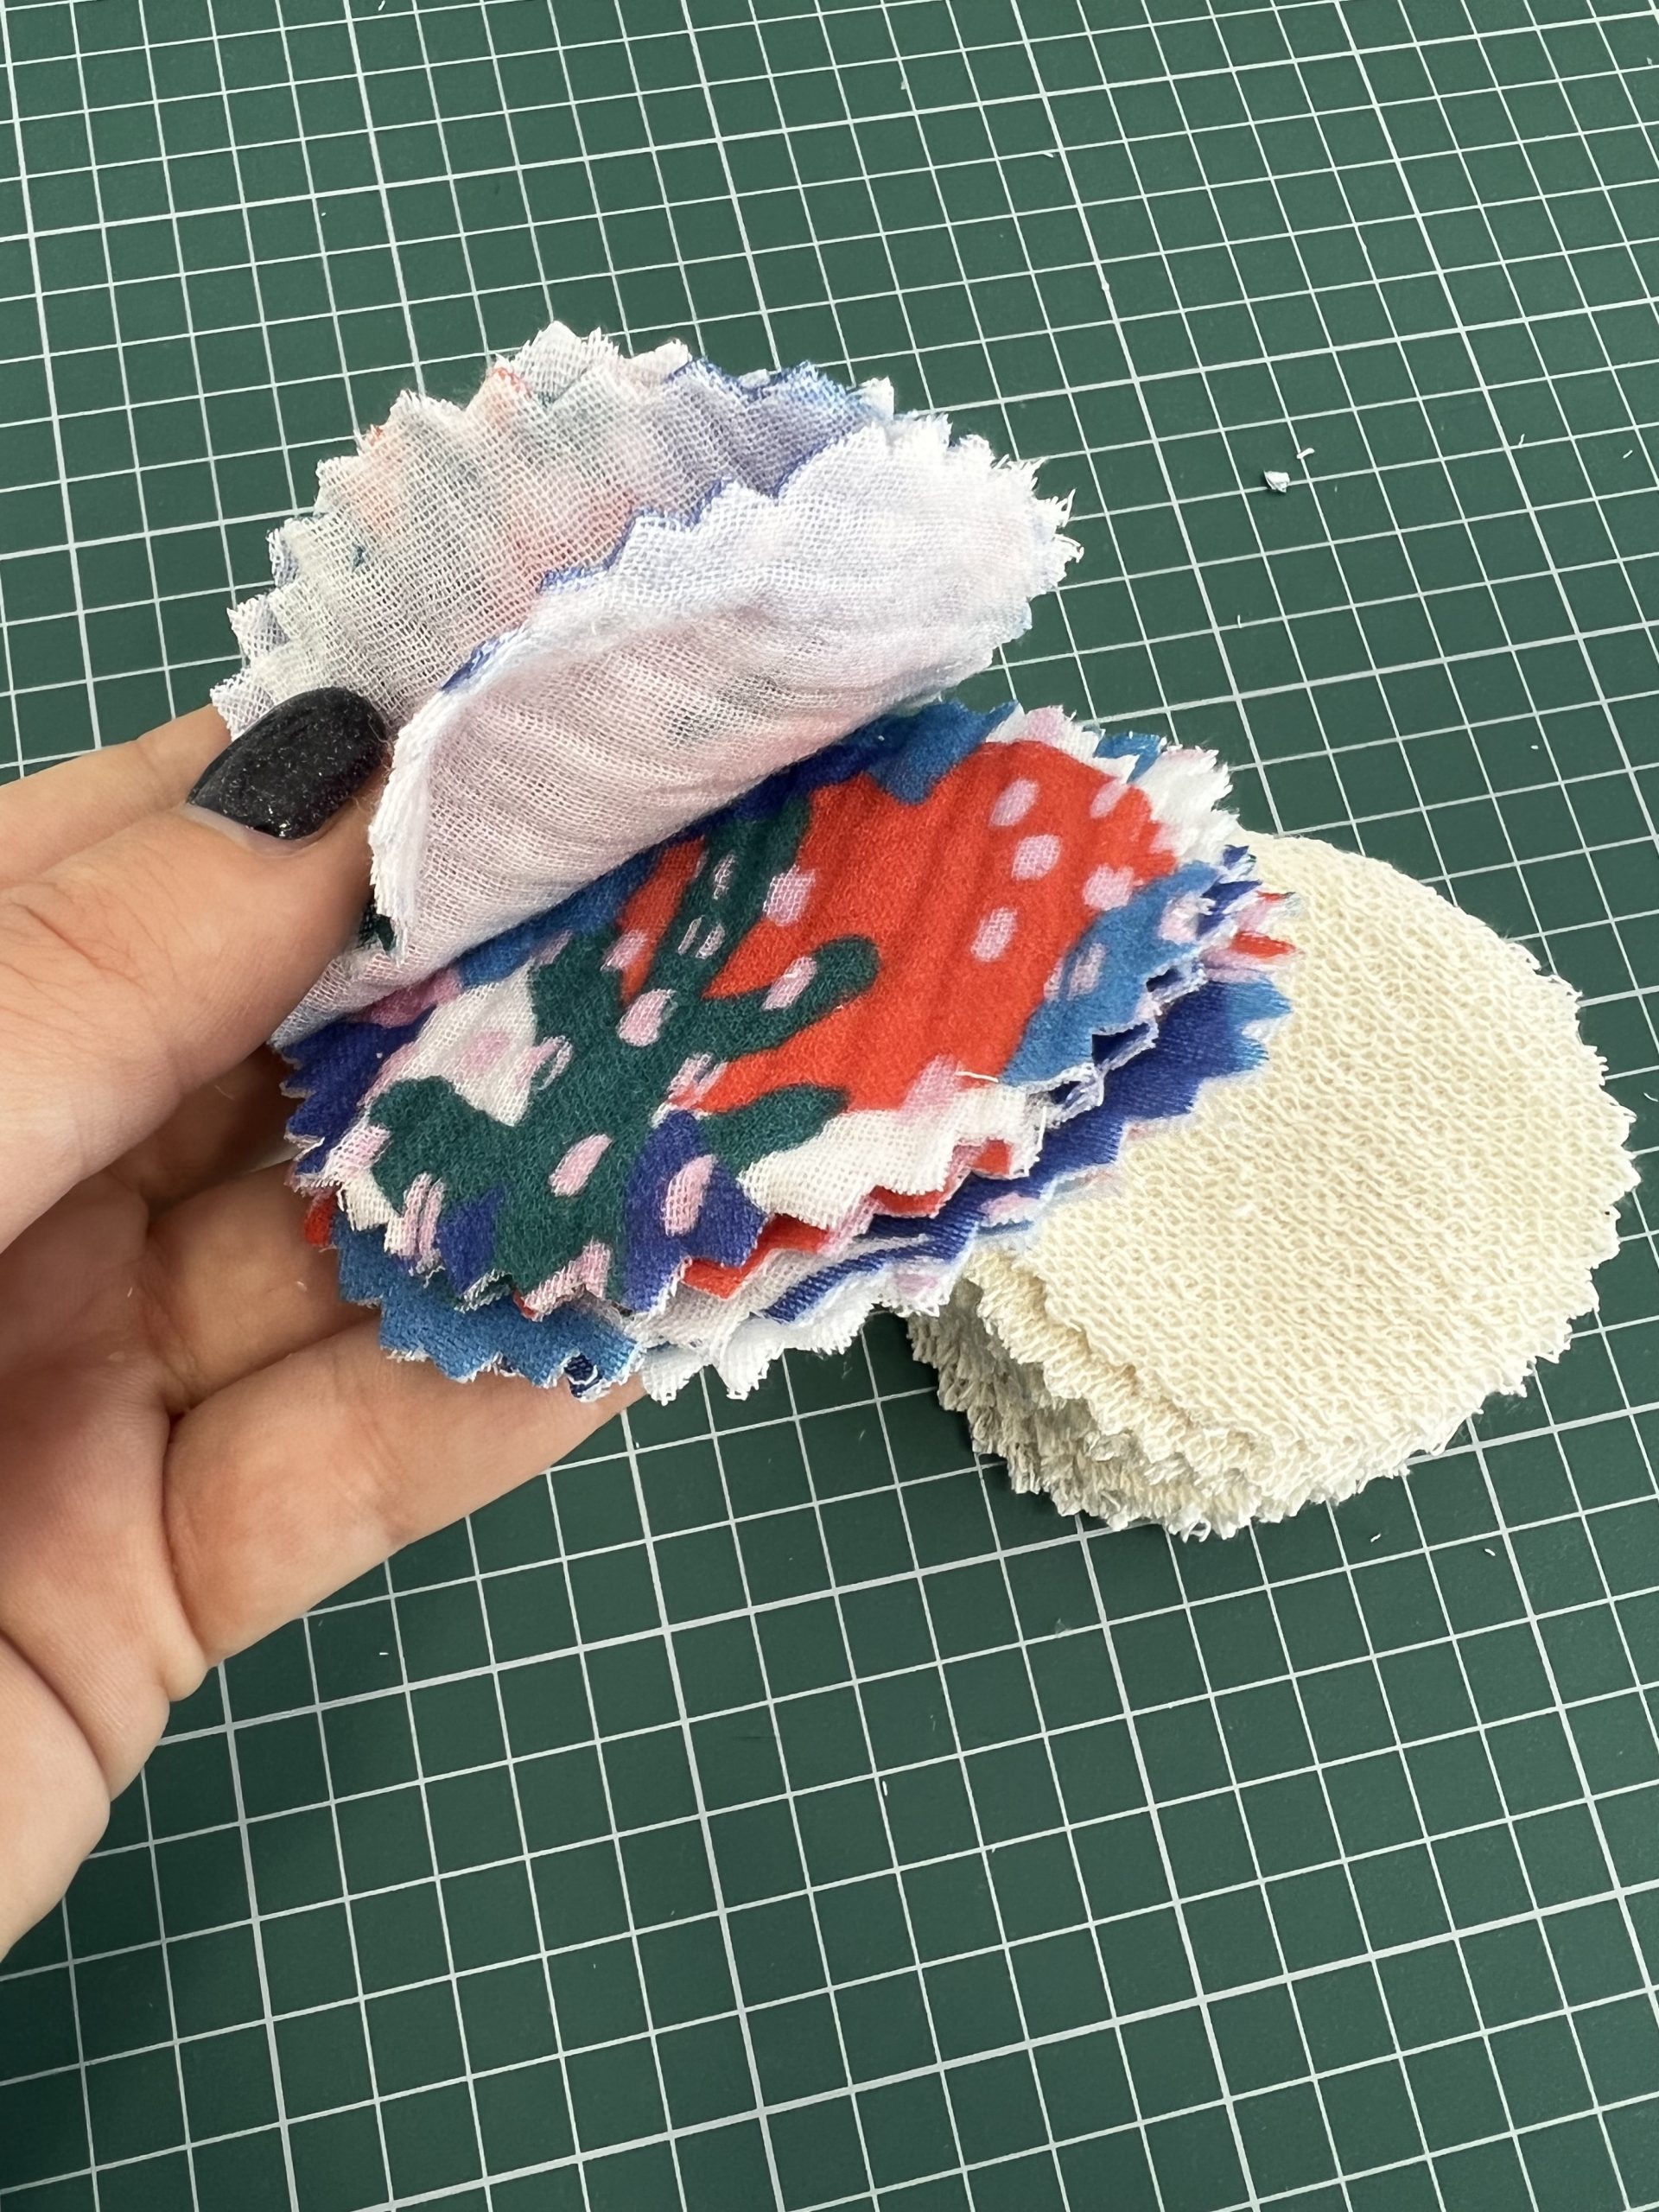
Make a circle on the towel using a candle jar. Repeat until you have about ten circles. To prevent the towel from fraying, cut out the circles with zigzag scissors. Repeat the process using a scrap of Muslin fabric after you’ve cut out all the circles from the towel.
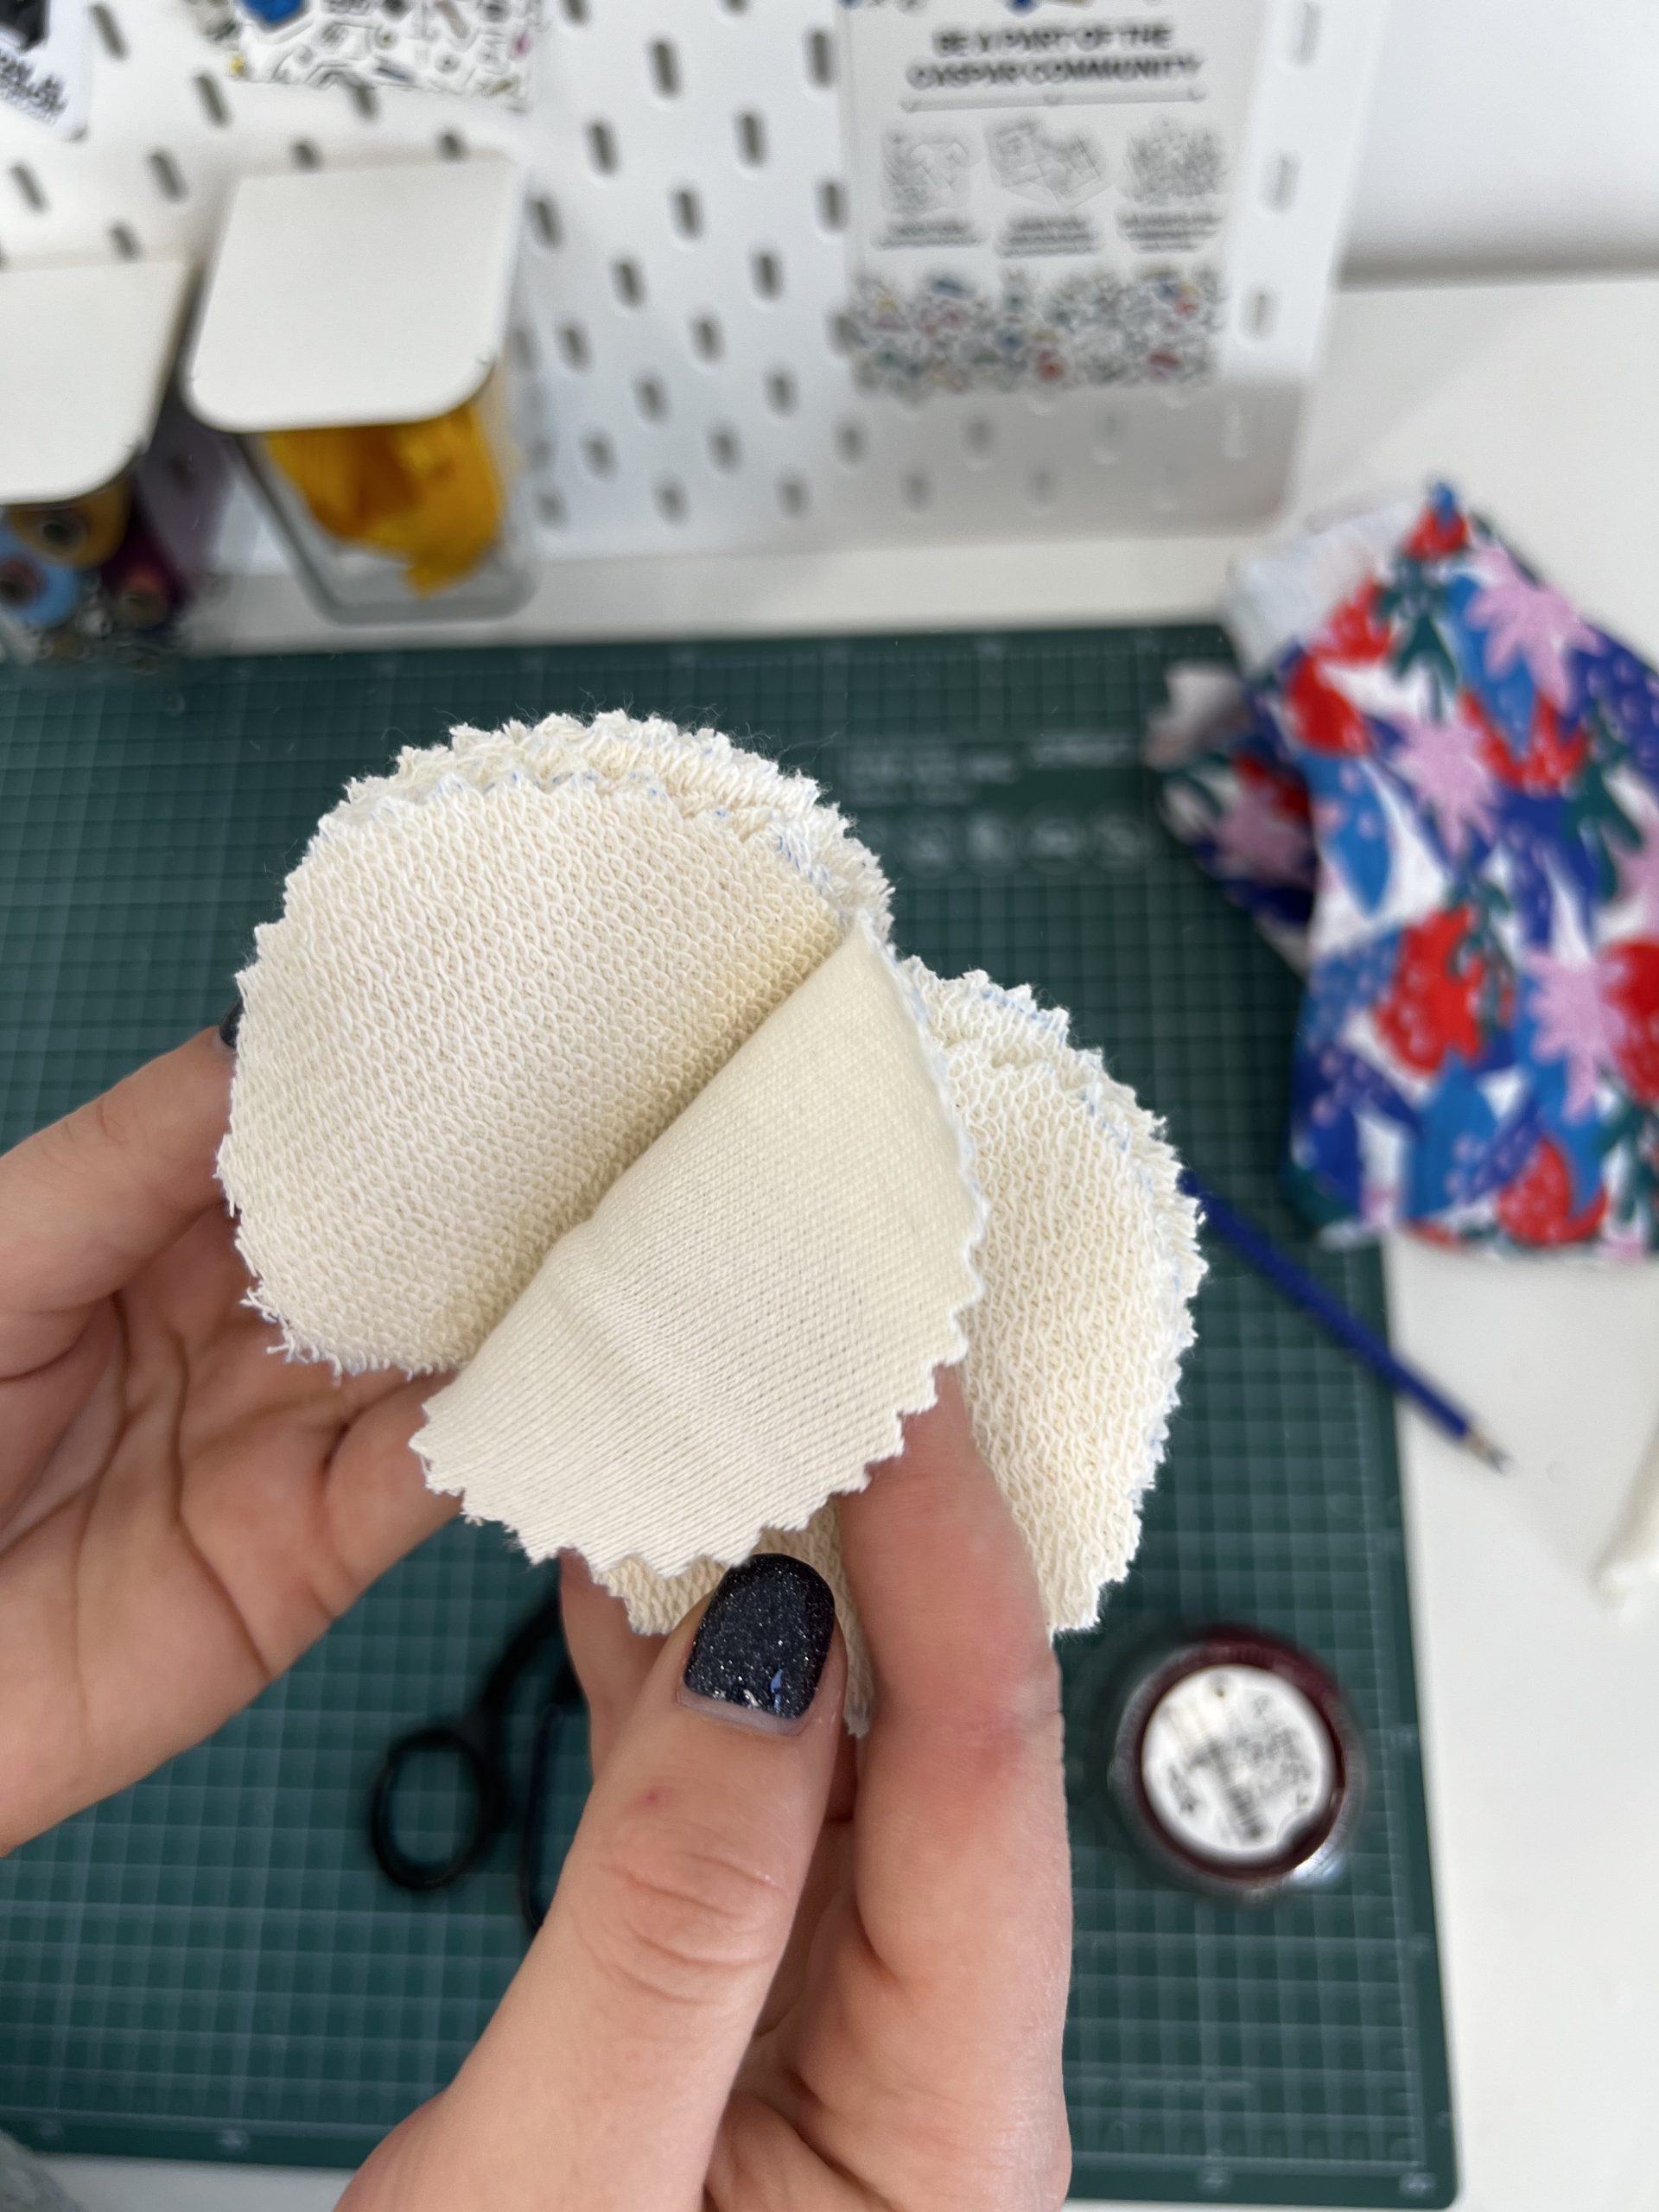
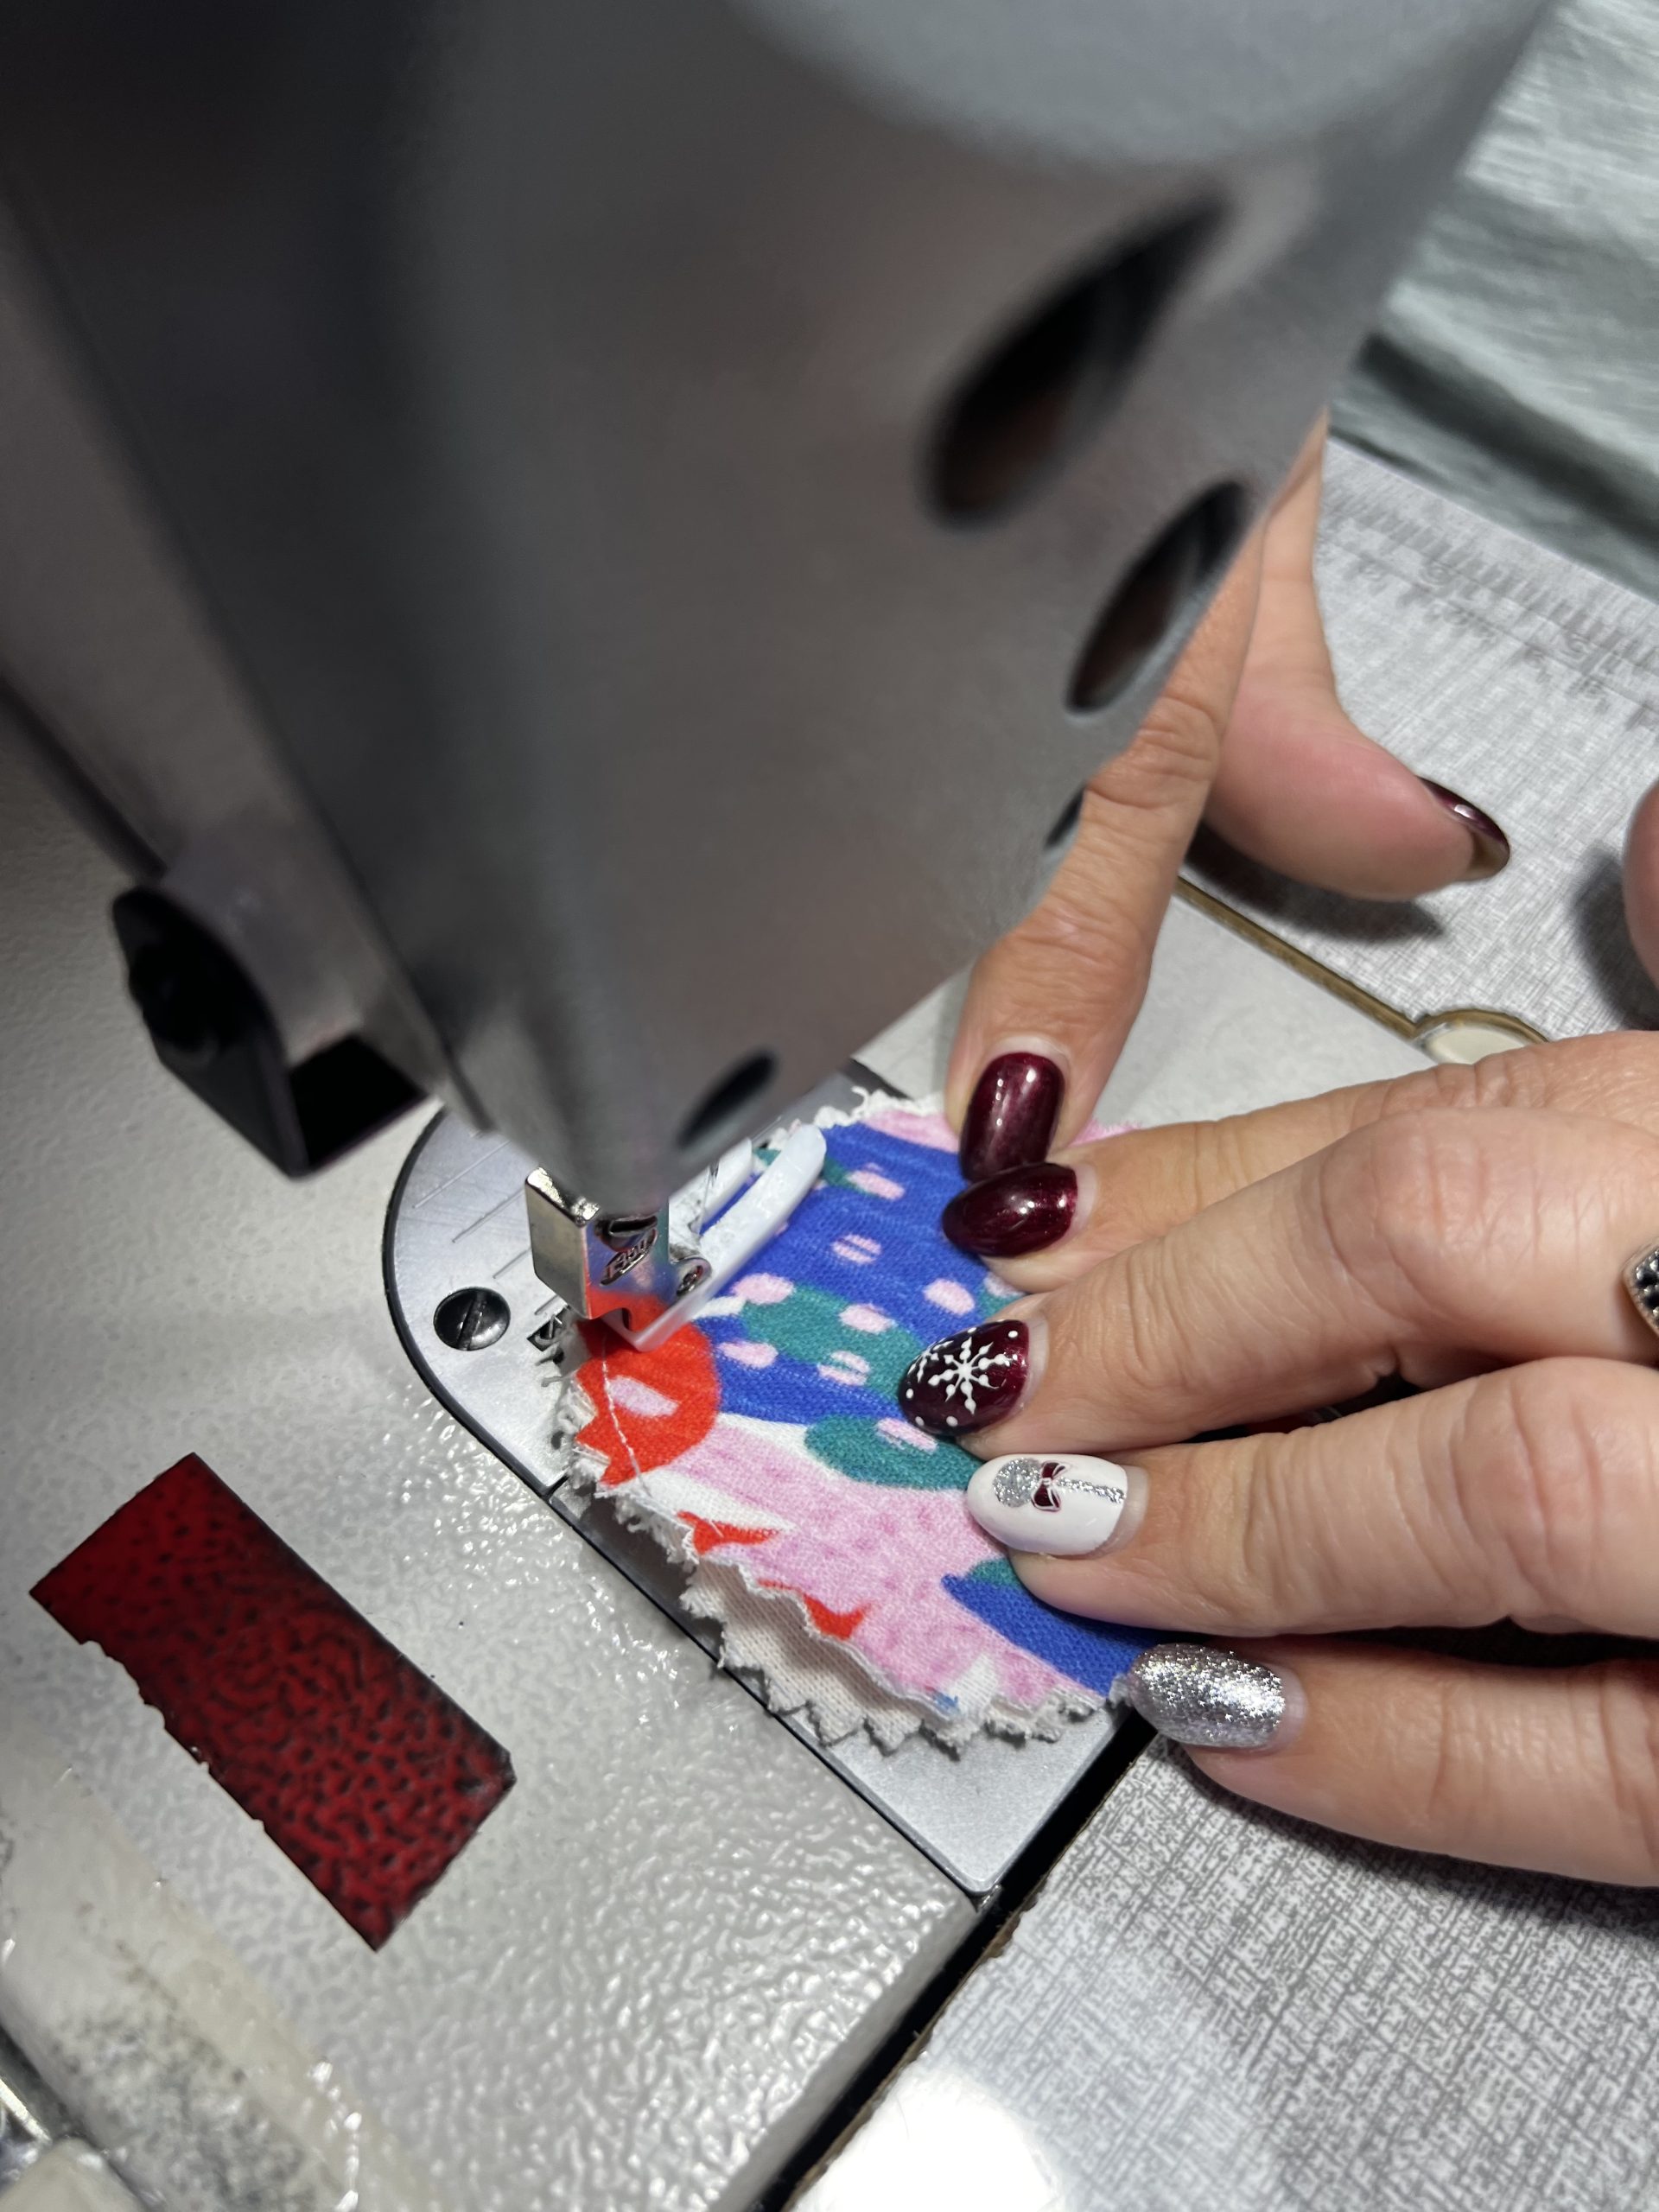
Step 2:
Put a muslin circle on top of the towel circle, and then pin them together. Use a regular stitch and sew roughly 6 mm in from the circle’s edge. Repeat the process for all the circles.
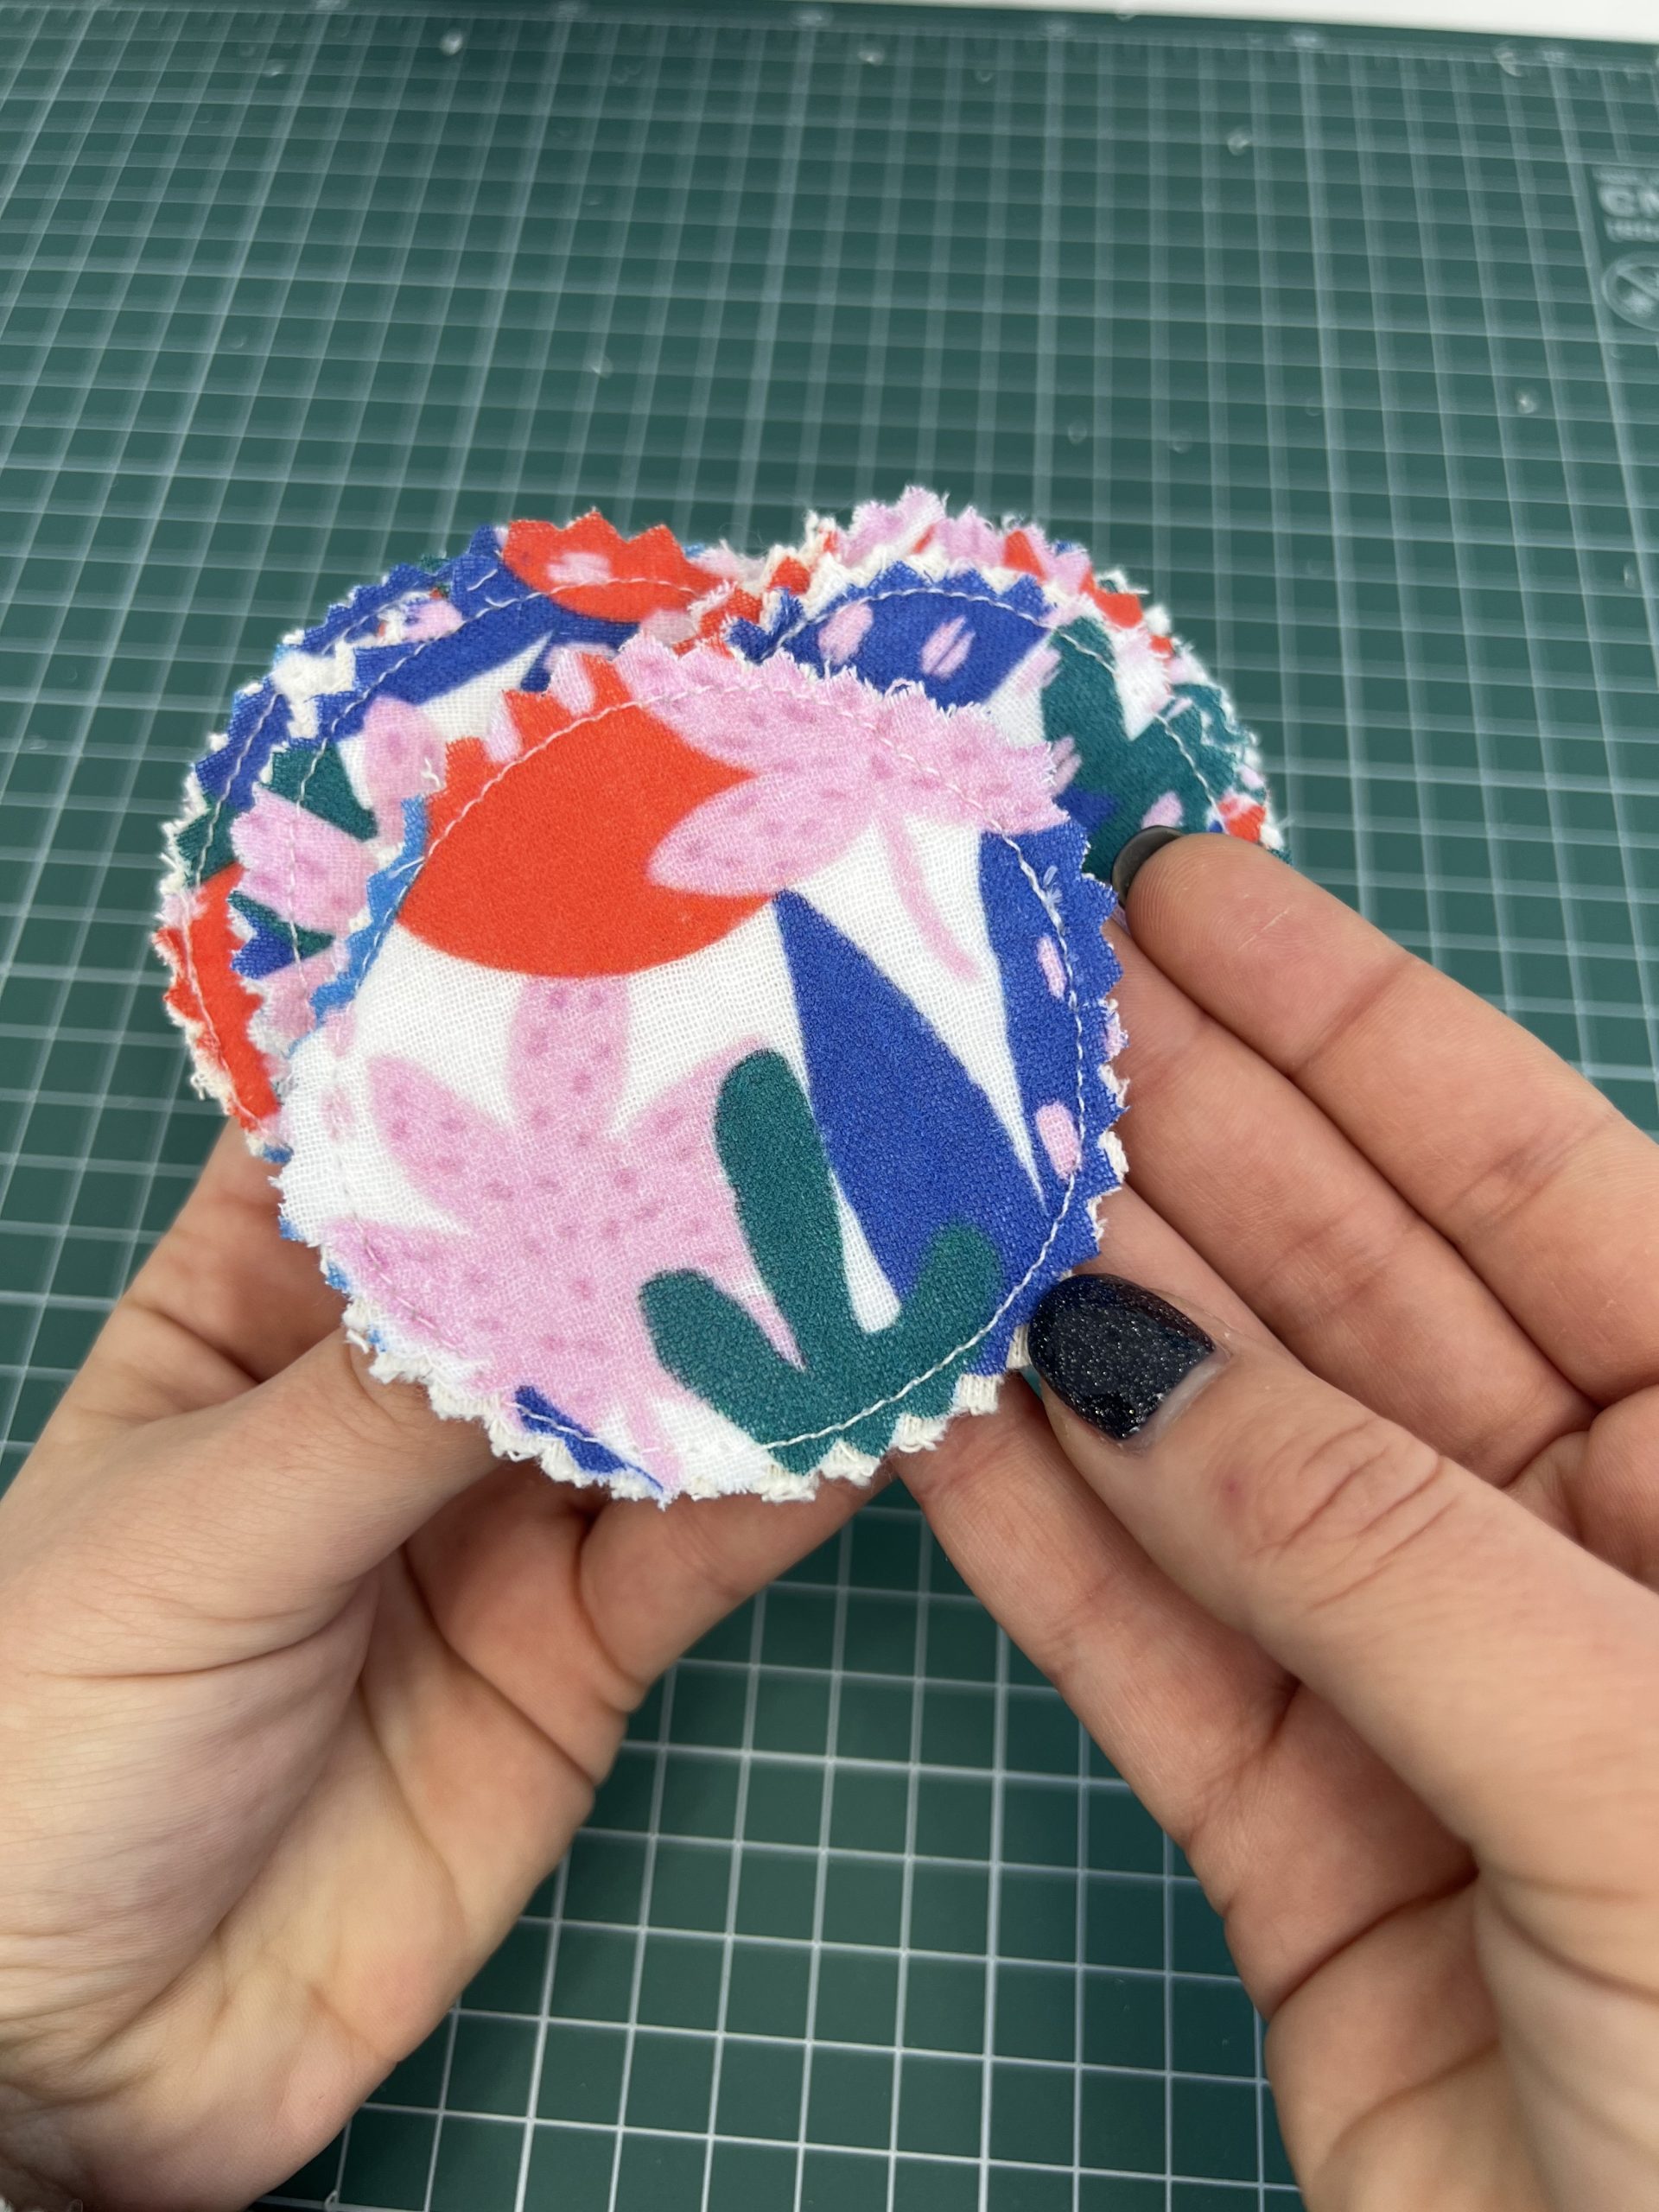

And that’s it!
Store your reusable makeup remover pads in a jar with a lid until you’re ready to use them! You can wash them in your washing machine by putting them in a smaller mesh bag and laundering them with your other towels.
To do this DIY project, go to the Fabric Types page and choose Muslin Fabric. After that, choose your preferred design – you can select one that matches your bathroom.
Send us photos and videos of your colourful makeup remover pads, or share them on Instagram with the hashtag #caspardiy. Can’t wait to see your beautiful DIY projects.
The post DIY – Reusable makeup remover pads appeared first on Caspar.
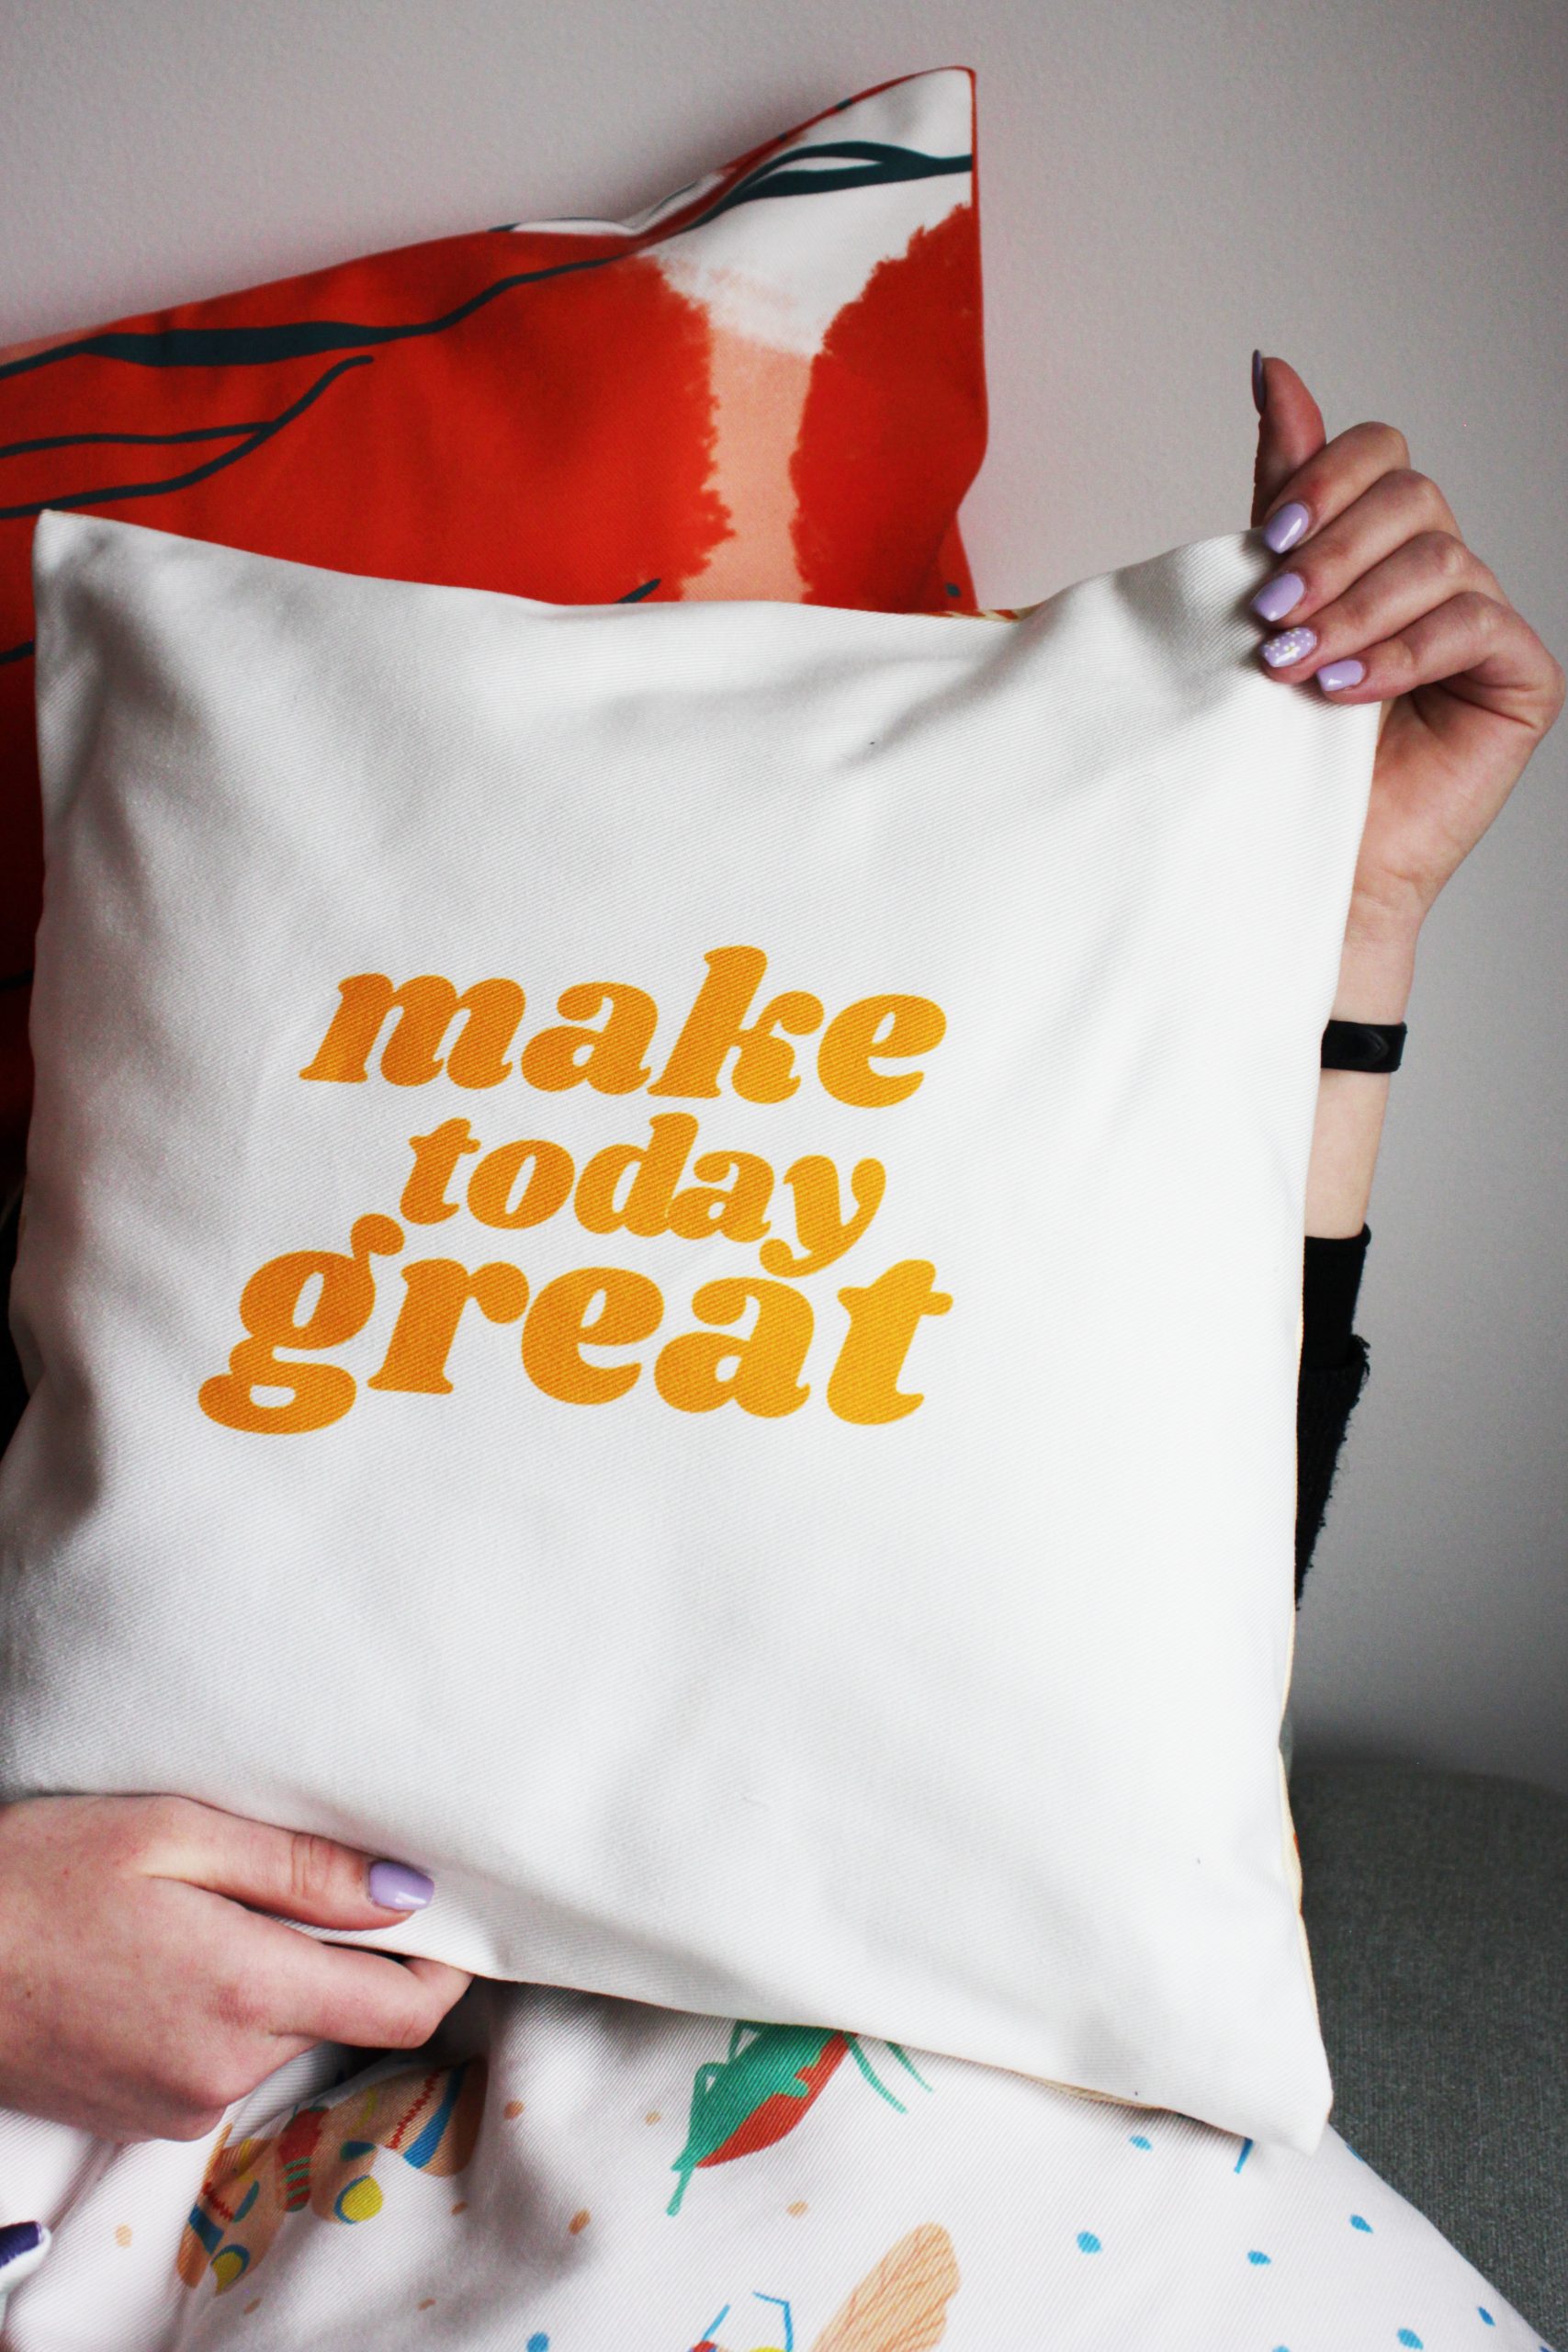
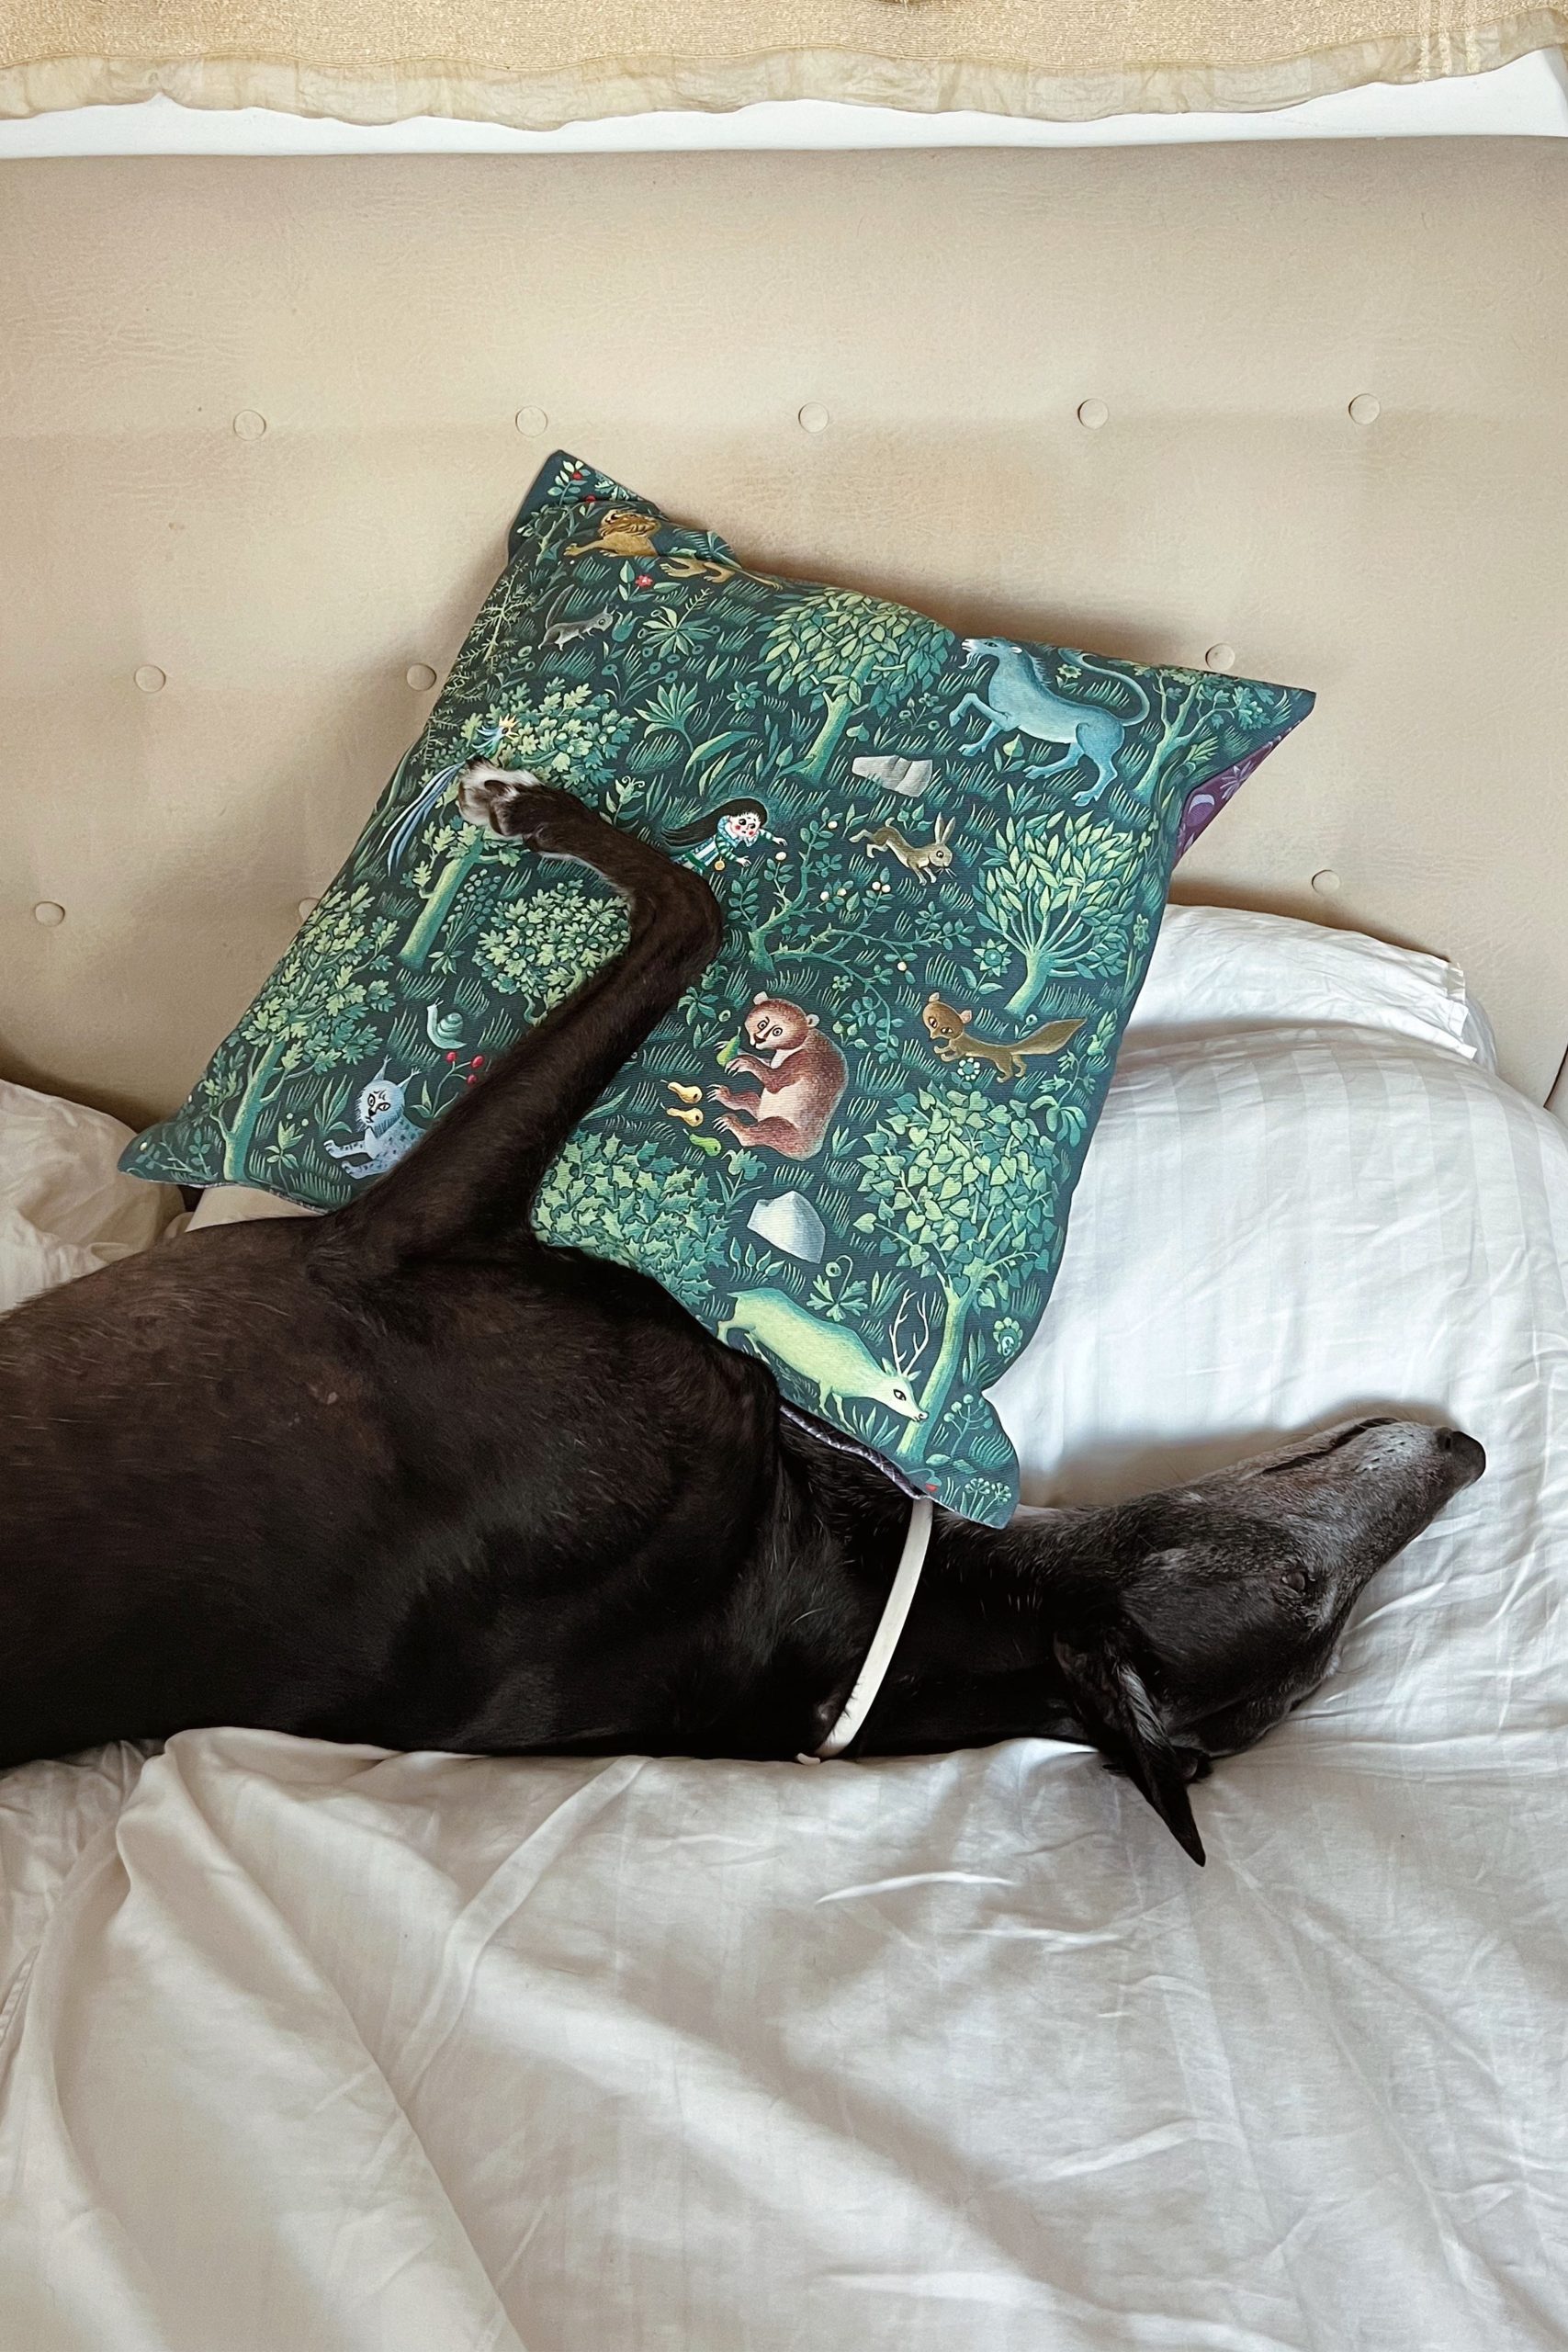
]]>The post Decorative Pillowcases: From History to DIY Guidelines appeared first on Caspar.
]]>On the bed, on the couch, on the floor. Stuffed with feathers, fibres, memory foam or buckwheat hulls. Pillows are a must-have in every interior, whether it’s a house, apartment, office, café or cottage. We use them for their primary purpose – head support – as well as for purely decorative purposes.
However, pillows looked quite different once upon a time.
When did the history of pillows begin?
The answer is a long, looong time ago – 9000 years ago in Mesopotamia (present day Iraq and Iran), to be more exact.
If you think that ancient Babylonians rested their heads on comfortable, soft feathers, you are in for a surprise: their pillows were actually made of stone. That’s right, their primary purpose was not comfort – pillows were made to keep those grovelling creatures such as insects out of citizens’ ears when they slept.
Similar kinds of pillows, but made of other materials, have found their ways into the households of ancient Egypt and China.
Luckily, the ancient Greeks and Romans took over the stage and began filling the pillows with soft materials such as cotton, straw and feathers.
Century after century of ups and downs, and finally we have reached the industrial revolution, when modern technologies enabled a lower price of this commodity. Therefore, decorative pillows weren’t something only the wealthy could afford; they became parts of all households, different sofas and chairs.
Today, pillows are no longer something we simply sleep on. They are the key to a good interior design, something that will elevate the charm of every room. Decorative pillows are here to embellish that boring grey couch or that chair that seems a bit dull.
However, why should we have three different kinds of pillows in case we wish for a different décor?
There is a much simpler way in which we can breathe in new life to these pillows. Of course, we are talking about pillowcases.
Endless decorative possibilities
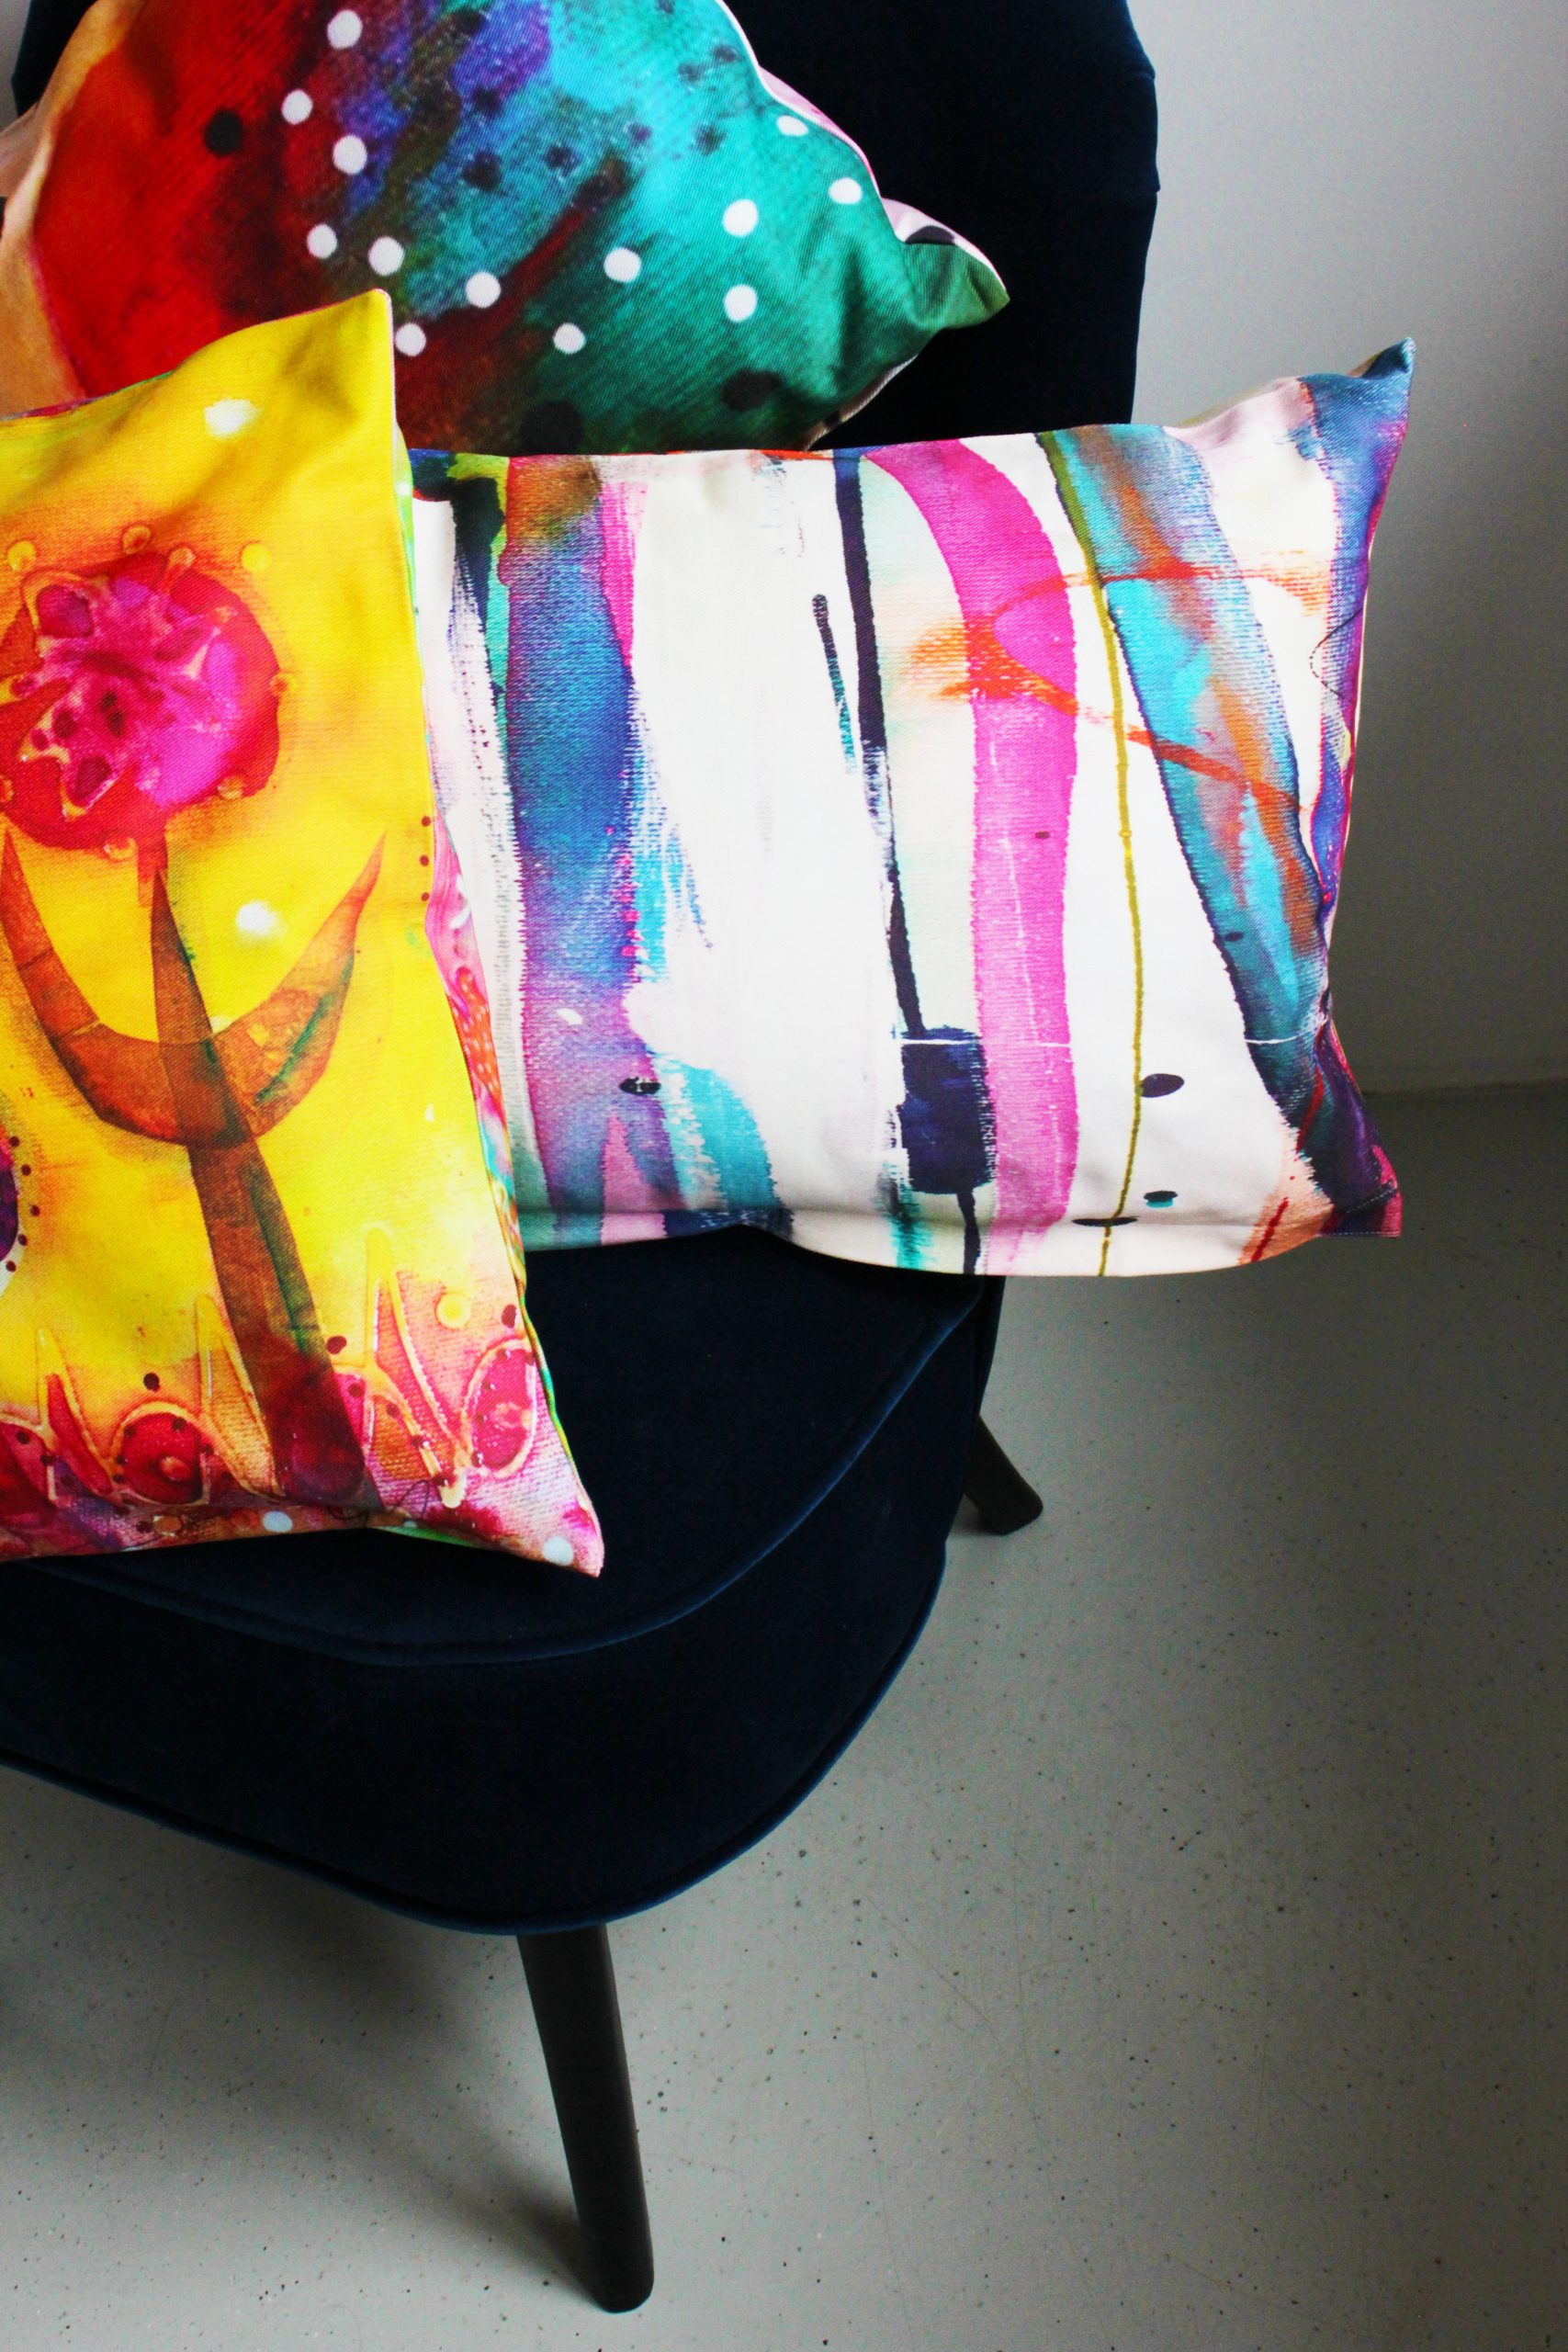
When we talk about decorative pillowcases, we primarily mean the ones that will embrace the pillows on your couch, armchair, hammock, dining room chair, even the floor in front of the fireplace.
Pillowcases give us so many options, so many different styles that we can safely proclaim these pieces of fabric the central elements of every interior design décor.
Would you care for some oriental style? Choose a colourful pillowcase with tassels.
Are you looking for a Scandinavian style? Choose pillowcases with clear lines and light colours.
Would you like to make your friends laugh? A pillowcase with Nicolas Cage’s face is just the thing that will make it happen.
Another option the modern times give you is to design your own pillowcase! Caspar gives you the possibility to create your own custom design. You can upload it through our online customizer (pattern, colours, even photographs) and put it on a pillowcase with all over print.
We will print your design on the fabric, sew it and deliver it to your address! Here is what you need to know about the pillowcase.
- The material we use is Heavy Twill – 100% cotton with a thicker structure (375g/m2).
- Available dimensions are 40x40cm, 50x50cm and 40x65cm.
In case you are more of a do-it-yourself kind of person, and one of your favourite activities is mastering the art of sewing, you can also make your pillowcase from scratch.
Here are some tips and tricks that will make the entire process much easier.
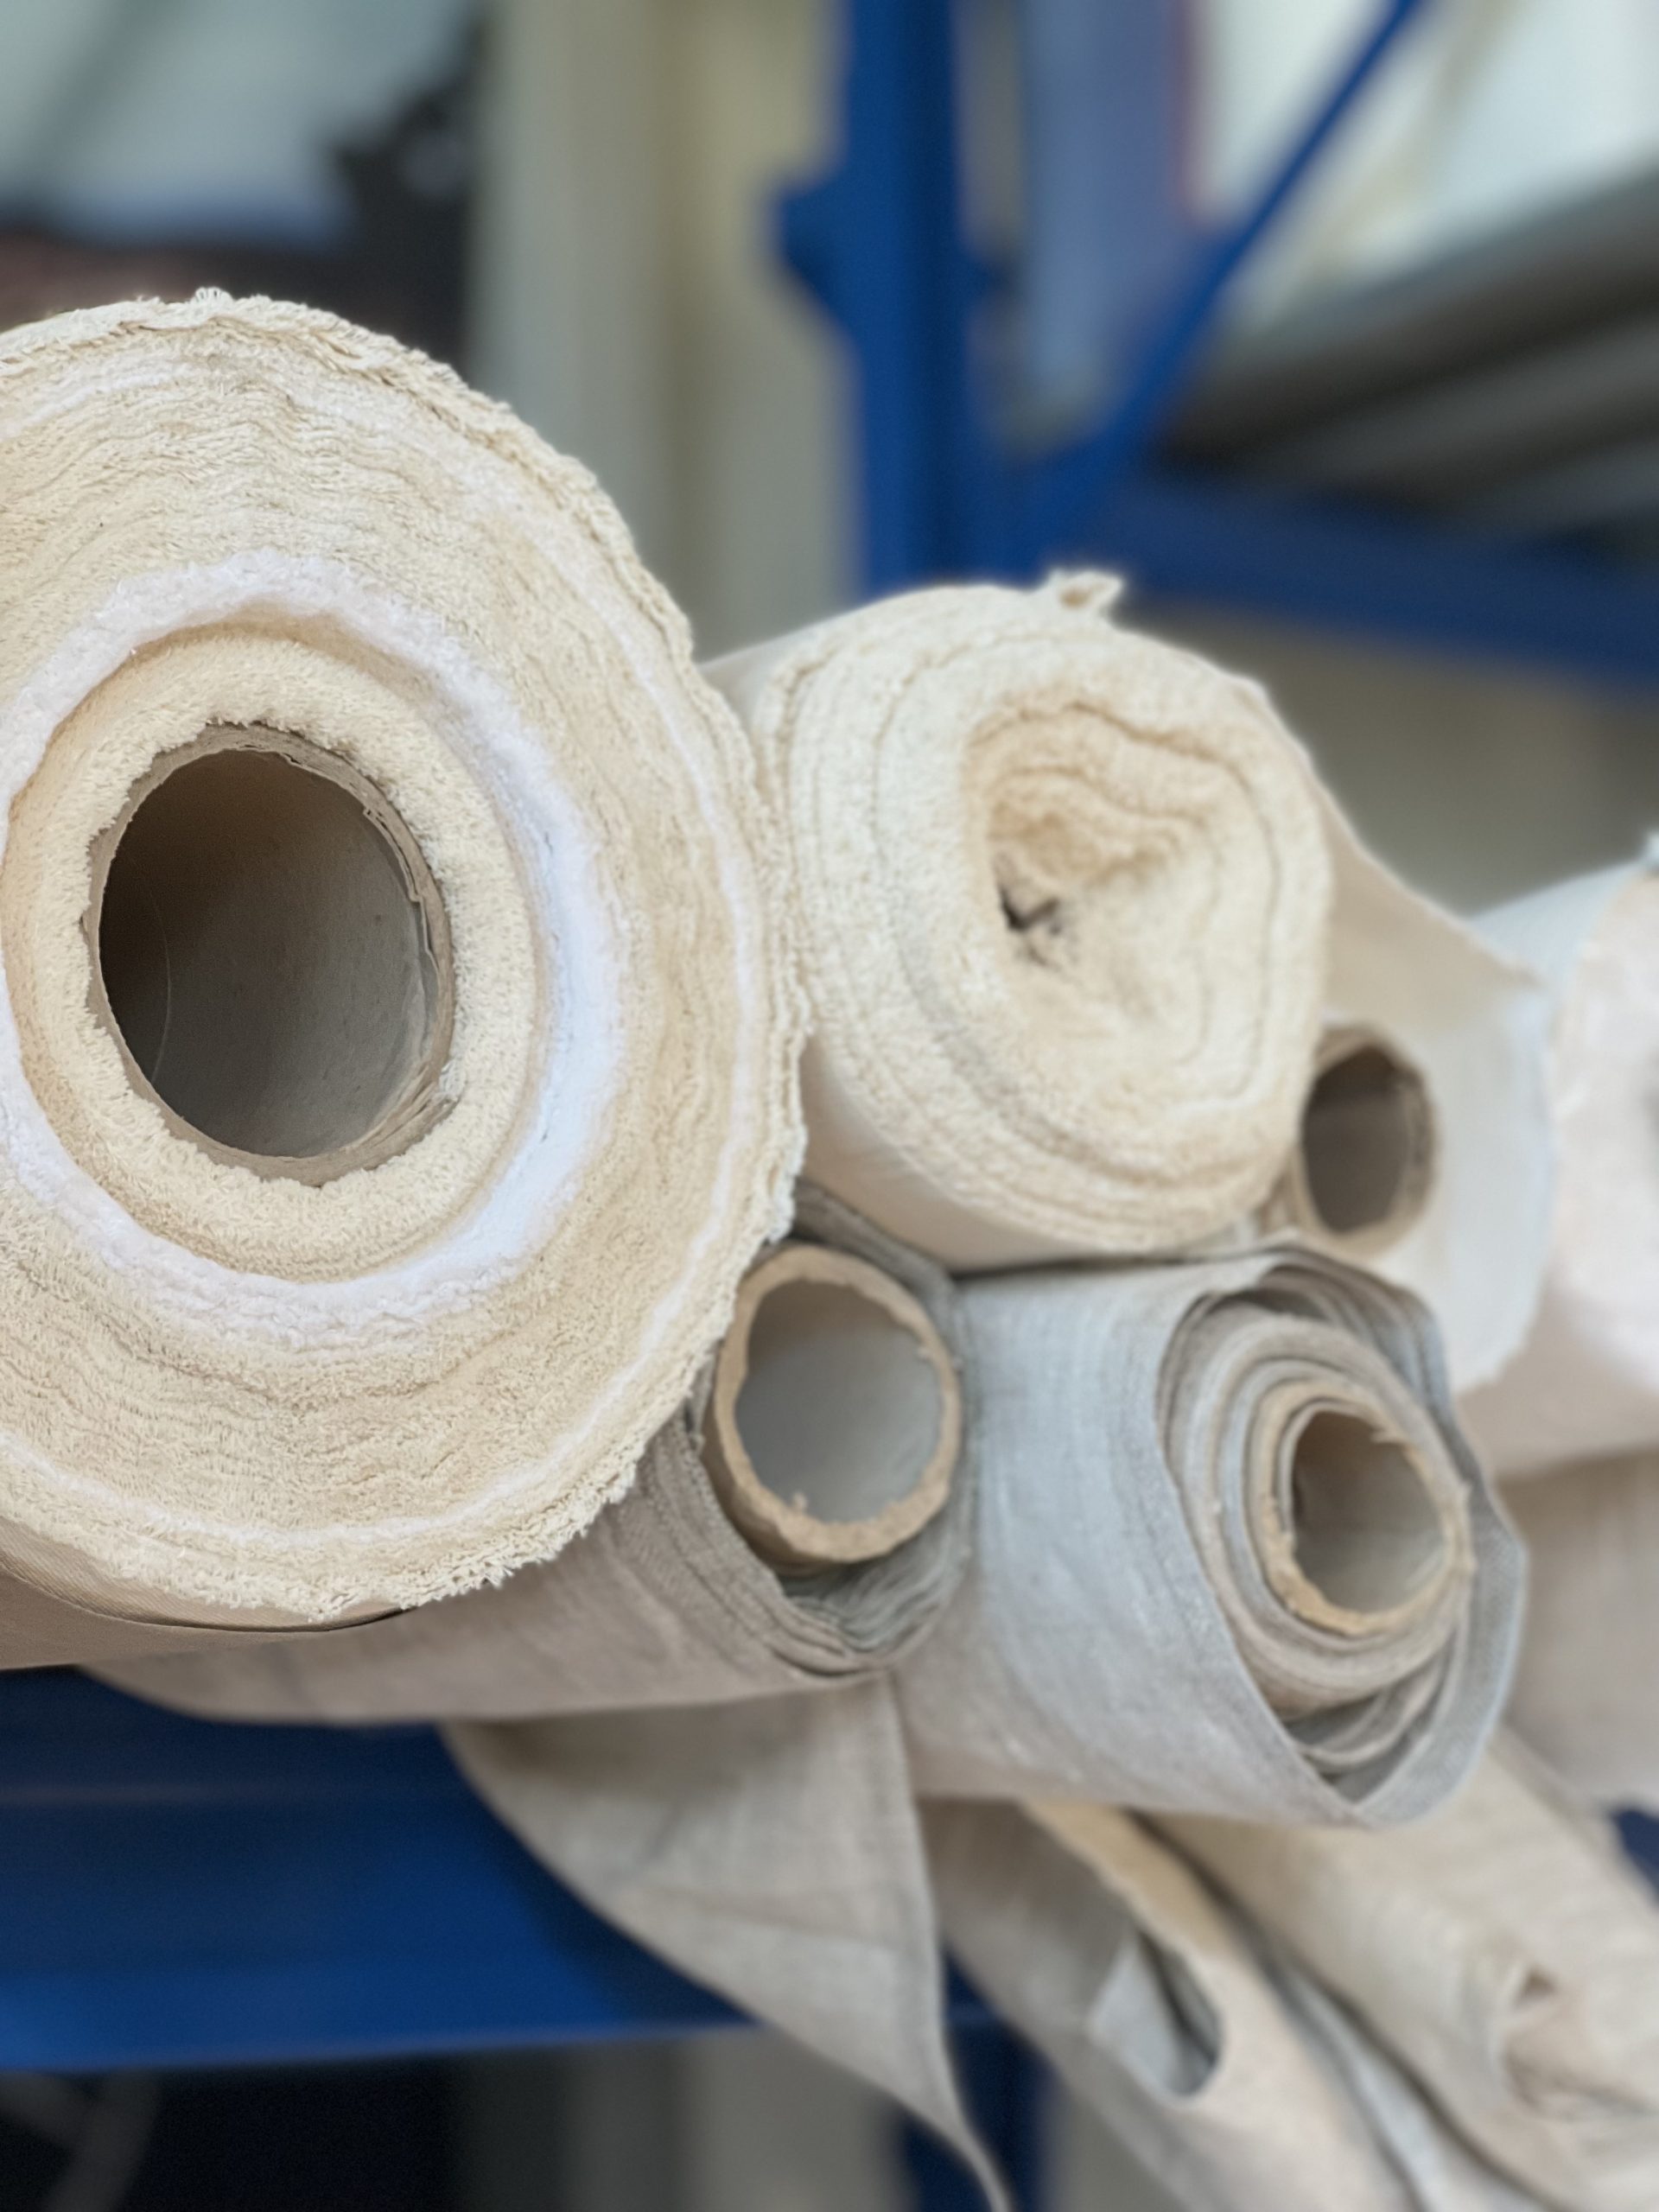
What are the best materials for pillowcases?
When choosing the material for your pillowcases, keep in mind that it must not be stretchable and that it must be firm. This way, it can keep its shape (or stuffing) and give you the level of comfort you are looking for.
According to these characteristics, we have three perfect materials that will be great for your DIY projects:
Each of these fabrics is very firm, making them ideal for both indoor and outdoor decorations. The main difference between Twill and Canvas is that Twills are more resilient due to their weave (keep in mind that denim is also a kind of Twill weave!).
Detailed features of each fabric can be found on the links, but you can also contact us if you have some more questions on your mind.
Use this opportunity and create a unique gift for different occasions: birthdays, bachelorette parties, baby showers, Valentine’s Day and similar events. Shhh – additional decorations such as pearls and tassels are also a great idea!
You can print your design on all the fabrics we have on offer. We’ve even prepared a blog that will explain everything when it comes to creating your custom design!
The post Decorative Pillowcases: From History to DIY Guidelines appeared first on Caspar.
]]>The post Microfactory: Solution for the Future of Textile Industry appeared first on Caspar.
]]>Textile industry is changing.
Decades of being based on mass production have led to textile (fashion) industry being one of the leading environmental threats. Now, it is finally heading in a new direction – sustainability.
Sameness is replaced by individualism, corporate dictation is replaced by young designers, and mass print is being dethroned by custom print (on order).
Well, let’s start at the beginning.
Let’s see how things worked until recently.
Textile industry: the old way
Up until now, the textile industry was based on a few steps. First a design was created, a product was made, and then large amounts of this product were manufactured. In the end, this resulted in large stocks of products, the ones that can fulfil retail demands.
However, this is everything but sustainable. A huge portion of these products will end up as waste when a new collection hits the shelves, and the manufacturing process is problematic in itself. Lots of waste material is being made, and the colours and fabrics used are not sustainable. Why? Because in this case, corporations need to save money on the manufacturing process (cheaper processes are not eco-friendly) to compensate for the production of these large quantities.
So round and round we go and fill the Earth with trash and pollution.
However, millennials are a new and different generation, and they have clearly declared that they want a different direction.
This new path has been supported by the arrival of digital print.
What exactly is this about?
Textile industry: new way
Individuality. Automatization. Digitalisation.
These are the guidelines that are leading the contemporary world and have found their way into the textile industry.
How does it work?
Simply put – instead of buying designs that someone else created, we come up with our own.
These designs are then digitally sent to the manufacturer (through a website or an app), and there they are printed on a product or a material. This way we don’t have large amounts of waste, and the manufacturing process is done locally, making it more sustainable.
This manufacturing process suits individual needs, young designers, influencers, craftspeople, small businesses and, most of all, nature. This process ensures a bright future of our planet and ourselves.
However, this process requires a high level of automatization and adaptability, something those classic factories cannot provide. Here is where microfactories come into the spotlight.
Microfactory
The idea of microfactories was first created in Japan in 1990.
These are the factories that are set in smaller spaces but have the ability to conduct a large number of processes – manufacturing, processing, packing and selling. How come?
Microfactories use modern technology that allows for a high level of automatization and digitalisation.
In other words, instead of needing five hours, two machines and five people to complete a process, in a microfactory it will be done in one hour, using one machine.
Well, all of this sounds great in theory, but what is it like in practice?
Let’s see how we do it at our microfactory – Caspar!
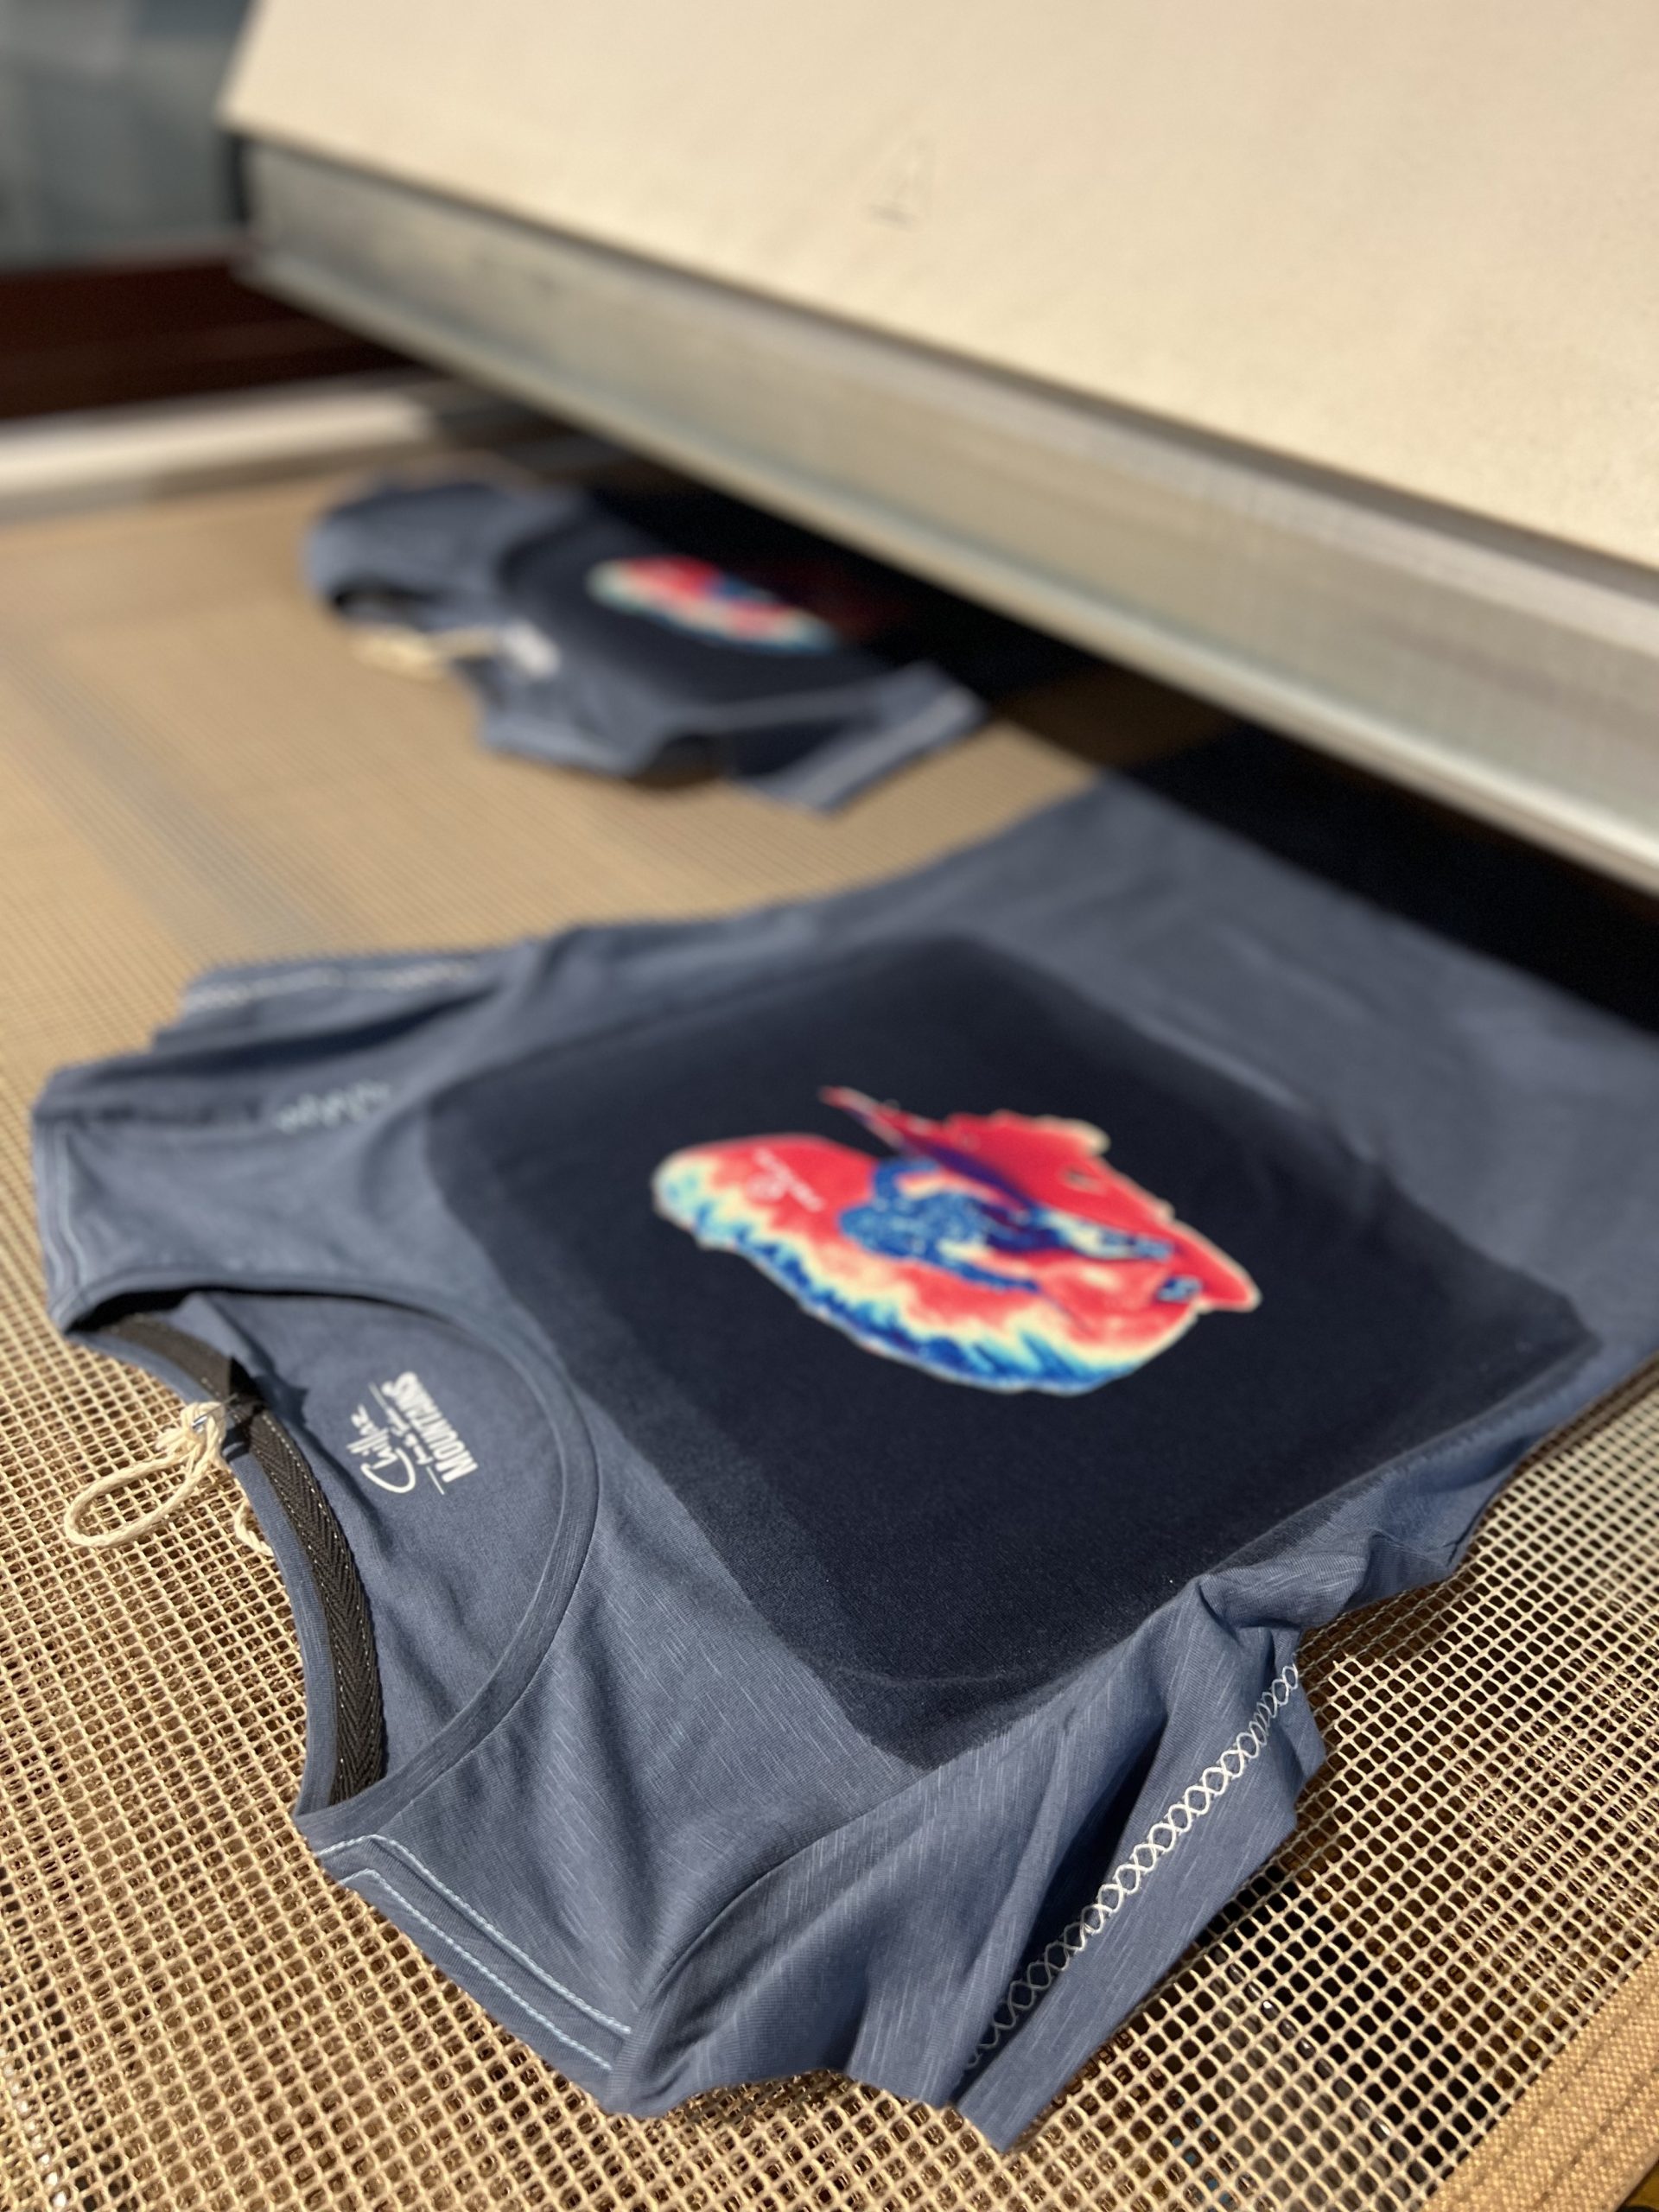
- Through an online customizer we receive the design from our buyer. Let’s say he wants it printed on a classic T-shirt.
- This design is then printed on a material this shirt is made of, Organic Single Cotton Jersey. We use eco-friendly textile inks that don’t require water, as well as digital print technology that is more sustainable.
- After we have printed the design, we cut the needed form and sew the T-shirt, making the amount of waste minimal.
- Et viola – the product is done! We only need to pack it and send it to the buyer.
So, the entire manufacturing process is done at our microfactory.
This doesn’t just suit the individuals’ needs. It works great for business owners that are looking for partners who can fulfil the needed quota, and can also go through all the production levels.
Here we reach another important thing for our factory – dropshipping.
Dropshipping
Microfactories’ partners are often start-ups and small businesses for which it isn’t profitable to invest in all the machinery, workforce and other processes needed to start manufacturing – it is still on a scale that is too small.
They will use dropshipping – a business model in which a third party does certain processes for a company.
So, you can open an online store, but Caspar will be the one that processes, manufactures and sends the items to your buyers. That’s right – you needn’t worry about logistics, machinery, storage or other equipment. These are the advantages of microfactories!

Do you like the way we do things?
Let’s cooperate – contact us and we will be glad to help you!
The post Microfactory: Solution for the Future of Textile Industry appeared first on Caspar.
]]>The post Fabric bowl covers – practical, profitable and lovely alternative to plastic! appeared first on Caspar.
]]>How often you are not in the mood to clean the leftovers after the Sunday family lunch? Almost every household has food left over after lunch, and we never know how to store it – leave it in the pan where it was cooked or transfer it to another bowl?!
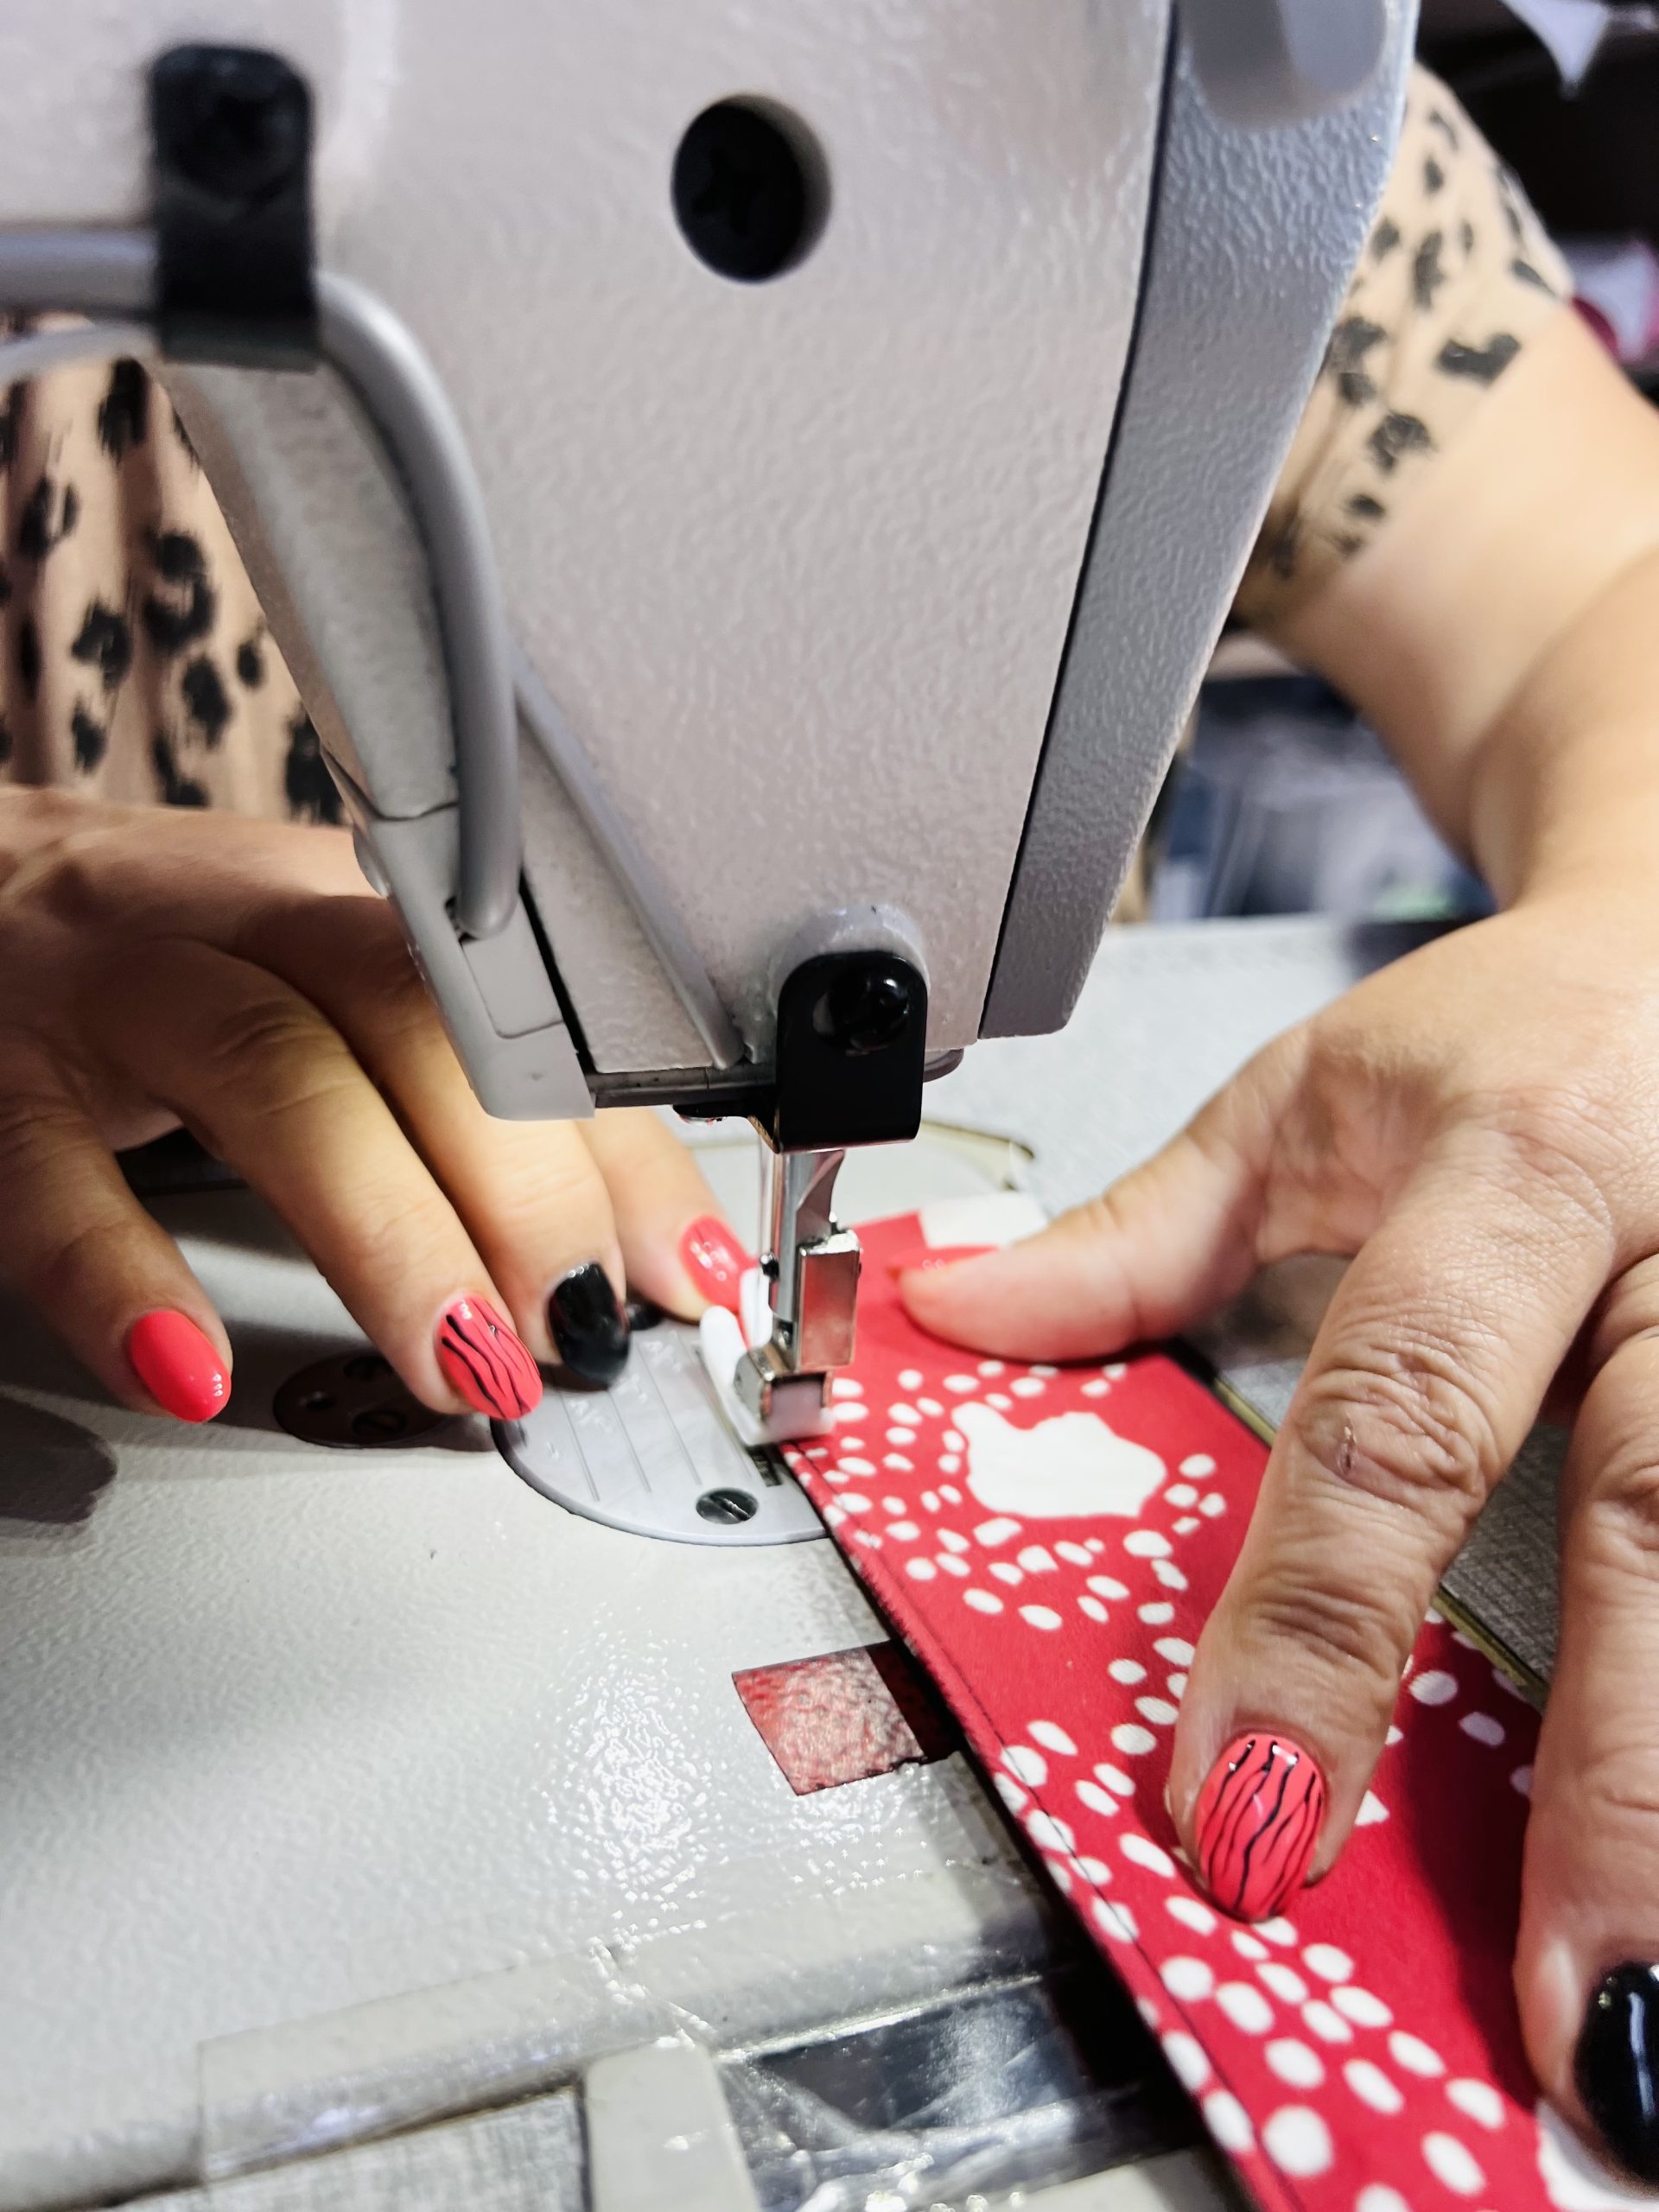
For making food preparation simple, we have prepared a simple DIY project – fabric covers. They are practical, keep food fresh, save us time and money and can be in various designs.
How to make Fabric Bowl Covers?
This project involves sewing, so you’ll need a sewing machine!
To keep the freshness of the food, we decided to use Muslin fabric.
The very breathable and soft fabric makes it ideal for this DIY project. It consists of 100% organic cotton. Just what we need!
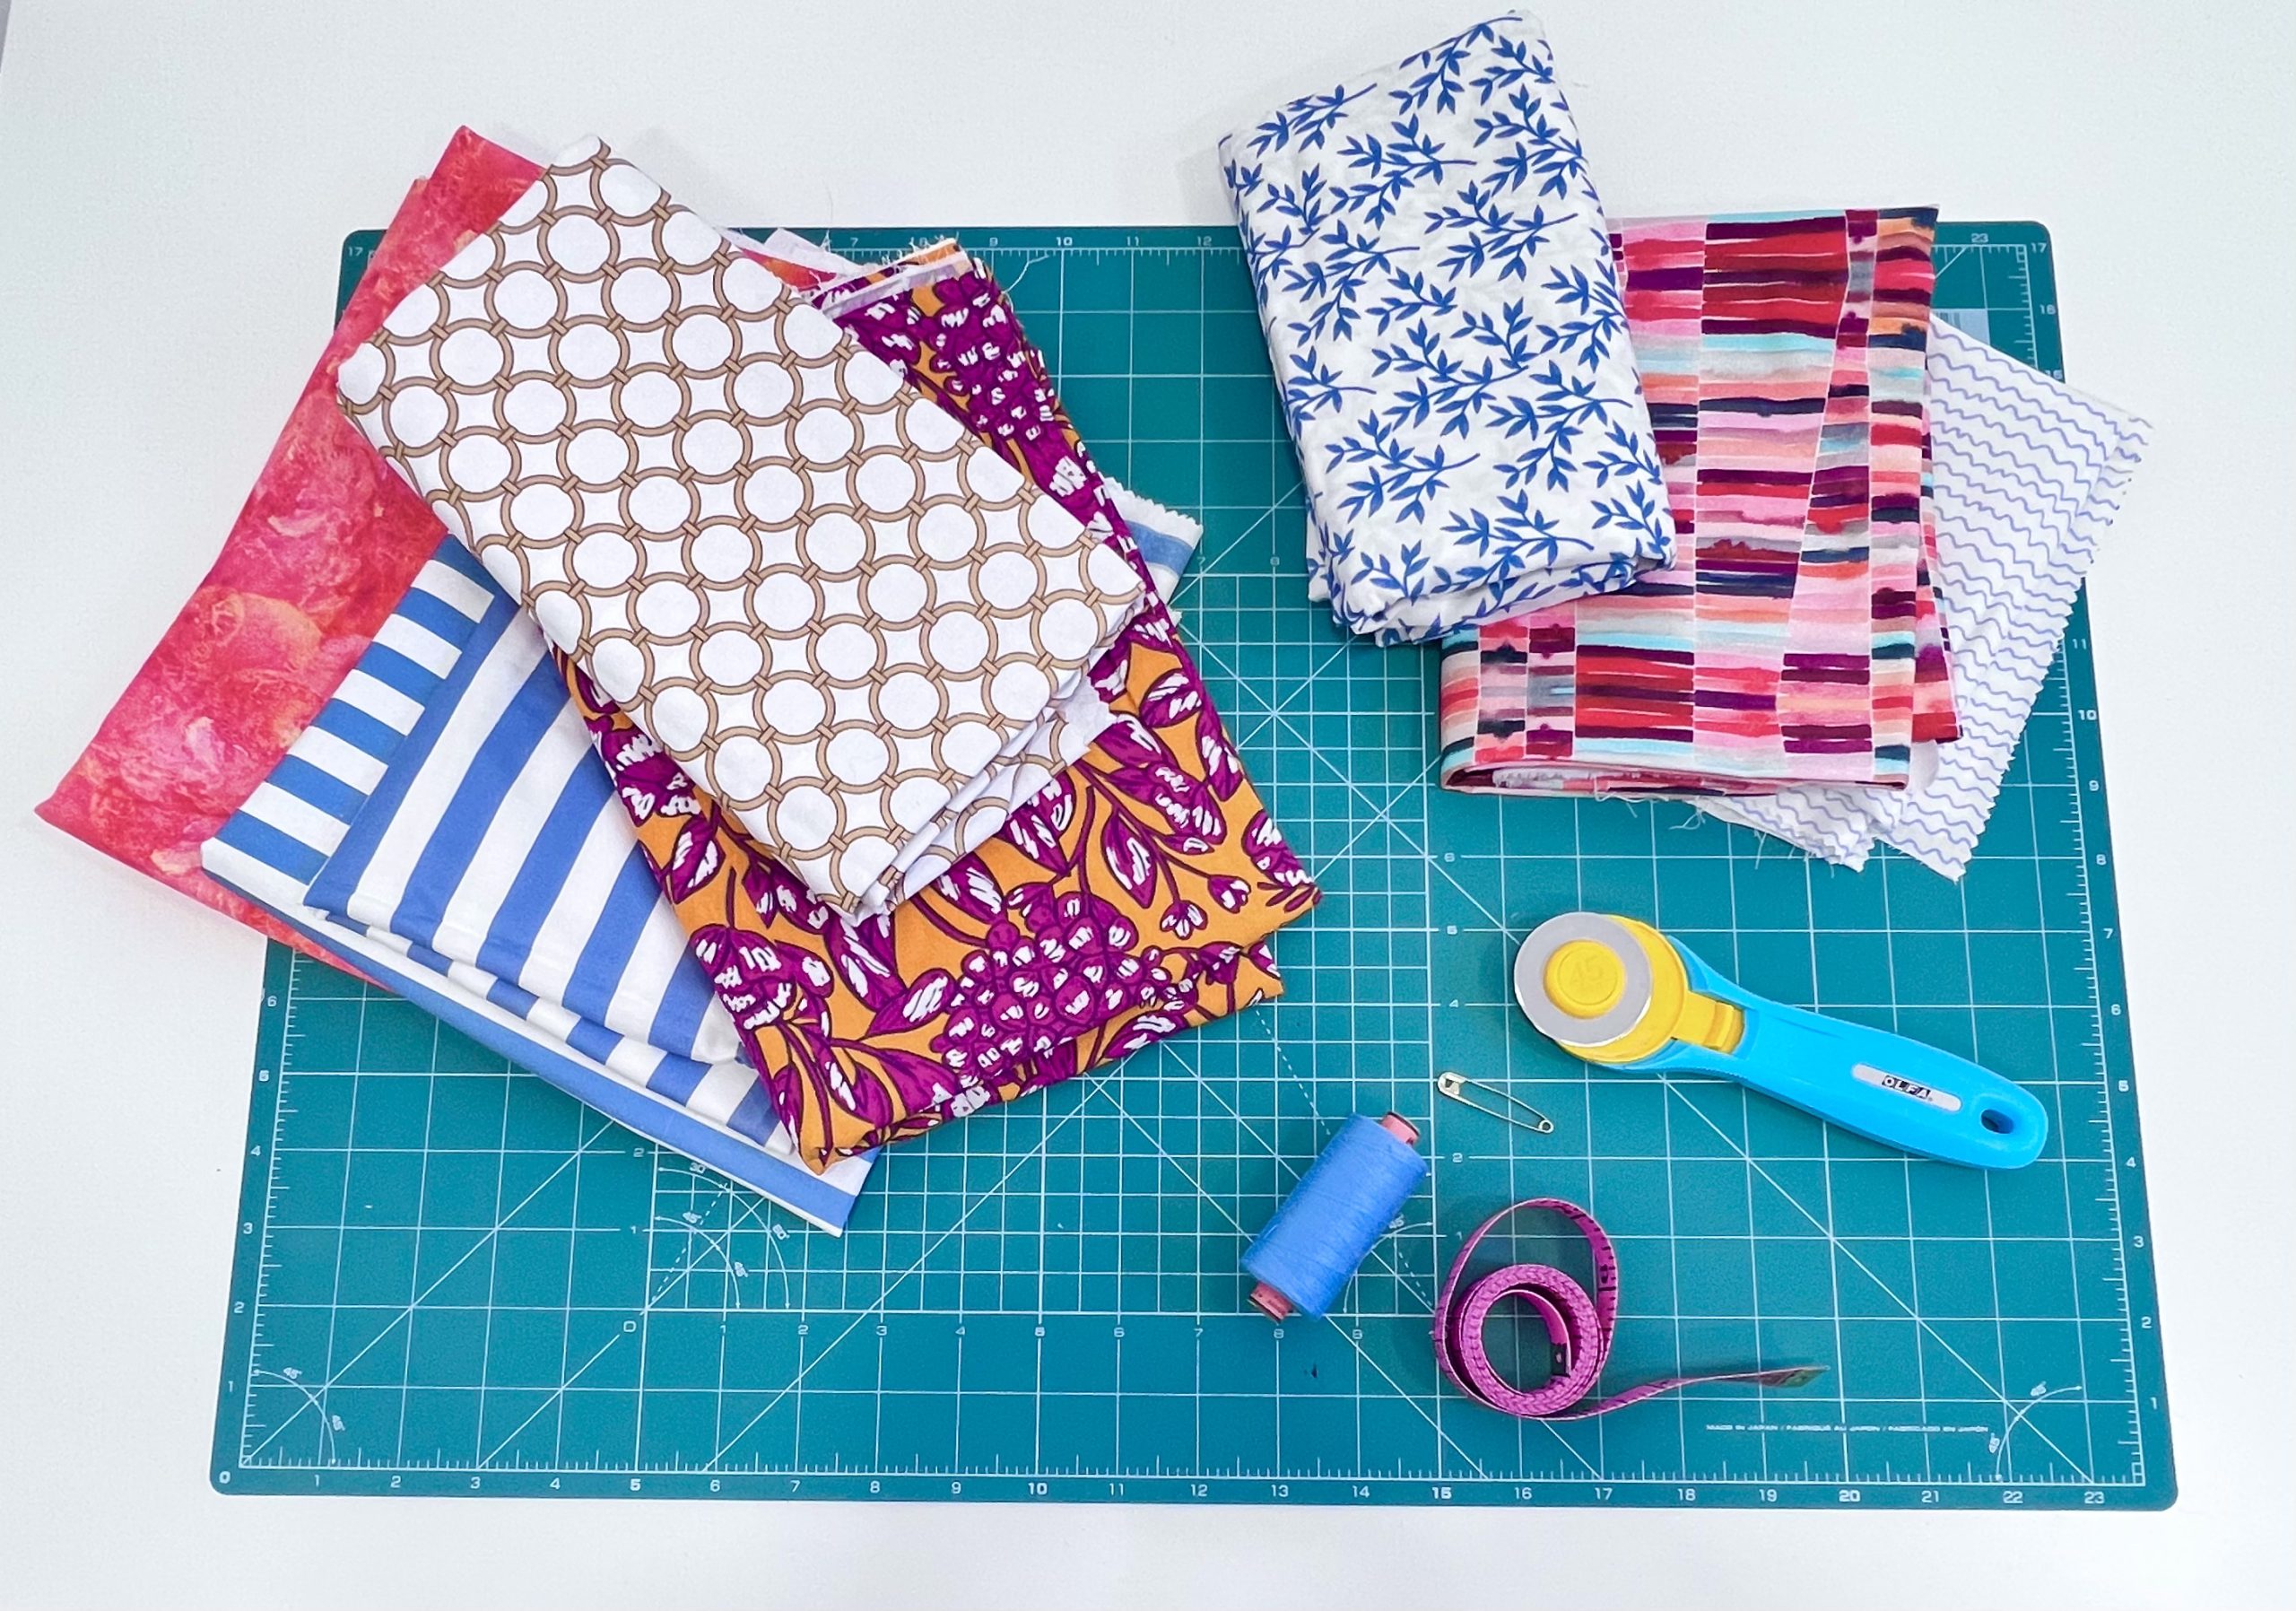
The list of what you need:
- 100 cm x 128 cm of Muslin fabric
- Rotary blade or fabric scissors
- Sewing meter
- Sewing machine
- Elastic rubber
- Pins
- Bowls
Watch the video below to make it easier for you
to make the fabric bowl covers.
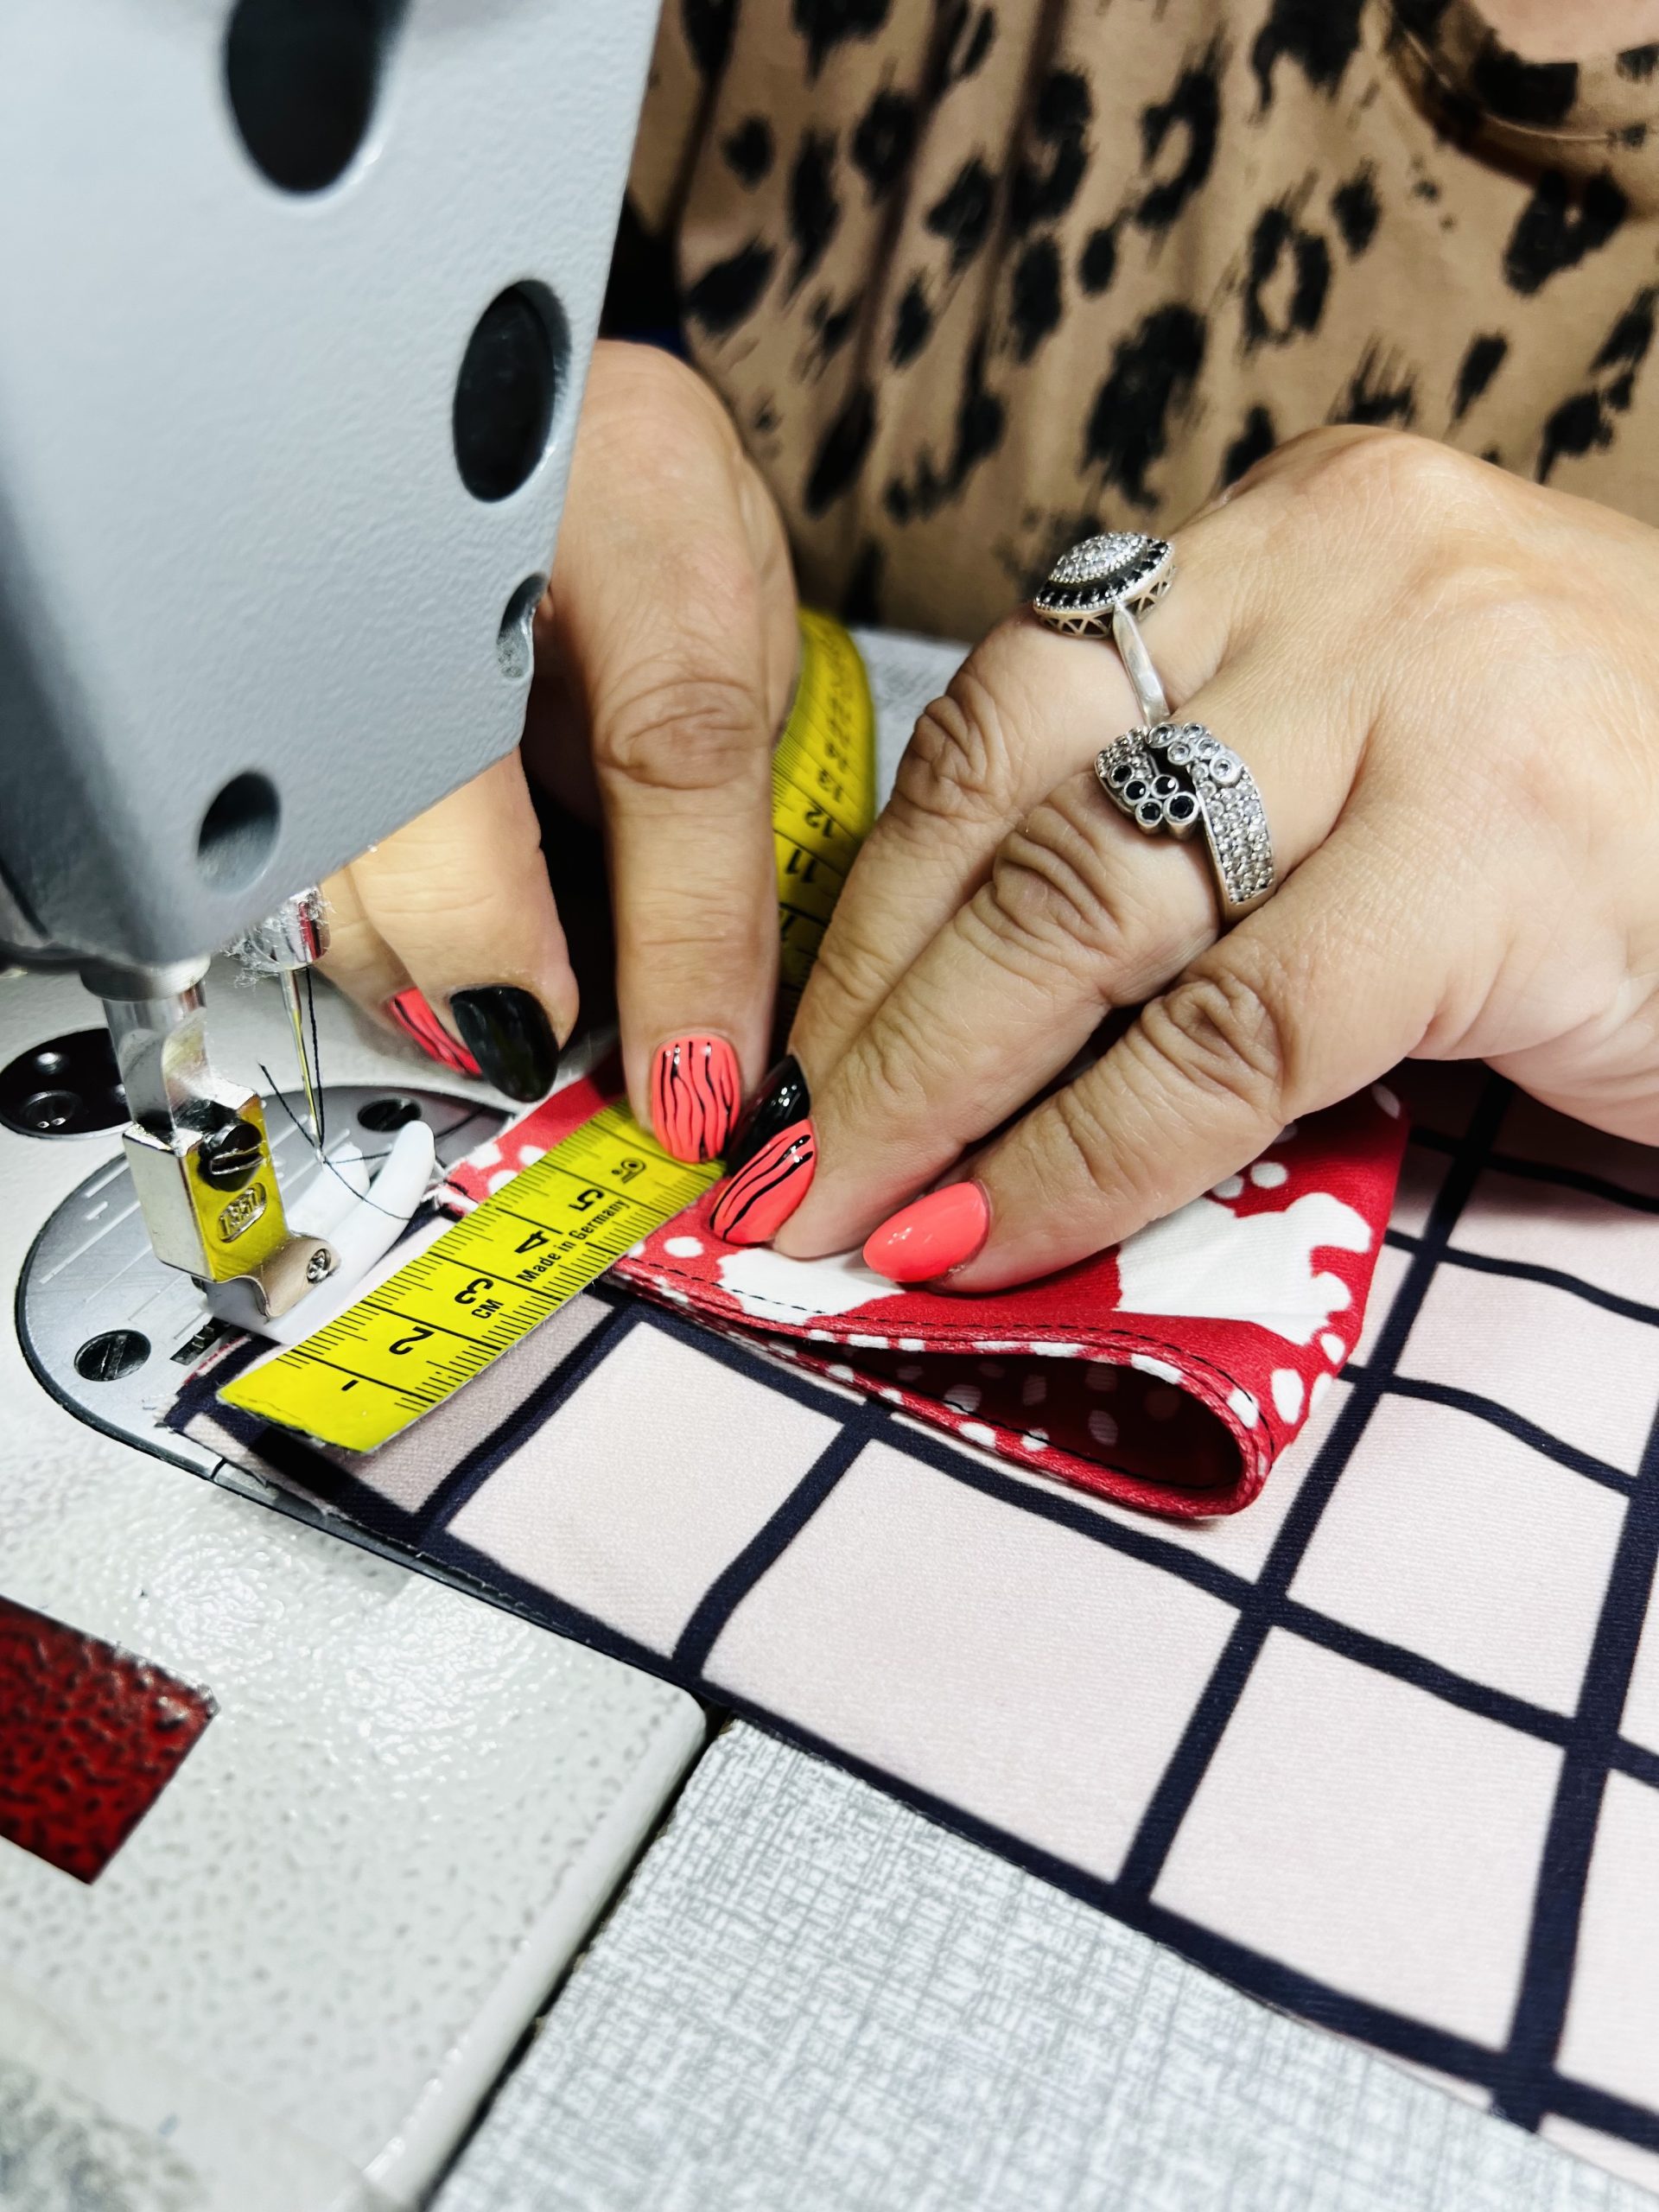
Step 1
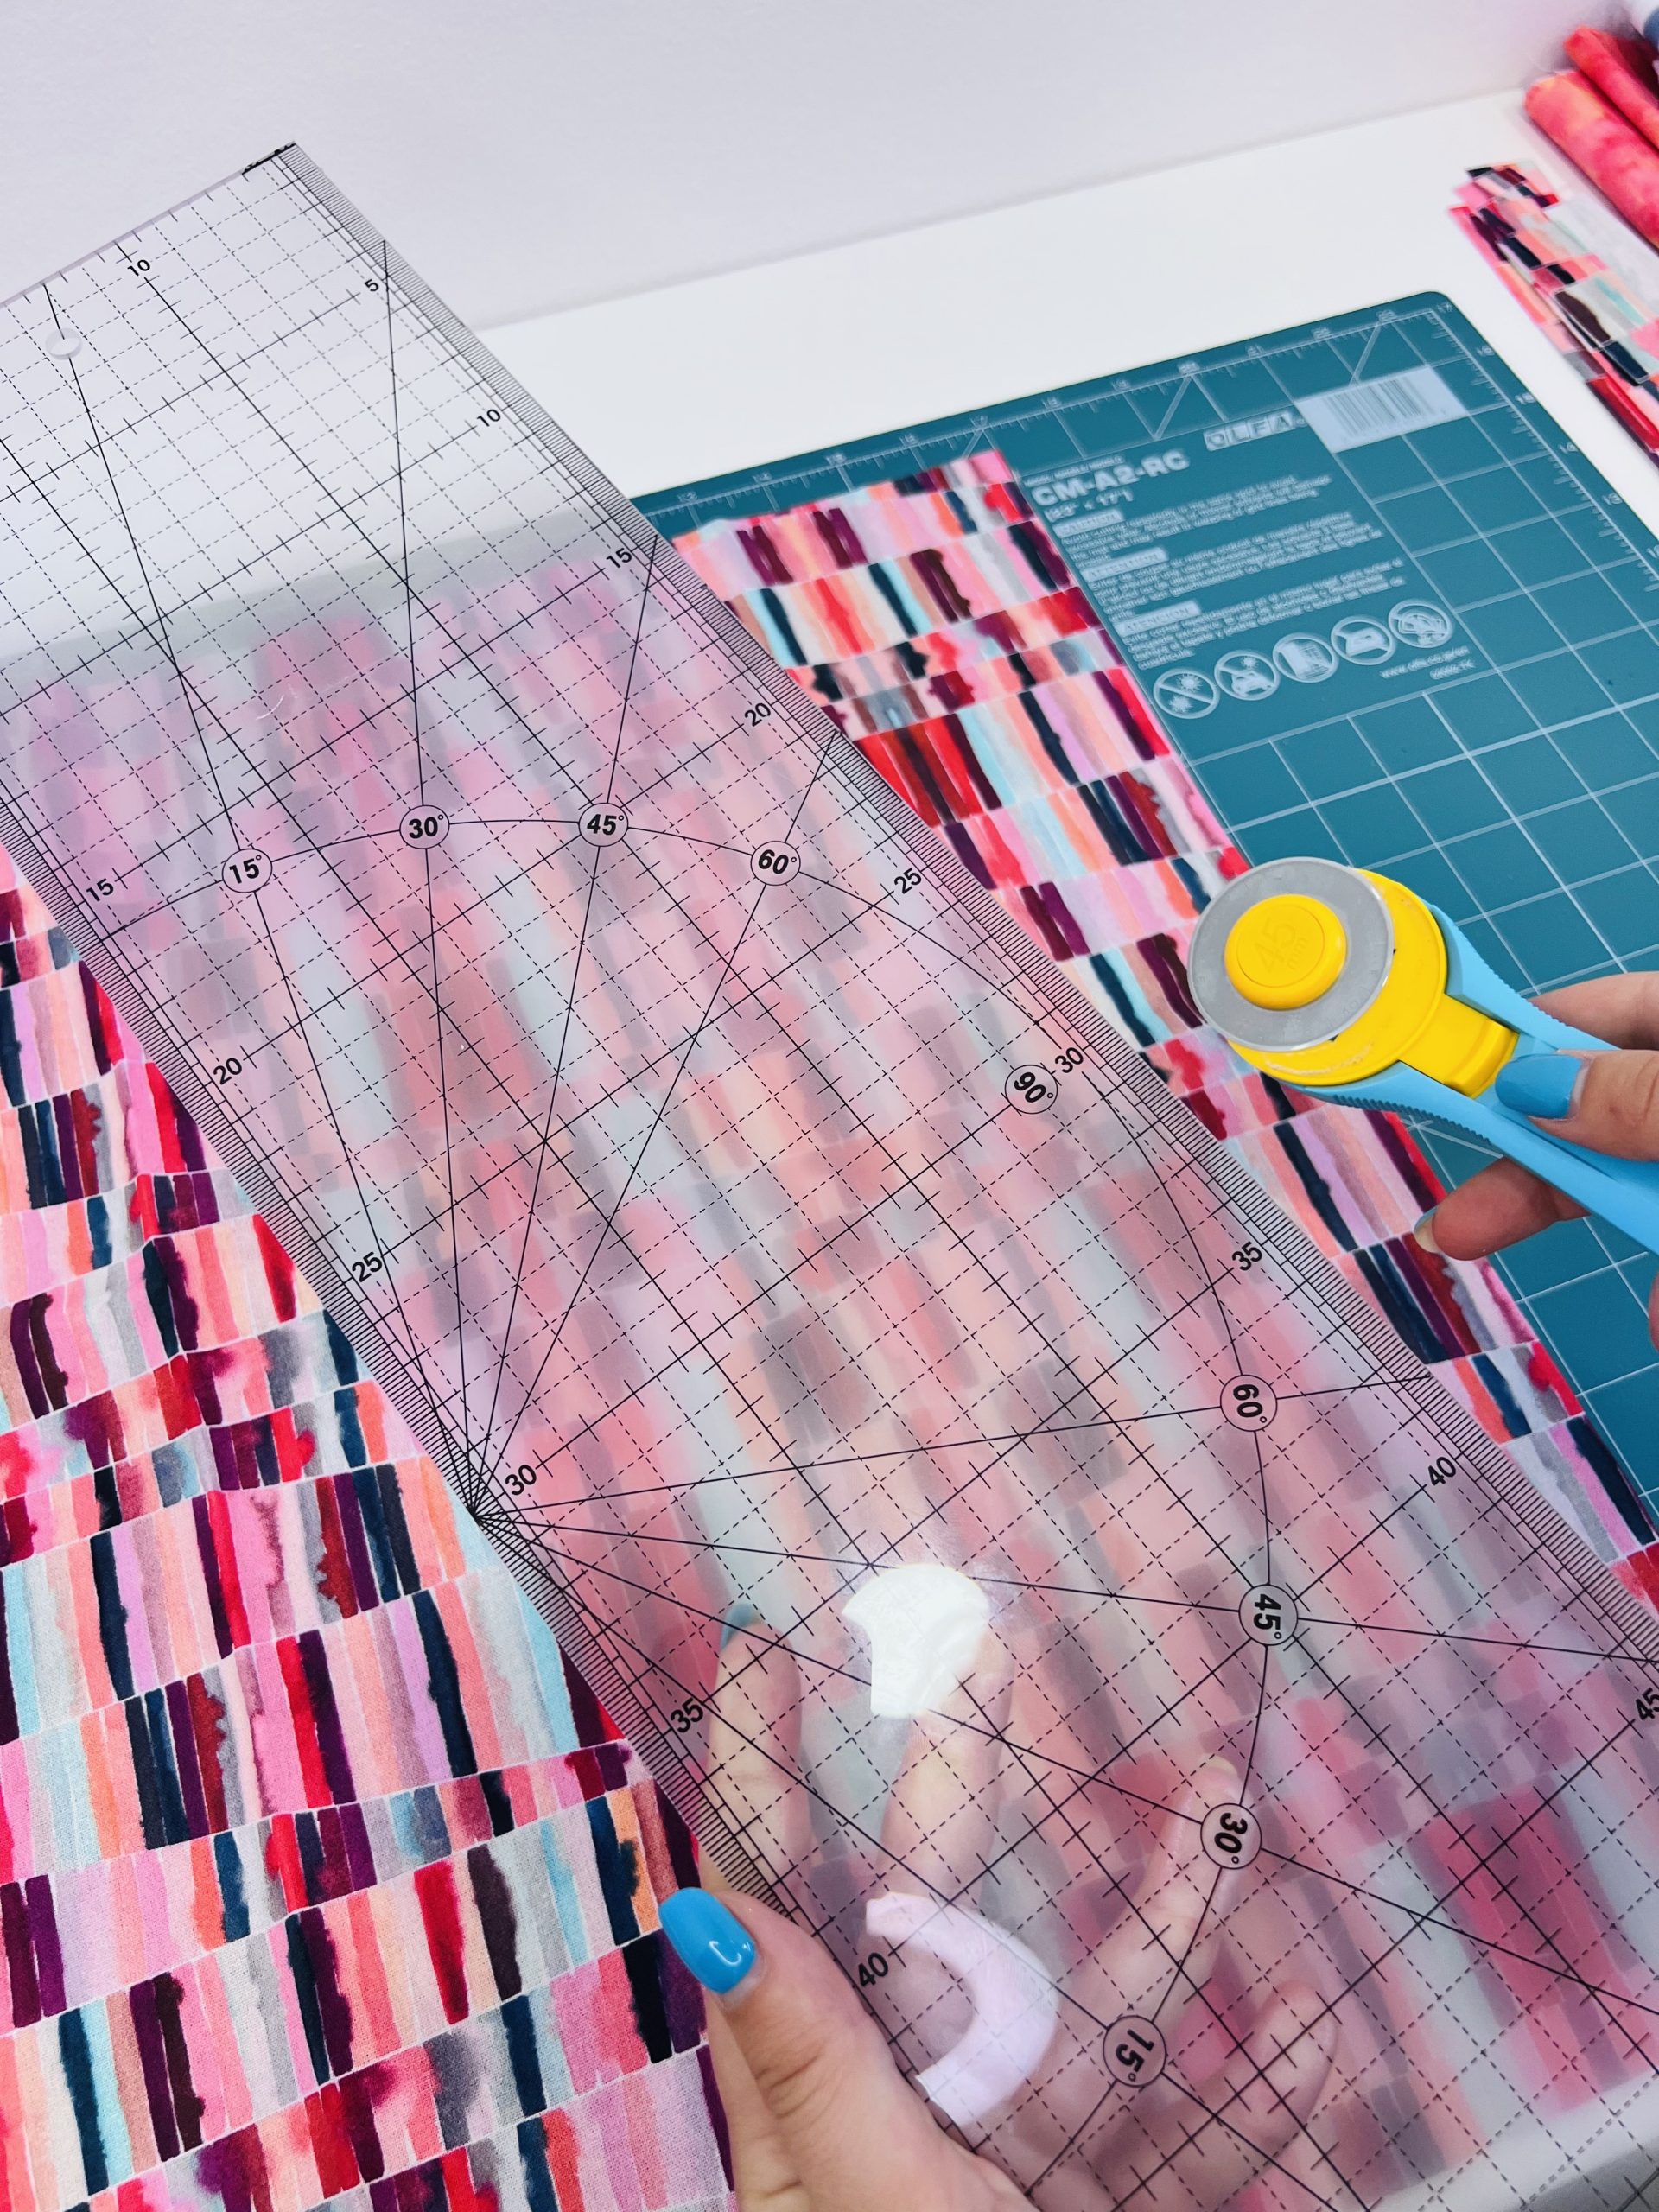
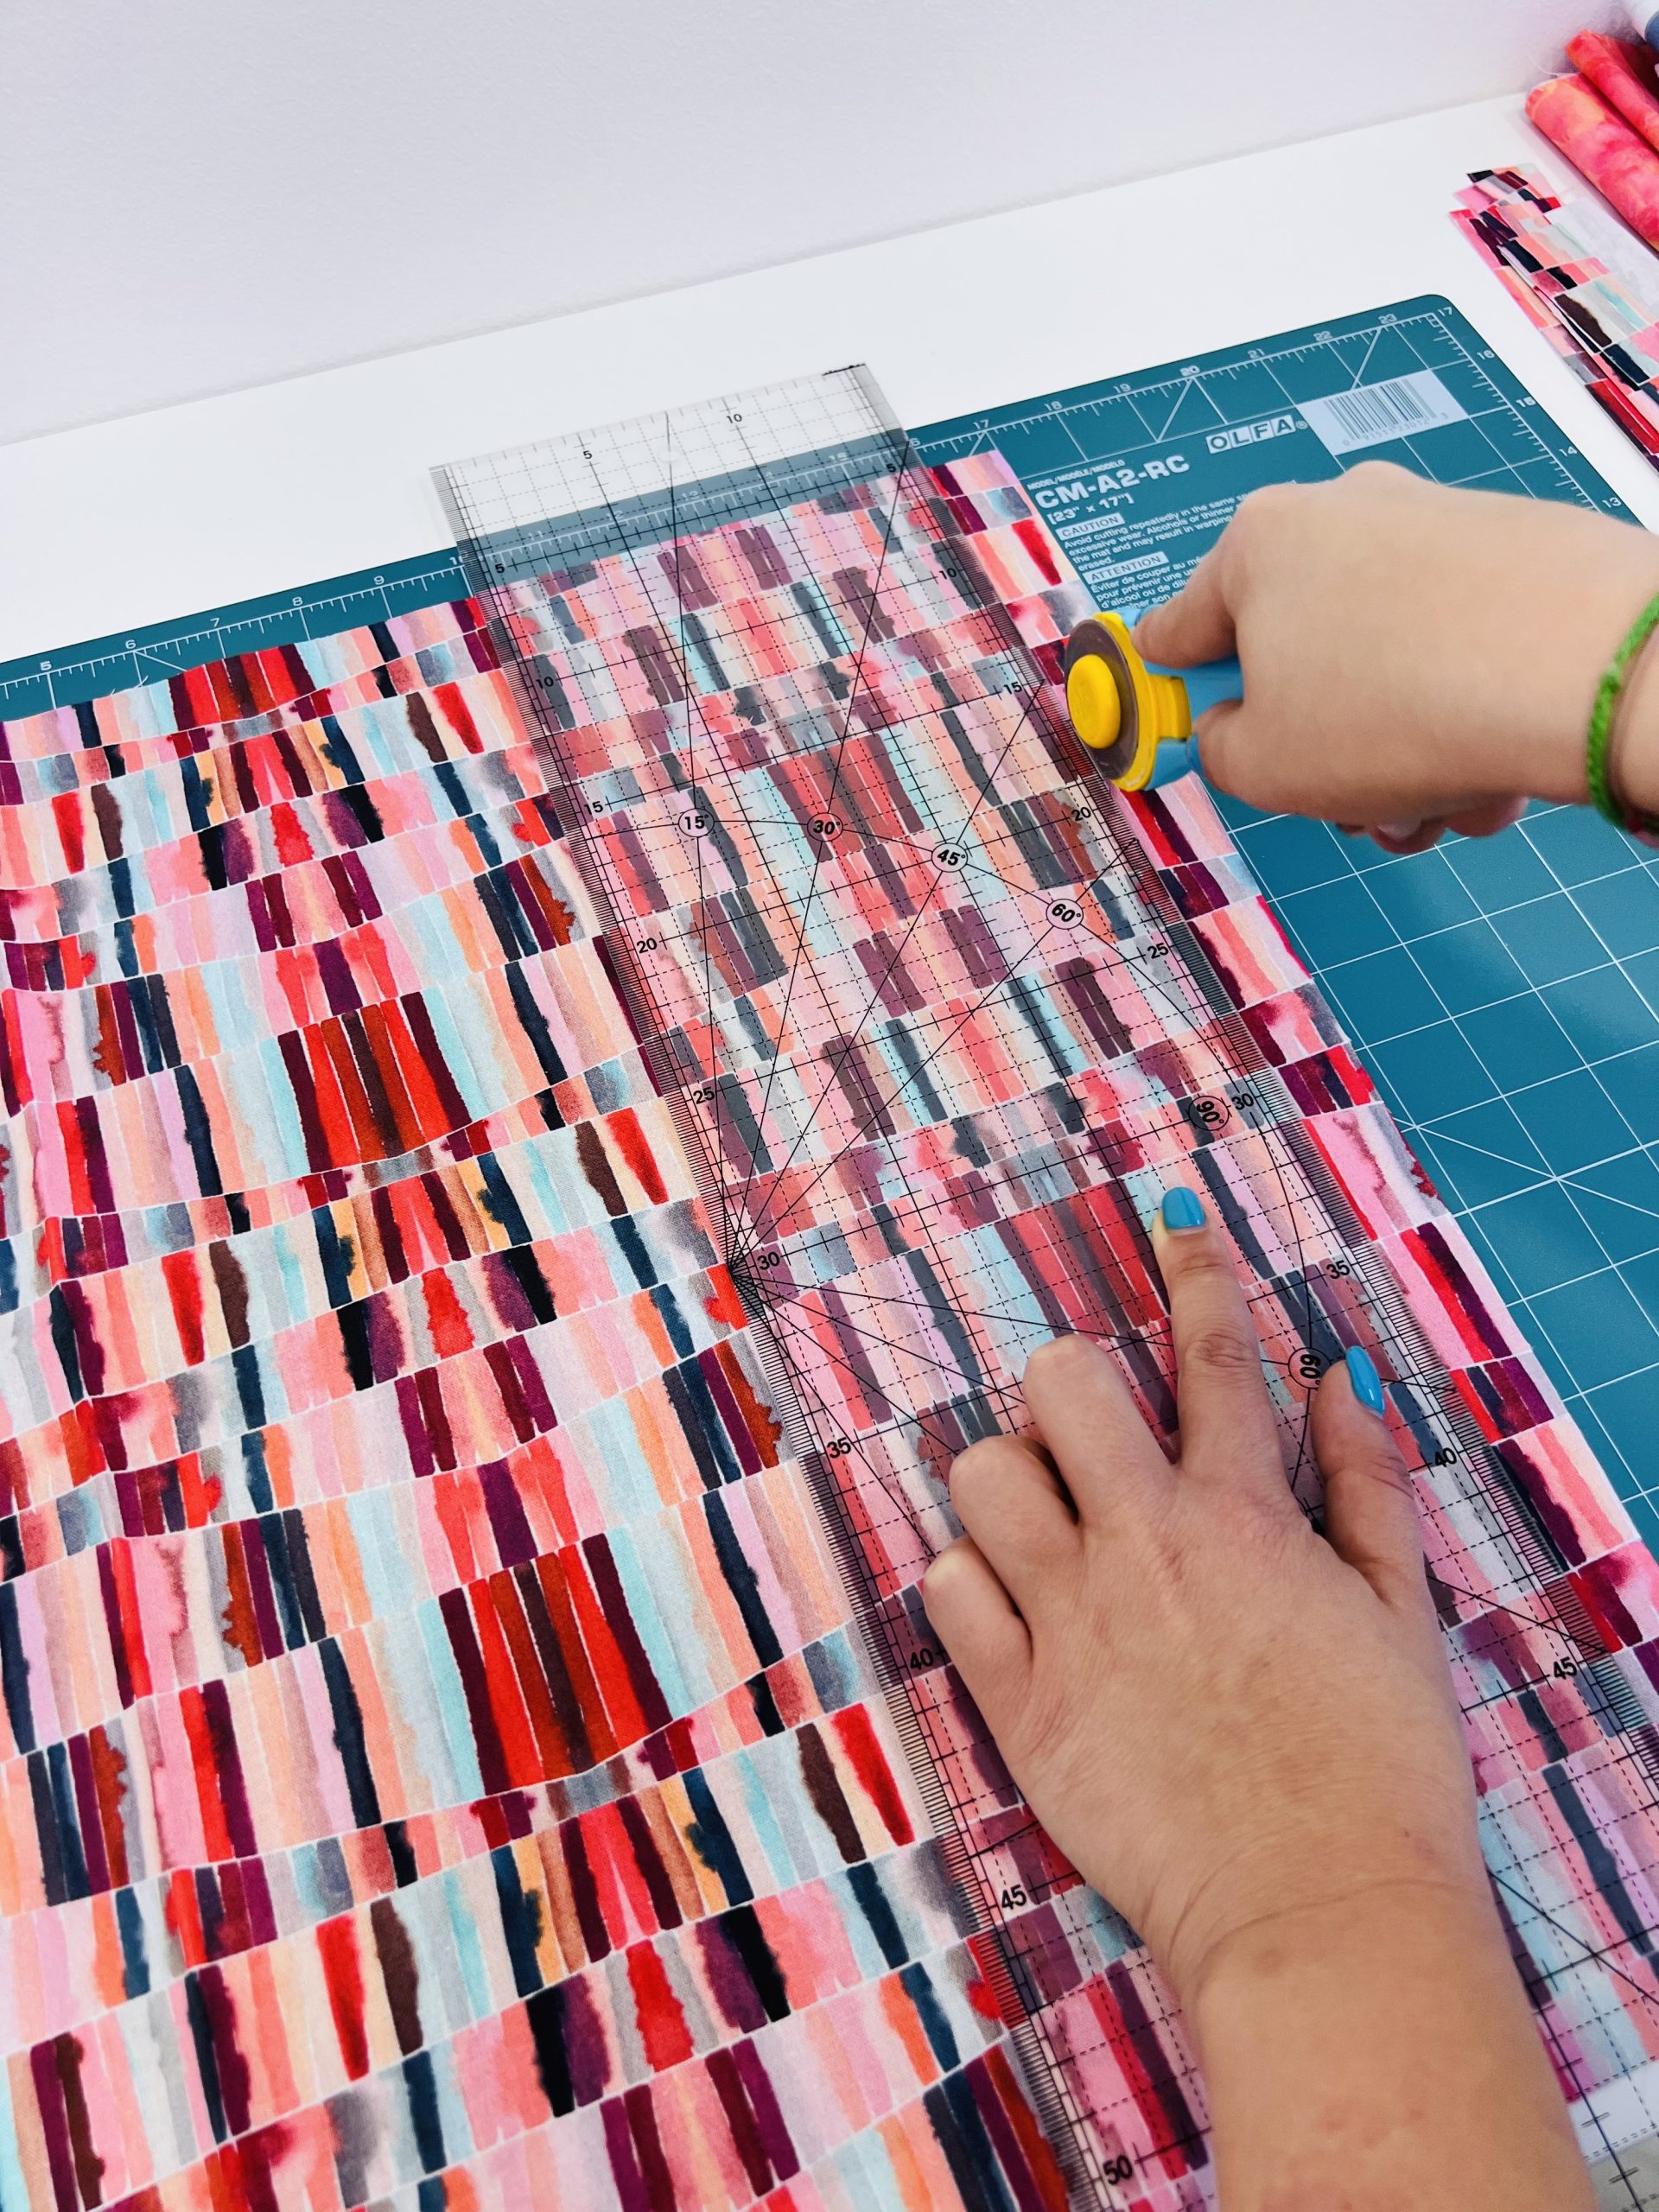
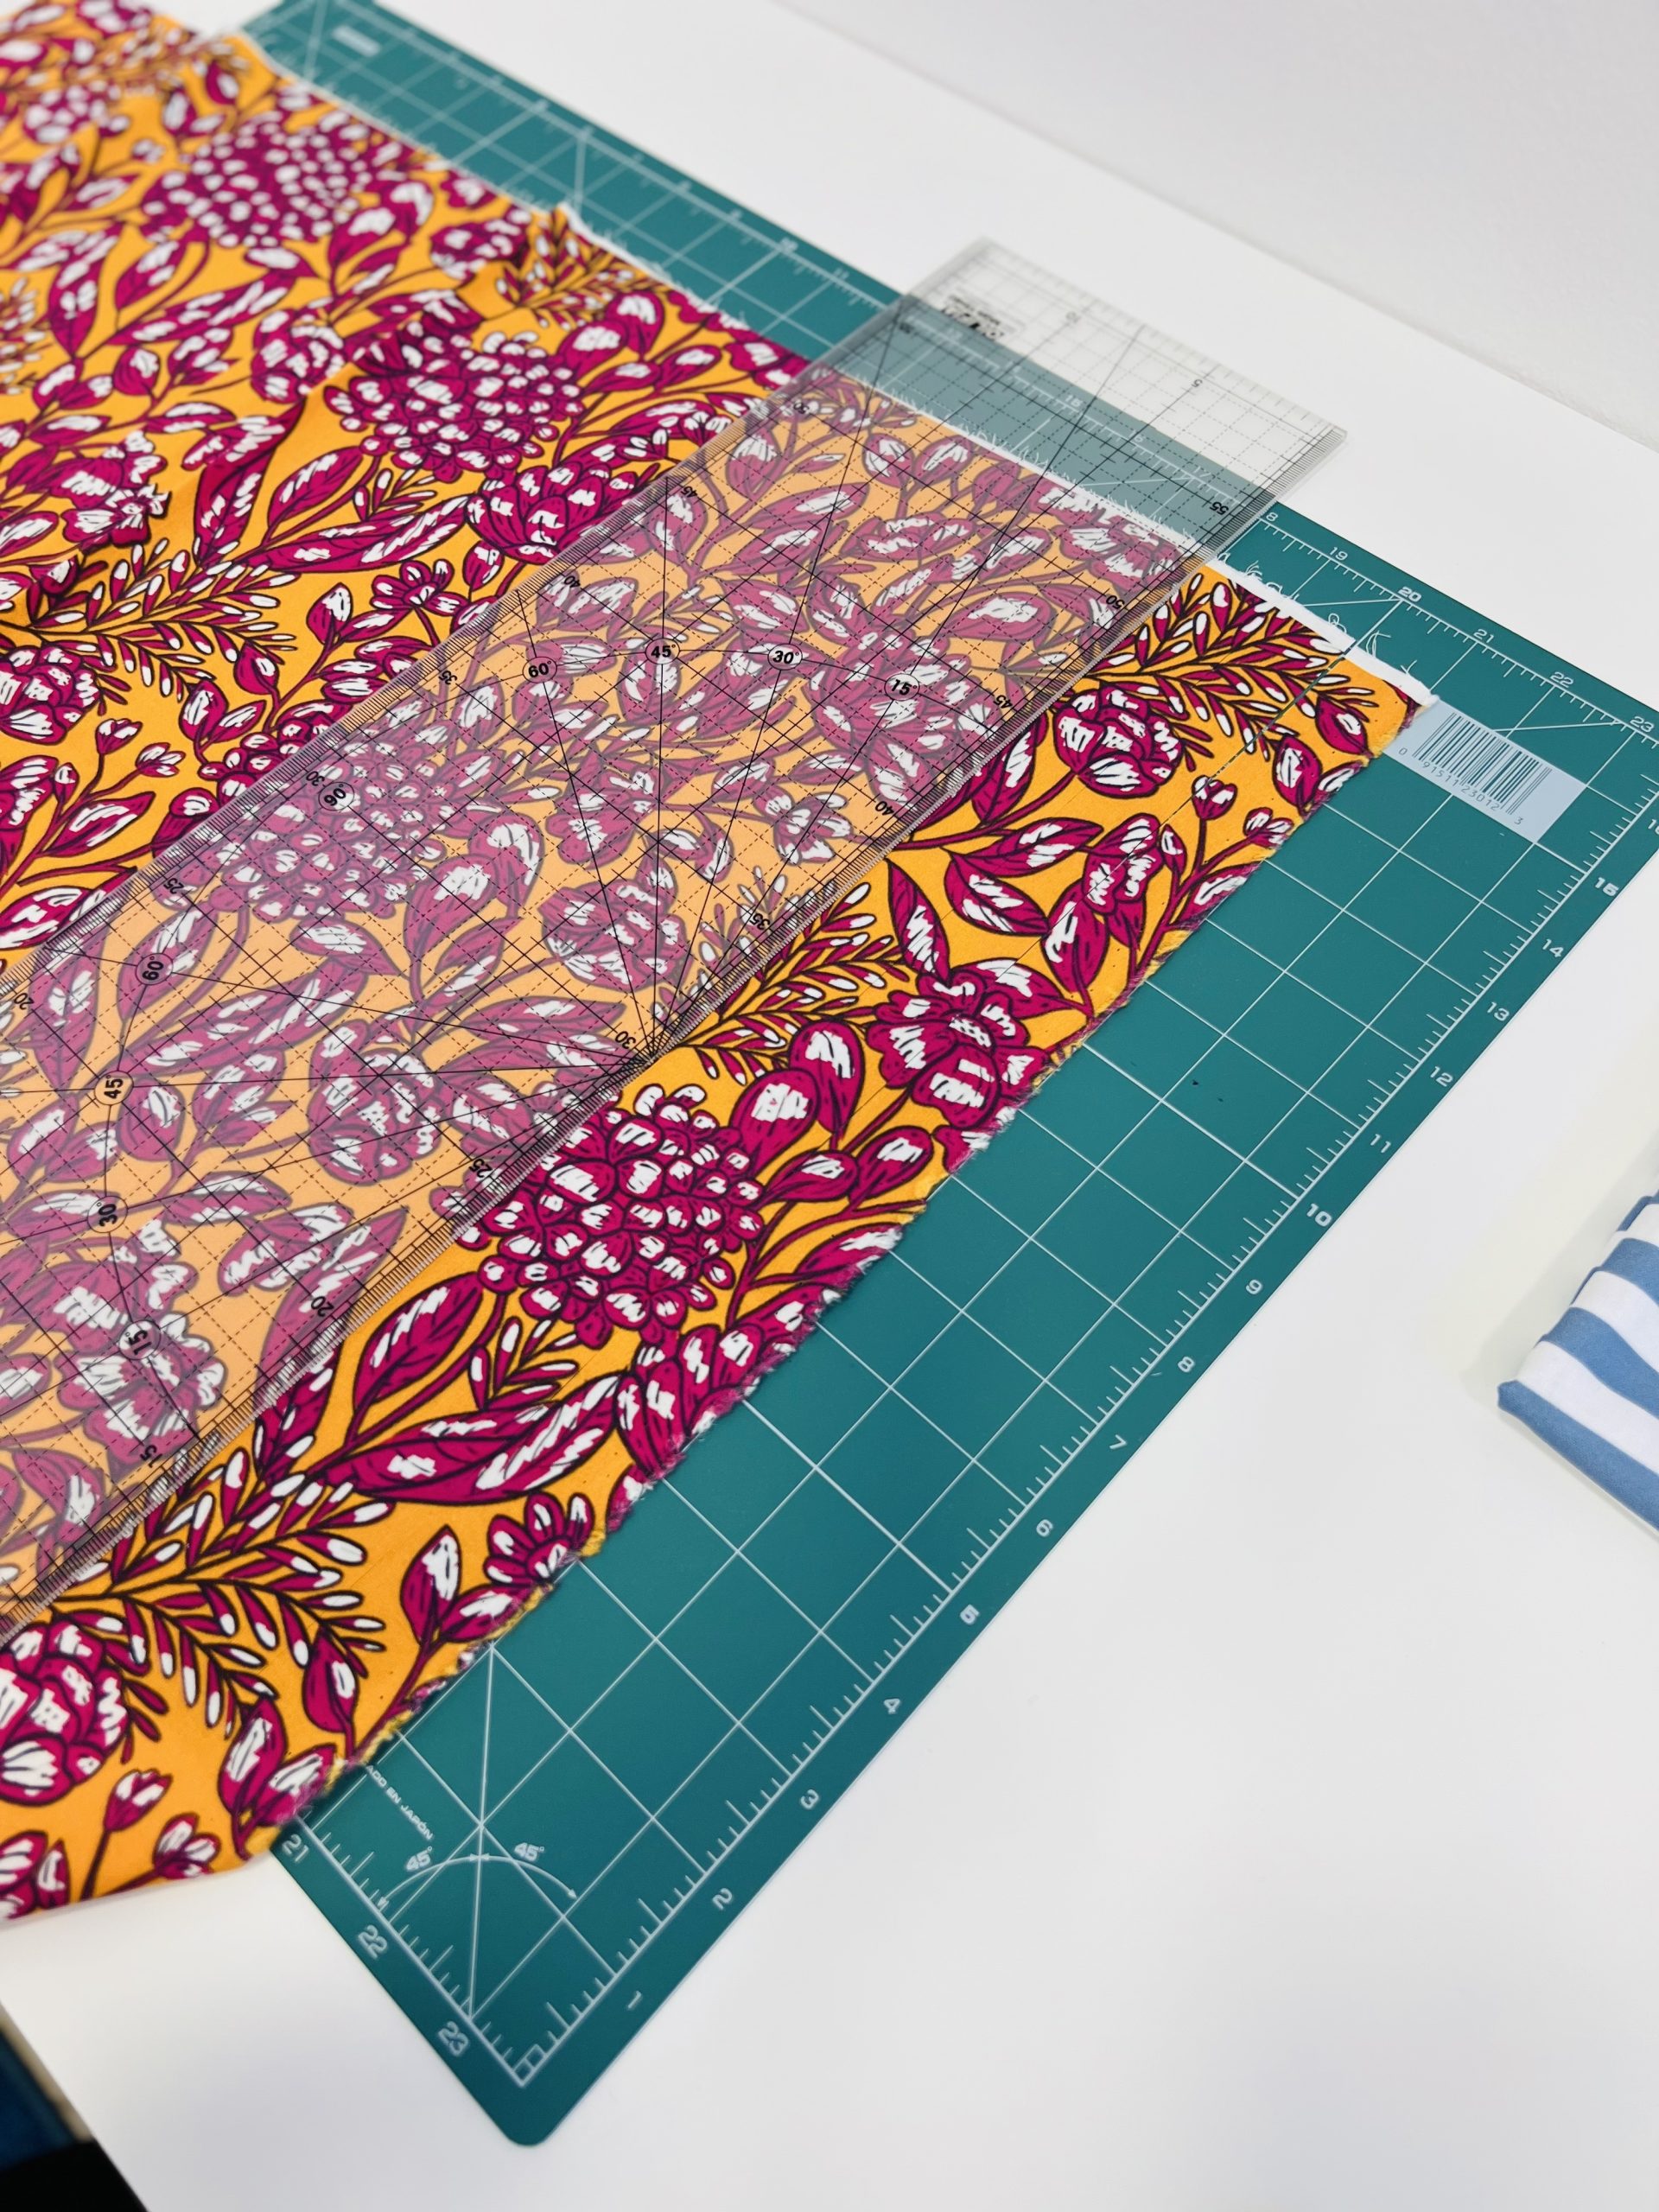
Place pieces of fabric on a cutting mat or table (if you don’t have a mat) and turn the bowl over. Draw a circle on the fabric with a pencil and measure about 5 cm from the circle and make a larger circle.
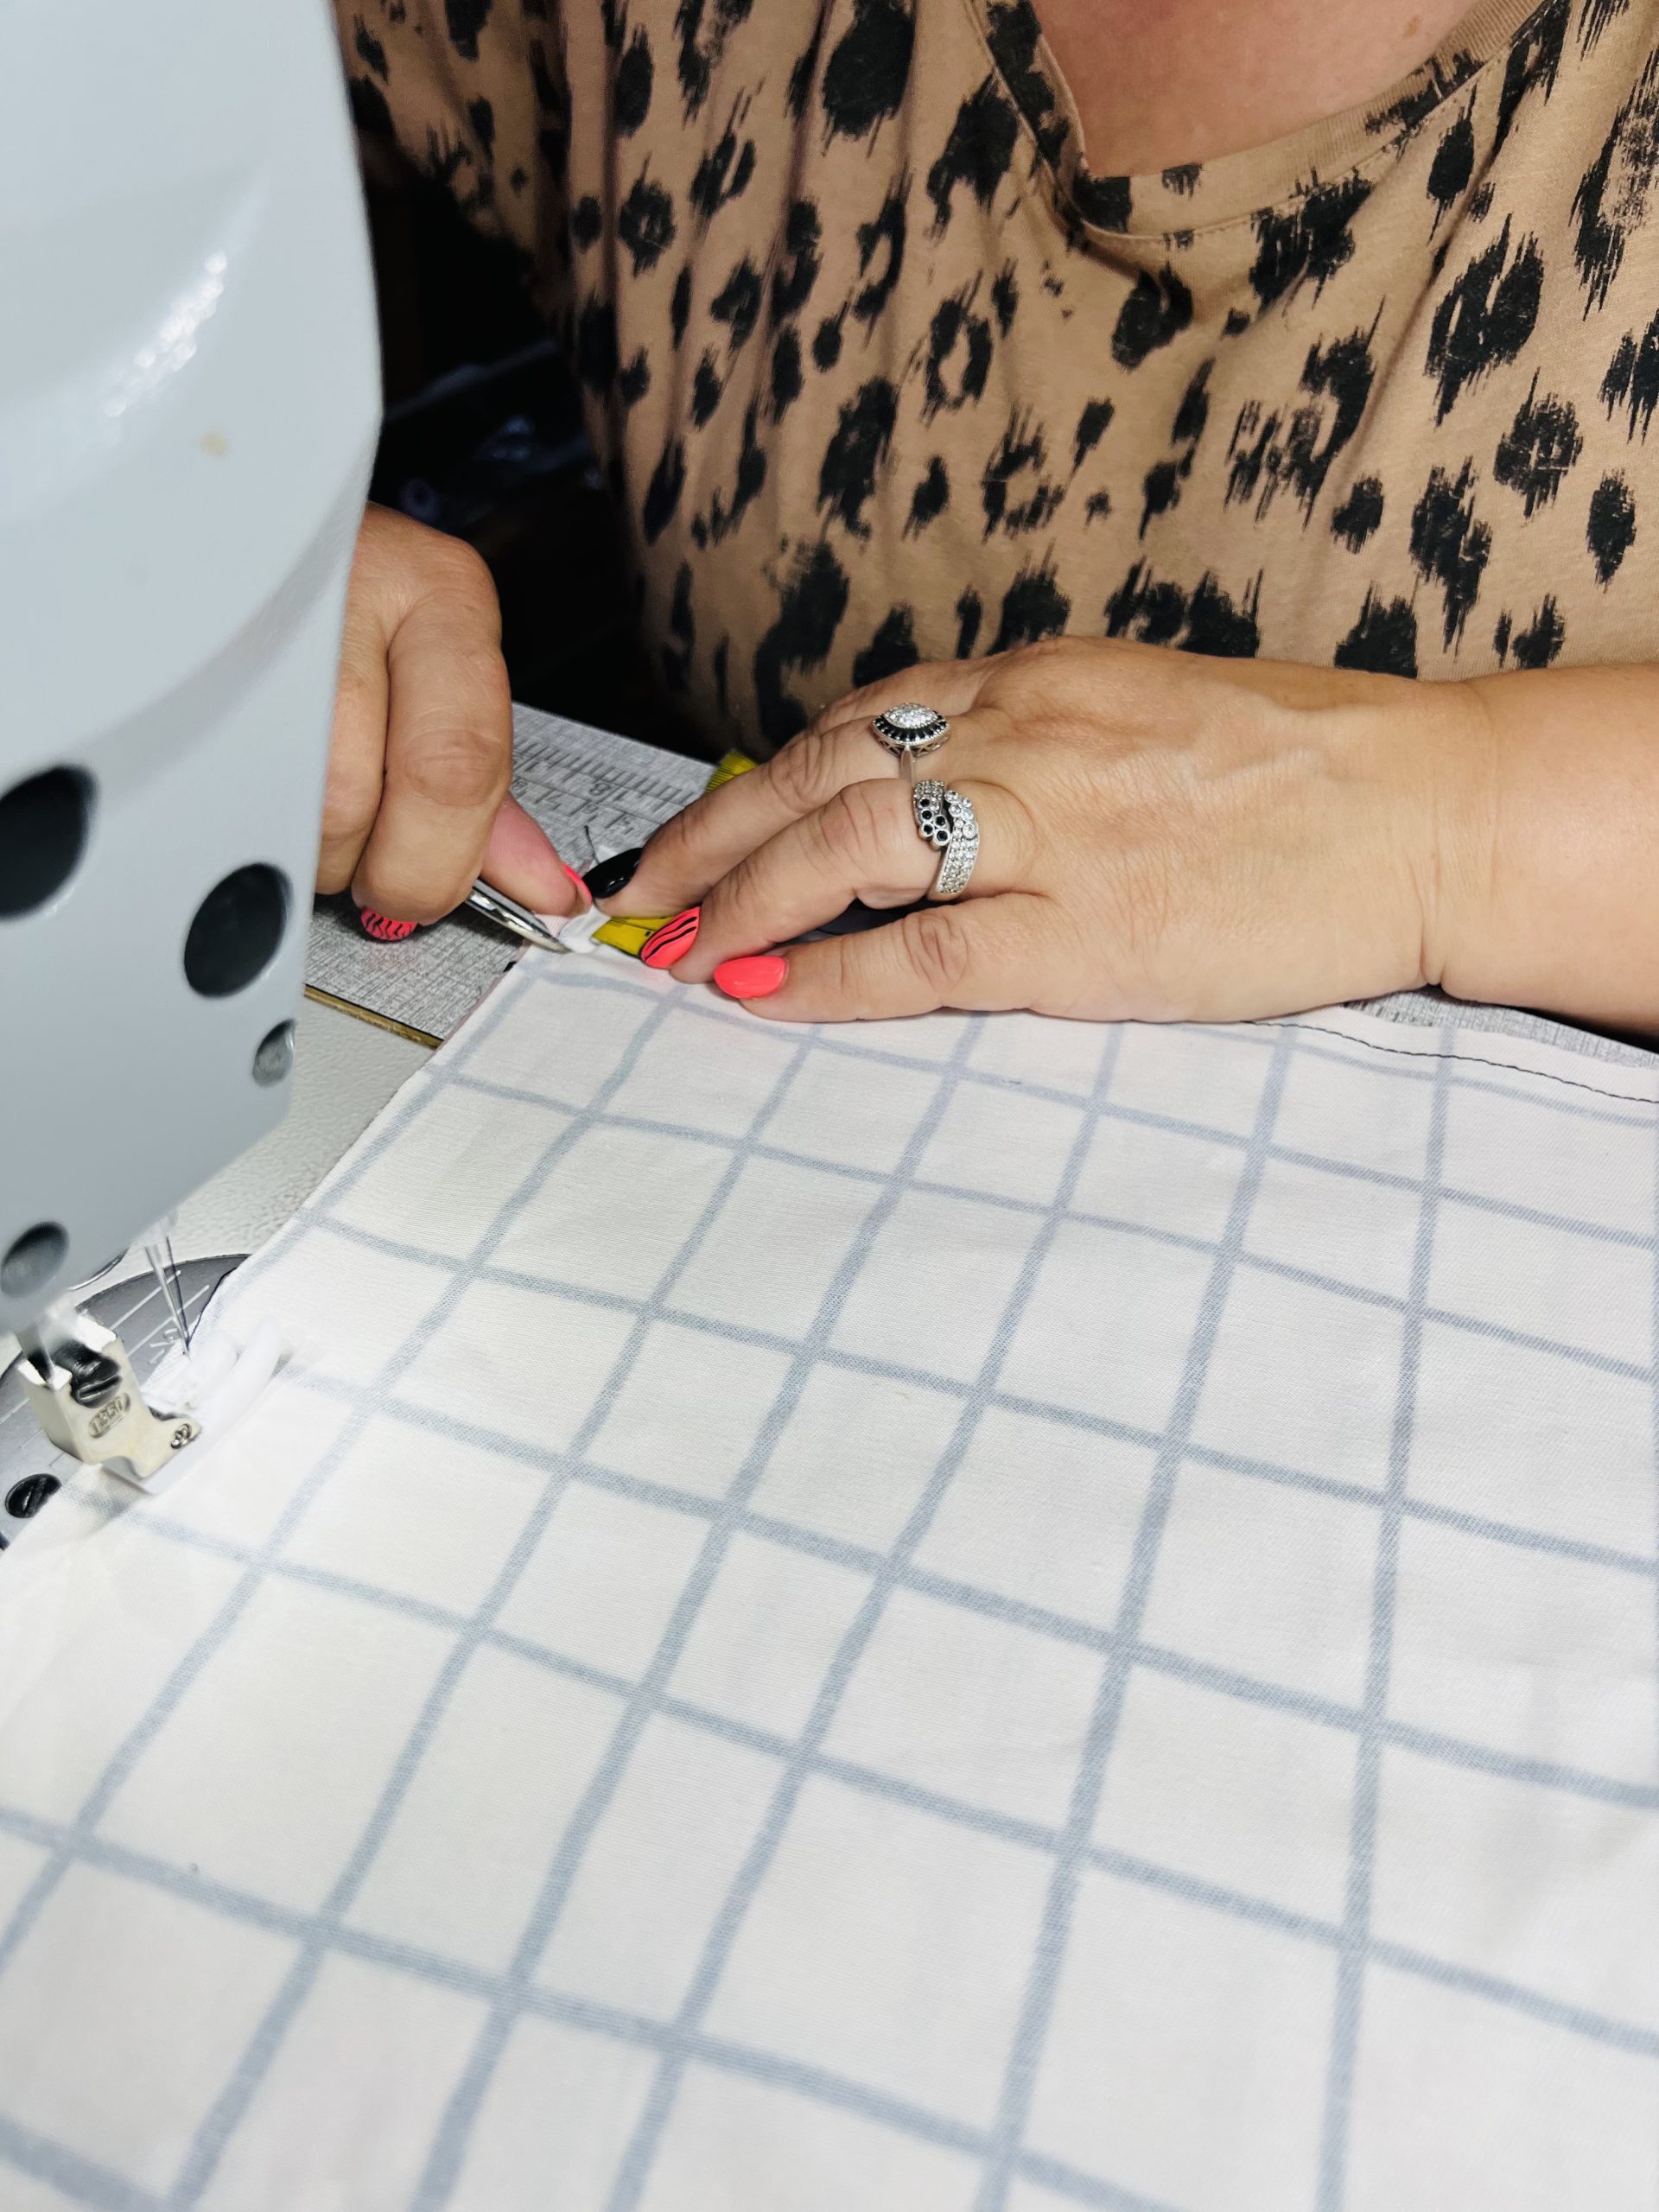
Step 2
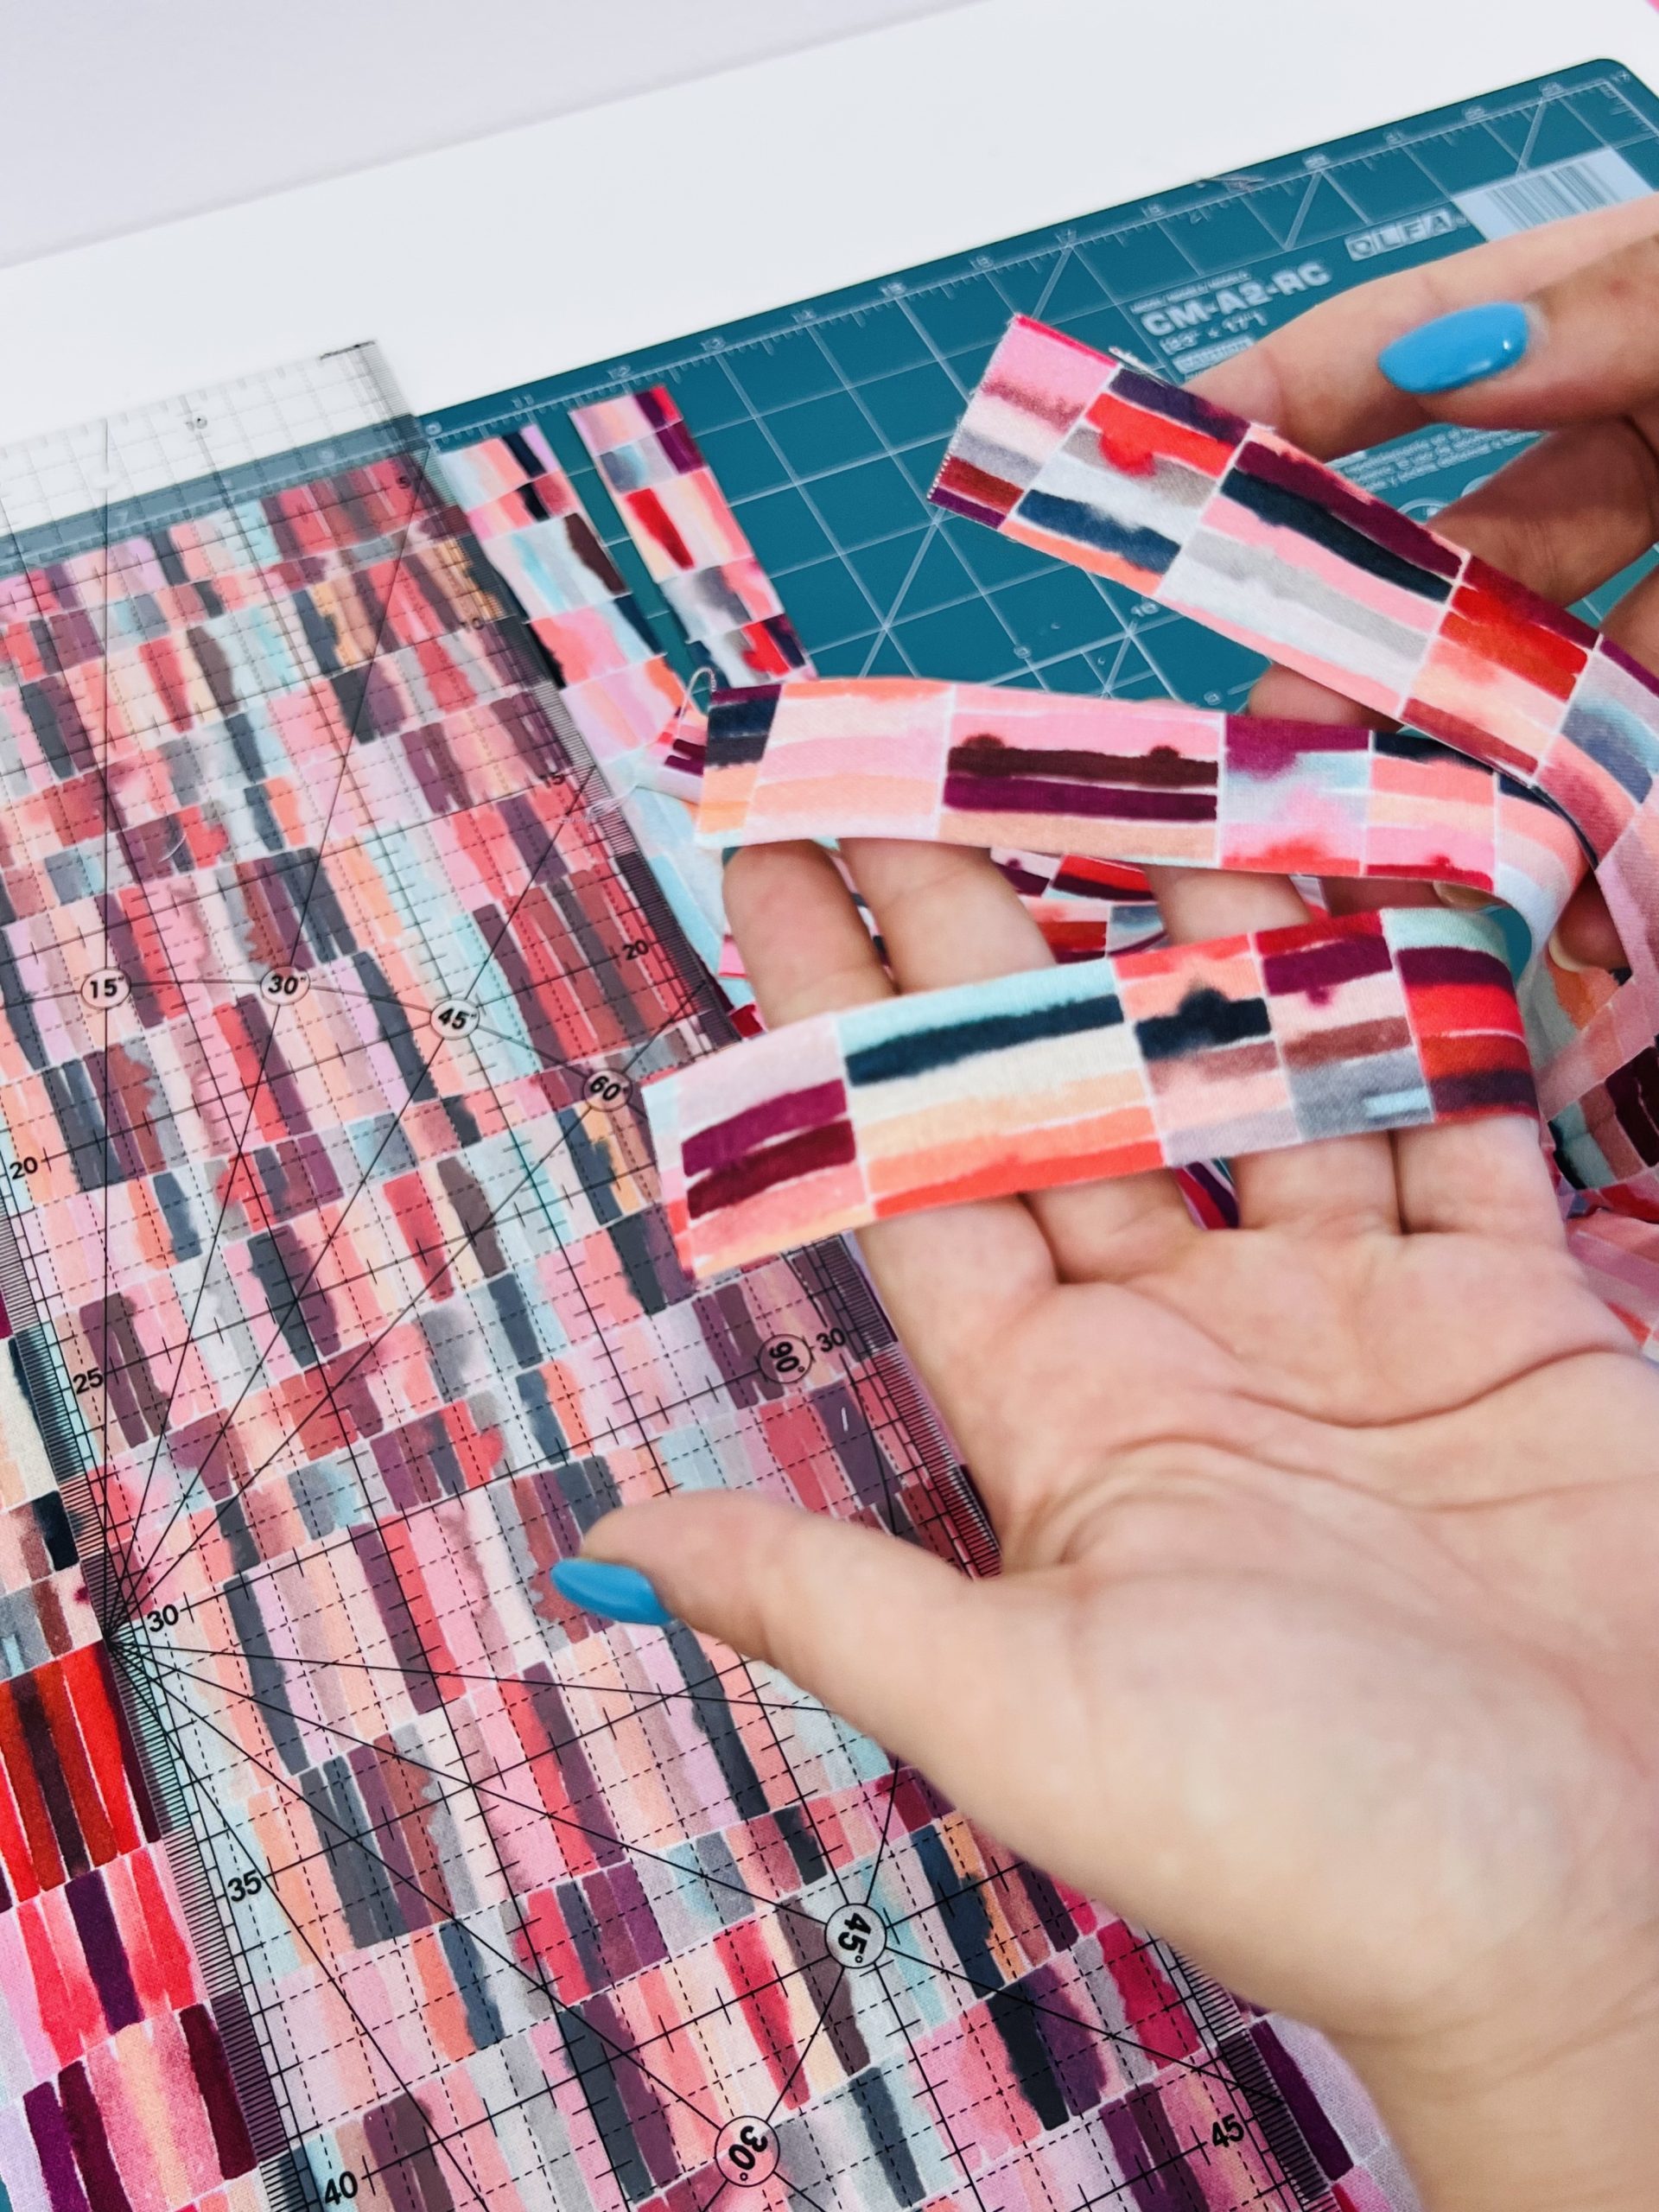
After that, use a rotary blade to cut out the following larger circle on the fabrics. Measure 1.5 cm from the edges and fasten it with pins to make it stable. Sew the edges with the sewing machine, but leave a little space at the beginning.
Step 3
The last step is to use a stapler to thread the rubber band into the free part of the fabric.
The easiest way to determine the length of the rubber band is to measure a centimeter from the edge of the bowl and then multiply by pi (π) and subtract 2 cm.
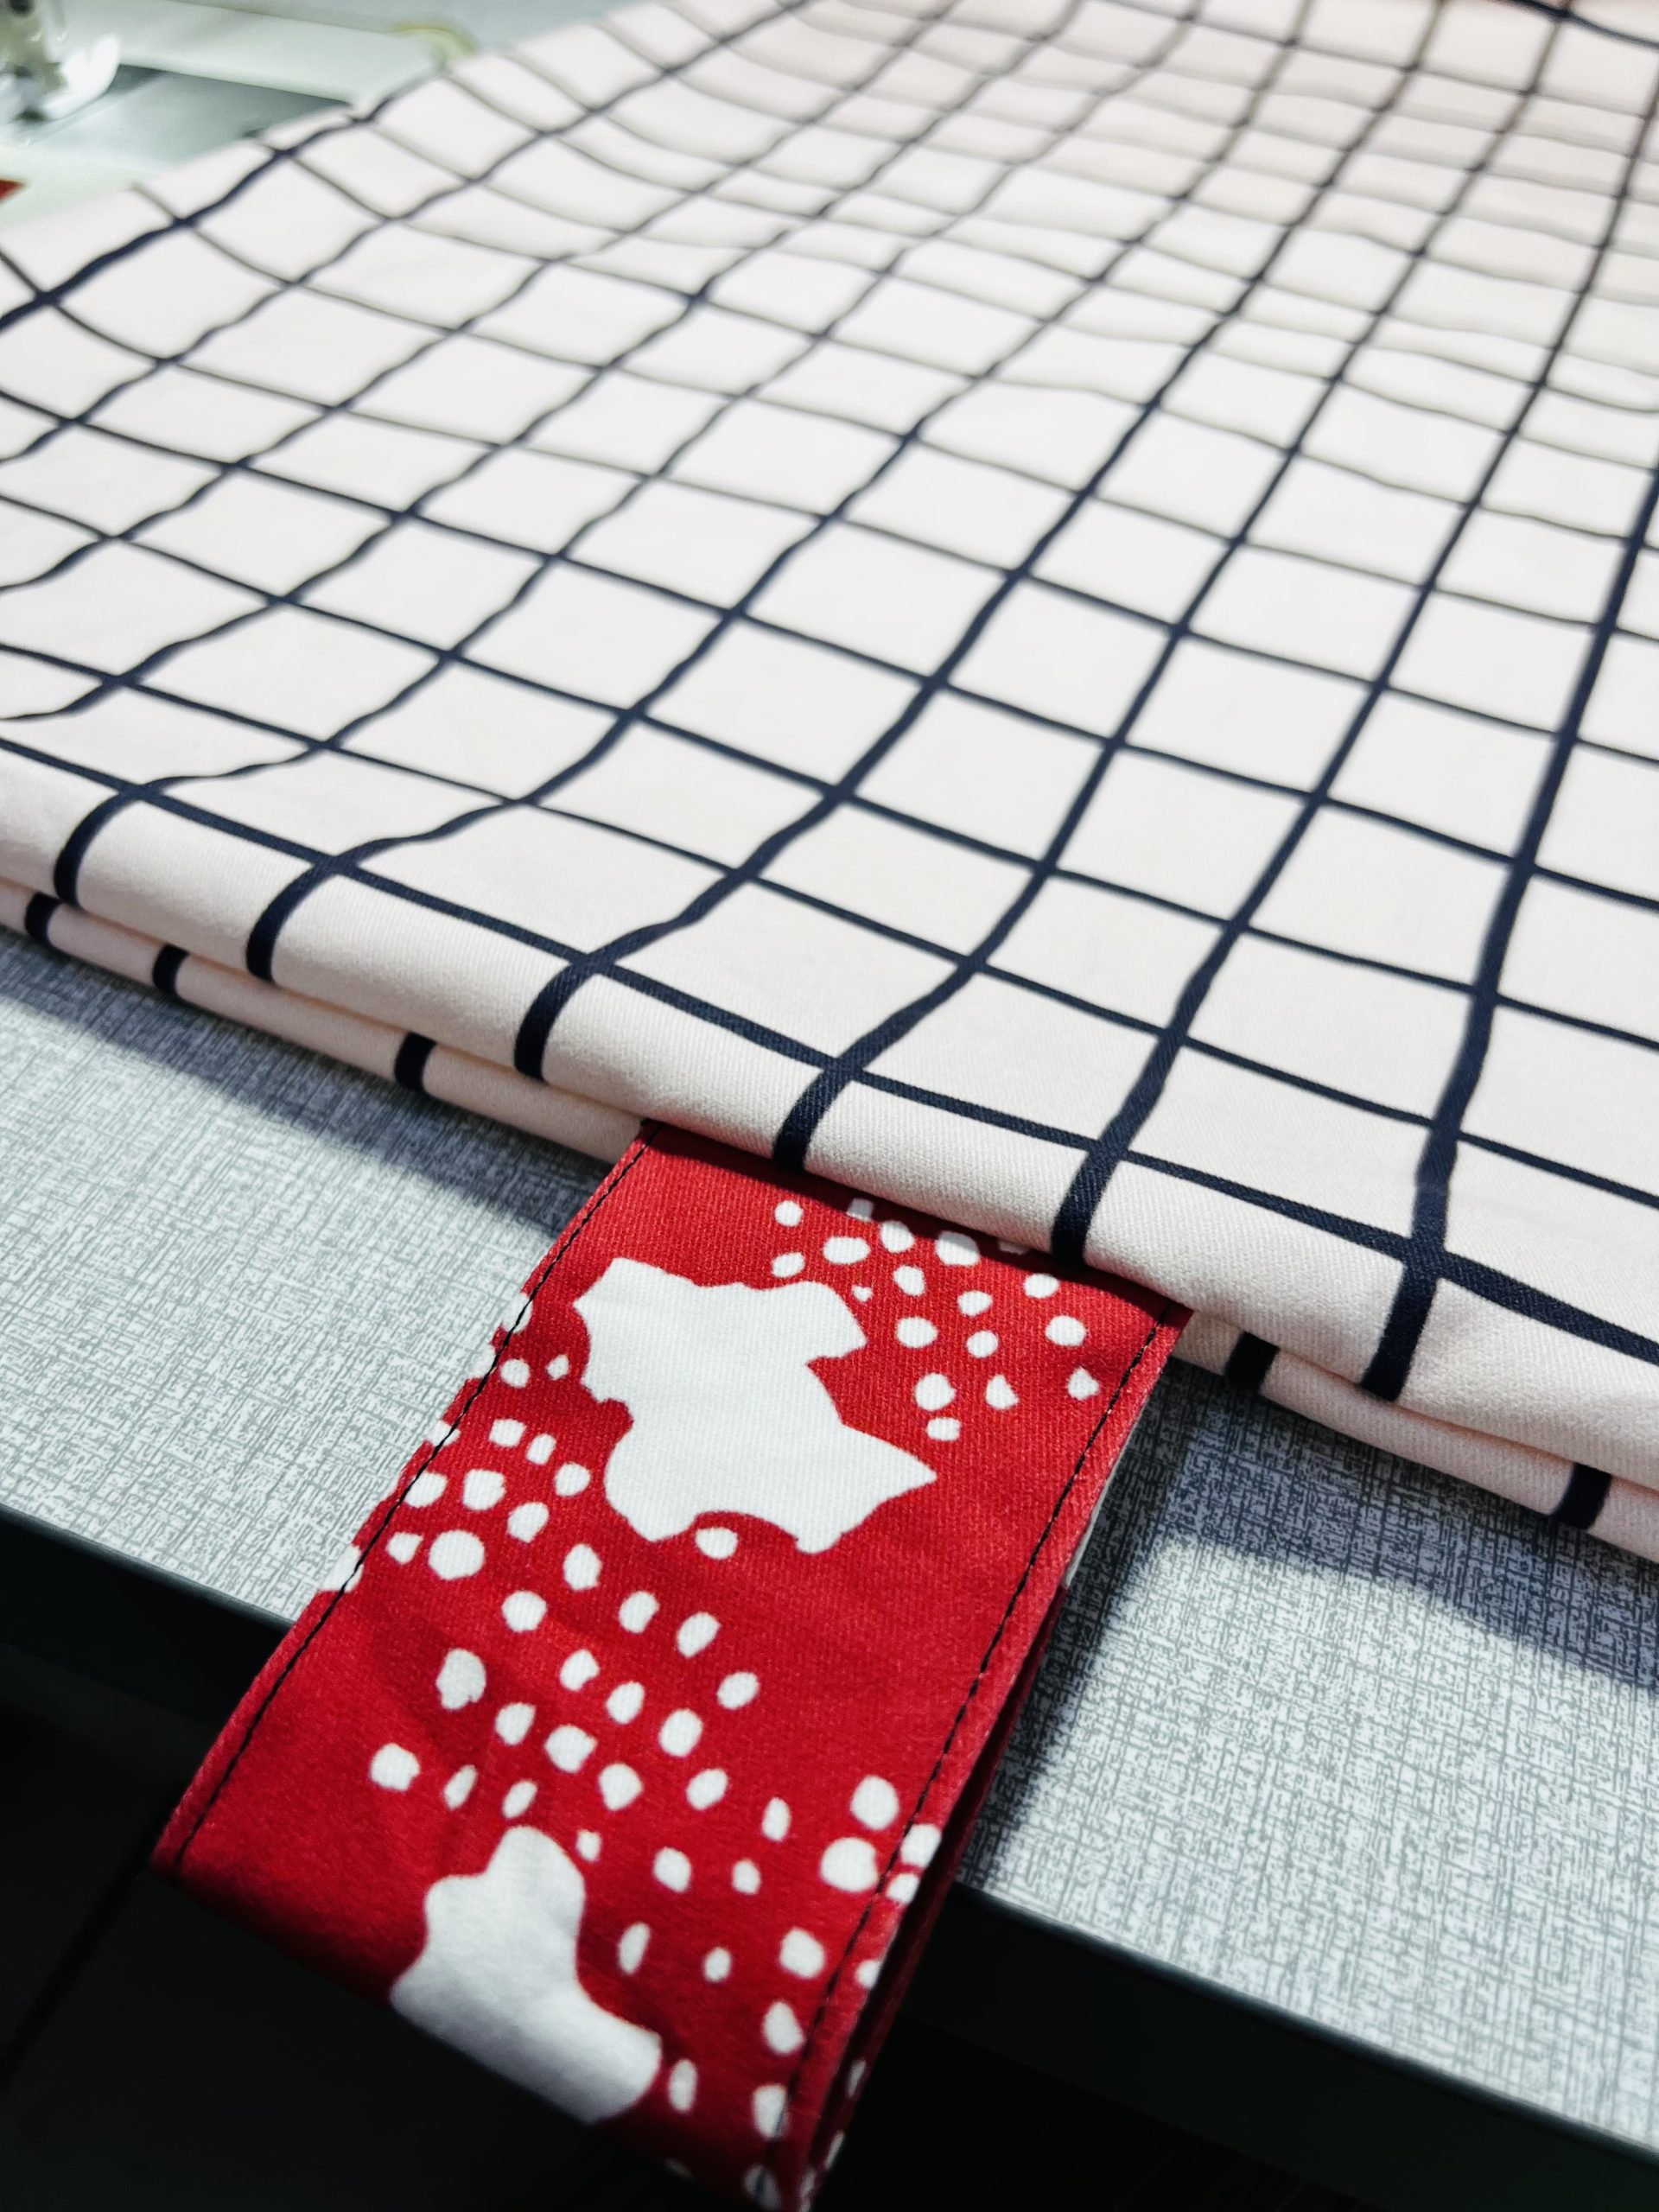
And that’s it!
You can use them for absolutely everything – saving food at home, when you’re in nature and want to cover a meal, when baking cakes or bread and the dough needs to stand…
If you want to try this DIY project, click on the Fabric Types page and select Muslin Fabric. After that, choose the design you want – you can choose the ones you can imagine in your kitchen. You can also put some recipes or pictures of your favorite food.
Send us pictures and videos of your colorful fabric bowl covers or post them on Instagram with the hashtag #caspardiy. Can’t wait to see your lovely DIY projects.
The post Fabric bowl covers – practical, profitable and lovely alternative to plastic! appeared first on Caspar.
]]>The post How To Choose the Perfect Fabric for Your DIY Project? appeared first on Caspar.
]]>DIY is a term we encounter everywhere.
Everybody already knows it’s short for Do It Yourself.
But what does DIY include?
Some will instantly think about patching up holes in the wall, others about making their own bath bombs, cutting their own hair, manufacturing furniture or sewing their own clothes.
Correct answer is – well, all the above! DIY includes performing tasks on your own, instead of paying for a product or service.
However, we’re Caspar so, in this case, we’re going to focus on the last task: sewing. Clothes, bags, pillowcases, curtains, tablecloths, accessories like scarfs, clothes for children, blankets – you can make all of these at home.
Take it easy, it’s not as simple as it sounds.
What does DIY sewing at home look like?
Some will think that a sewing machine, a couple of threads and a fabric are enough.
But that’s far from it!
Sewing involves a certain level of knowledge, some of which you can acquire only through practice. Still, you can start simply by watching a YouTube tutorial, reading a book or (this) blog.
There are A LOT of fabrics and knits. And not all of them will be suitable for every project – one will be great for making clothes, the other one for curtains, and another one for scarves. One will stretch and glide through your sewing machine so it won’t be an ideal fit for beginners, while others will stand still and patiently wait to be formed by you.
Keep this in mind before you throw yourself into a project, and answer these questions:
- What are the properties of each fabric? In our web shop, every fabric has its detailed description along with its purpose.
- What are your sewing skills? If you’ re a beginner, choose non-stretchable fabrics of medium thickness.
If you’ve successfully answered these questions, we can move on.
To make your DIY projects easier, we’ve made a list of suitable fabrics according to the various types of projects. You just need to click on the link and see which fabric corresponds to your task.
Casual clothes
Cotton. Everything made of cotton is so light, so breathable, it feels so good on the skin – clearly there’s no better option for casual clothes in which you’ll chill on the couch or take a walk through the park.
Of course, viscose doesn’t lag behind either. It’s equally soft and drapes down the body beautifully.
Fashion accessories
Bags, shawls and scarves – which materials are ideal for fashion accessories?
It’s easy to choose – just keep in mind whether you need a light and airy material (for a shawl) or a firm one for a bag. Here’s the solution:
Kids’ and baby clothes
If you’re thinking about designing kids’ or baby clothes, be especially careful while choosing the right material. Their sensitive skin will love natural materials like cotton, as well as viscose.
Fashion clothing
Why did we put fashion clothing in its own category? Because materials used in the making of tracksuits are different from the ones you’ll make a fashion dress out of. For skin-tight pieces there is no better material than viscose, while the twills are used for firmer and sharper lines.
Home decor
You’re probably aware that you won’t need the same type of fabric for comfy undershirts and for pillowcases which will be placed on the terrace couch, right? Home decorations acquire somewhat firmer materials, and twill and linen are the rightful winners.
Have you found your fabric? Take a peek at our Fabric Types page and find the one that suits you!
The post How To Choose the Perfect Fabric for Your DIY Project? appeared first on Caspar.
]]>The post DIY Wall Organizer appeared first on Caspar.
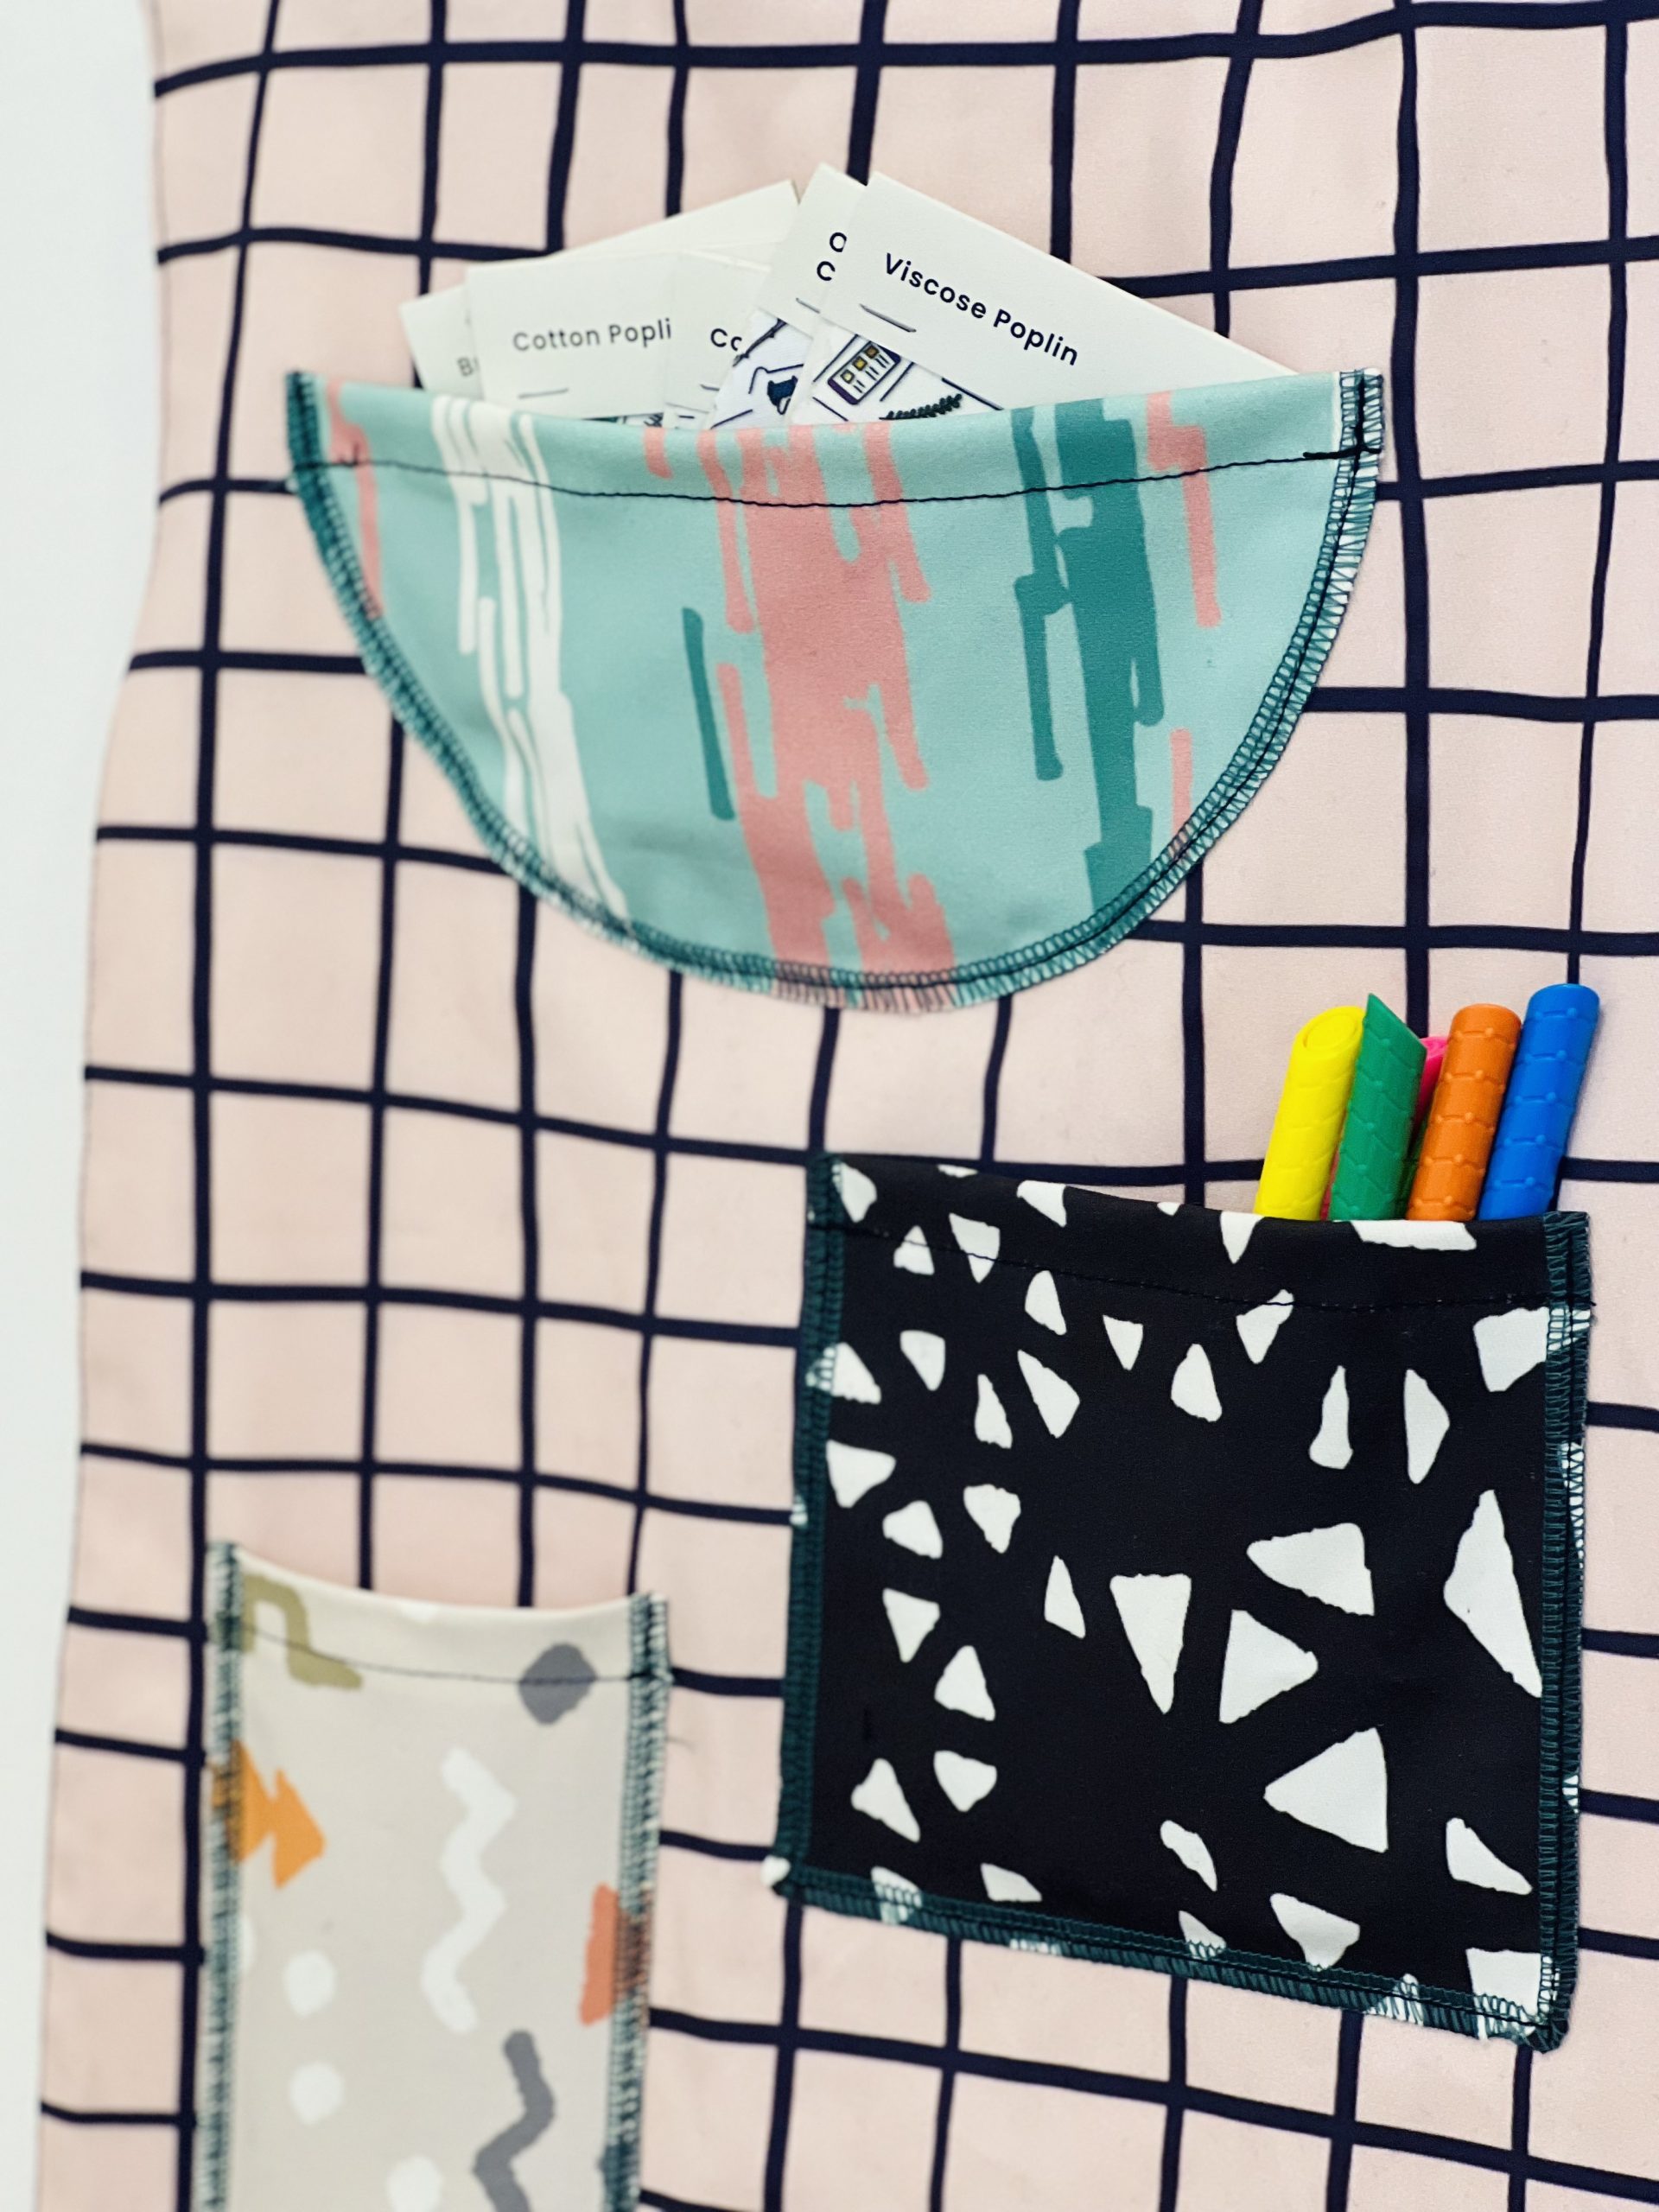
]]>Can an organization be functional and look attractive at the same time? For all those who don’t have enough space at home, but have a lot of things on the table, we prepared a colorful solution – a wall organizer.
All you need for this DIY project is a little imagination (and a few tools).
So, where to start?
We will use Cotton Twill fabric for its durability and strength.
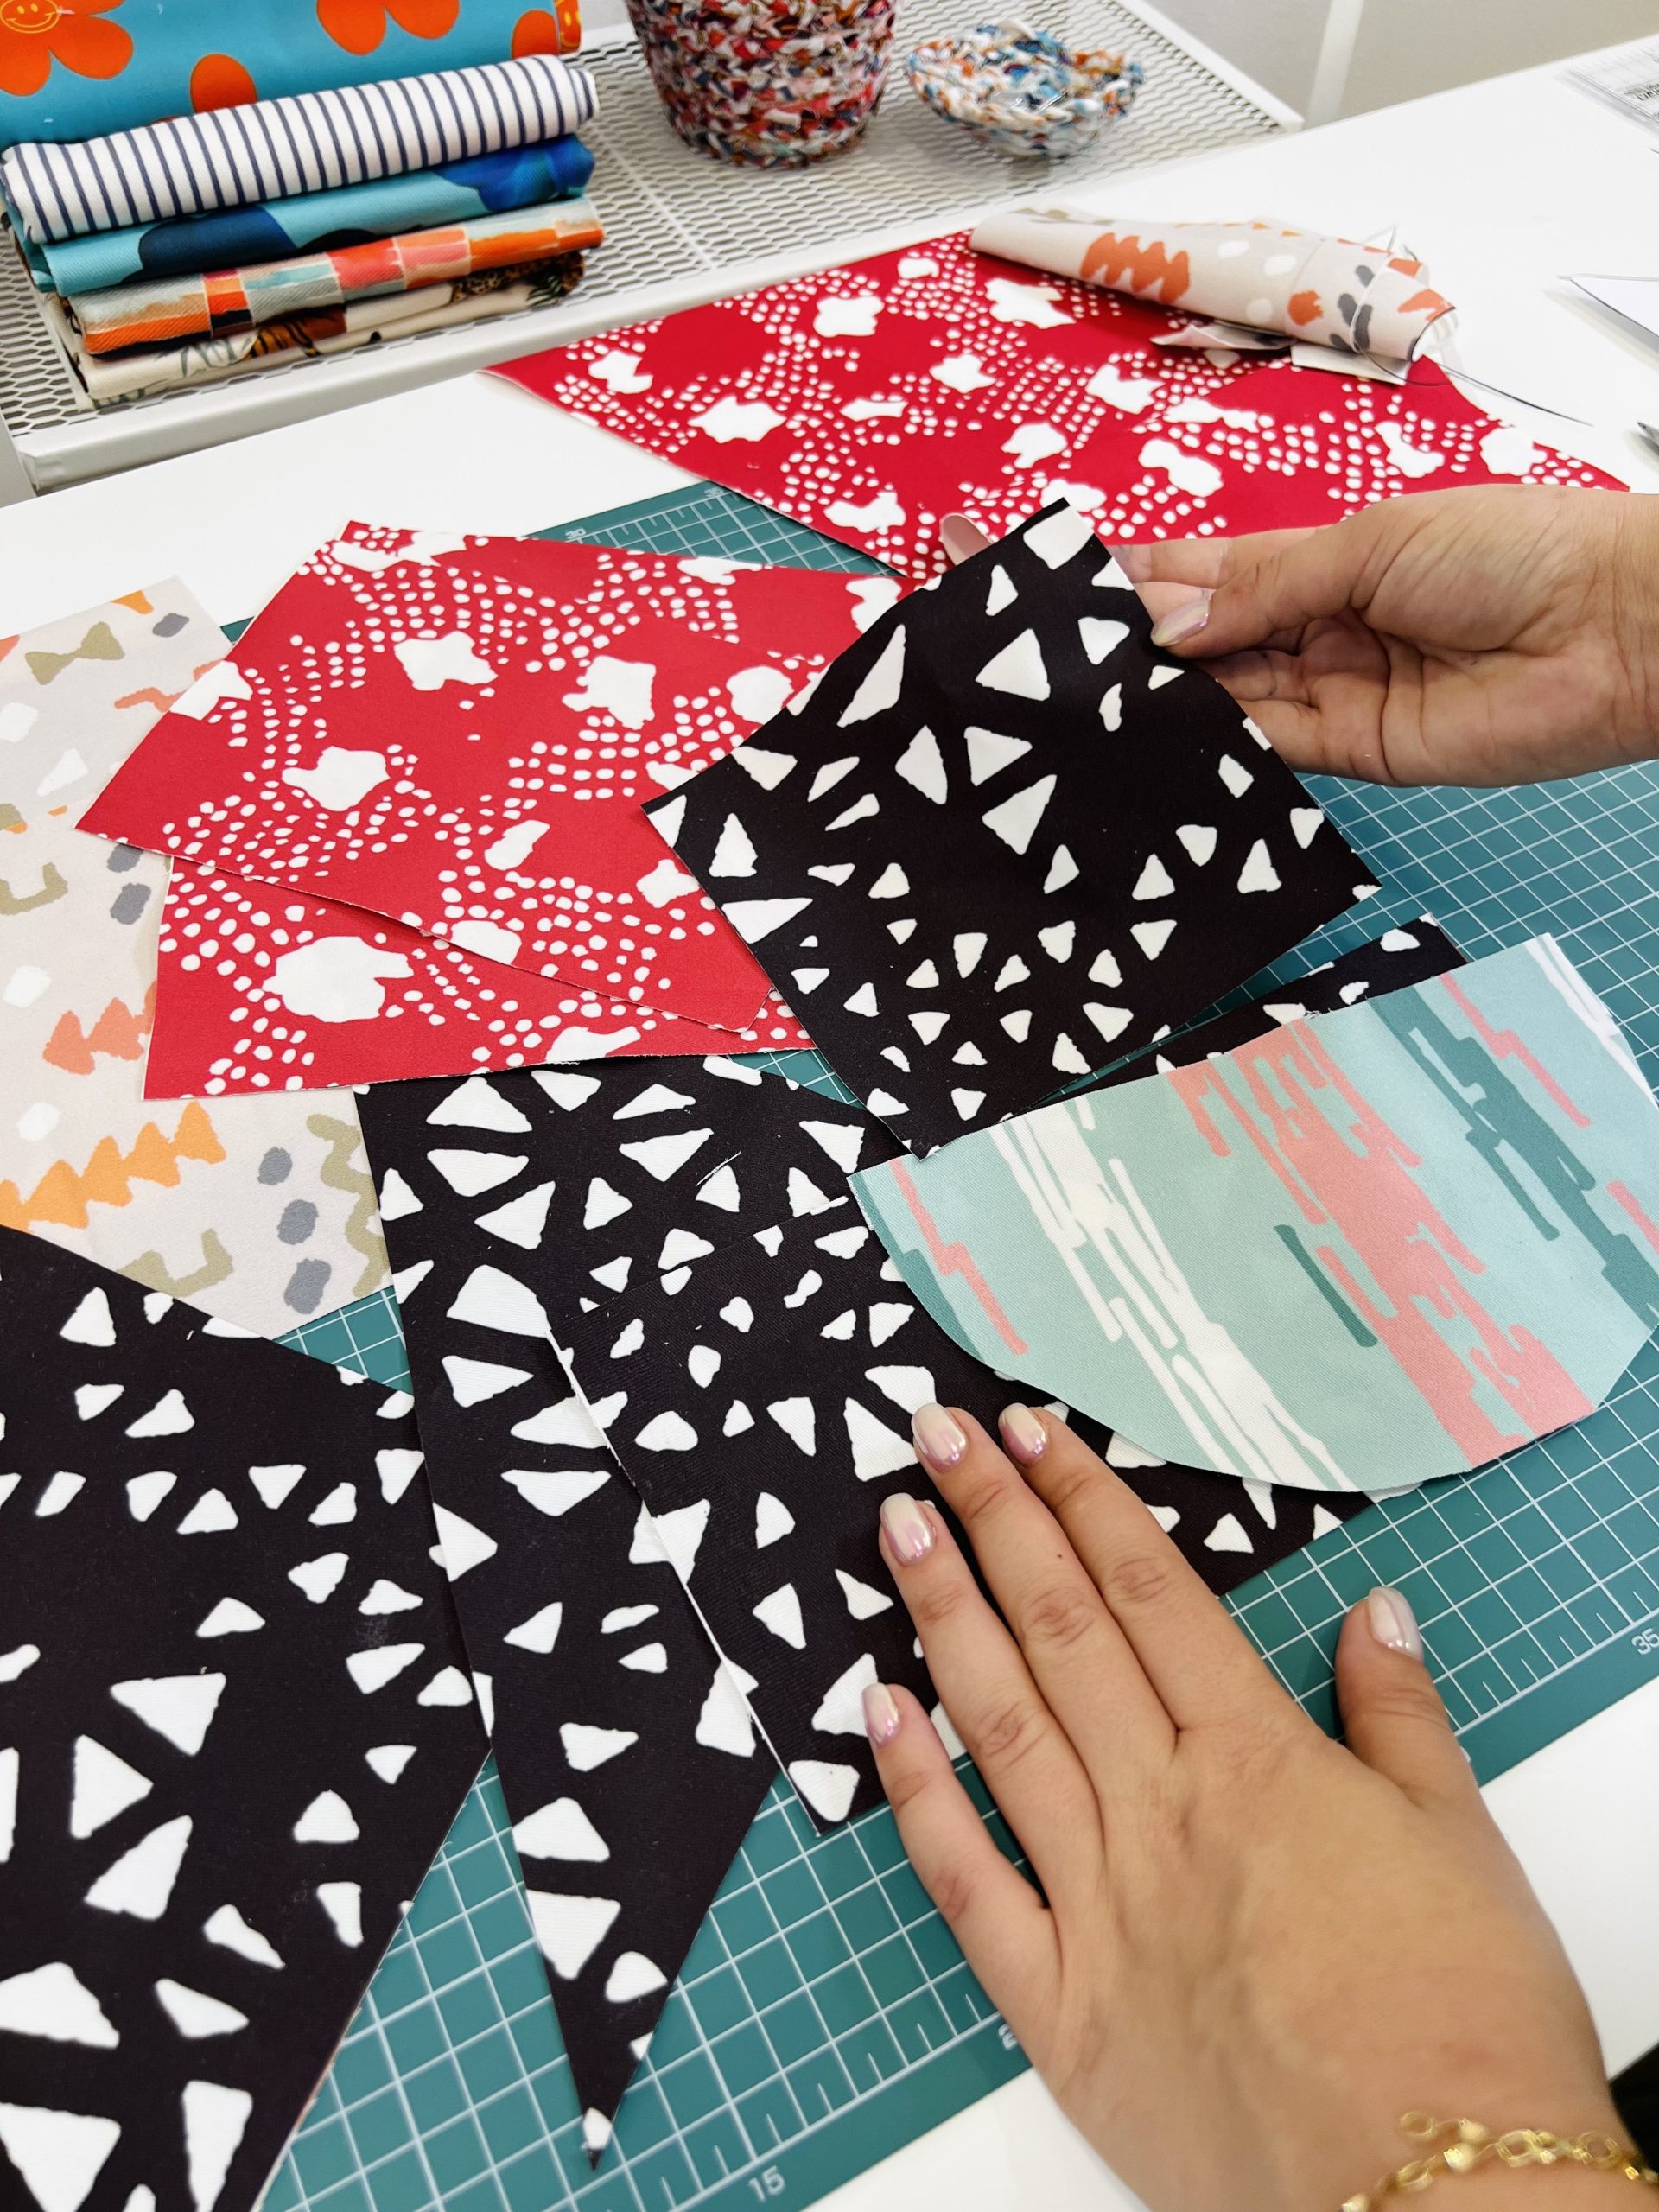
The cool thing is that we can choose several patterns and combine different colors to best fit our workspace.
The list of what you need:
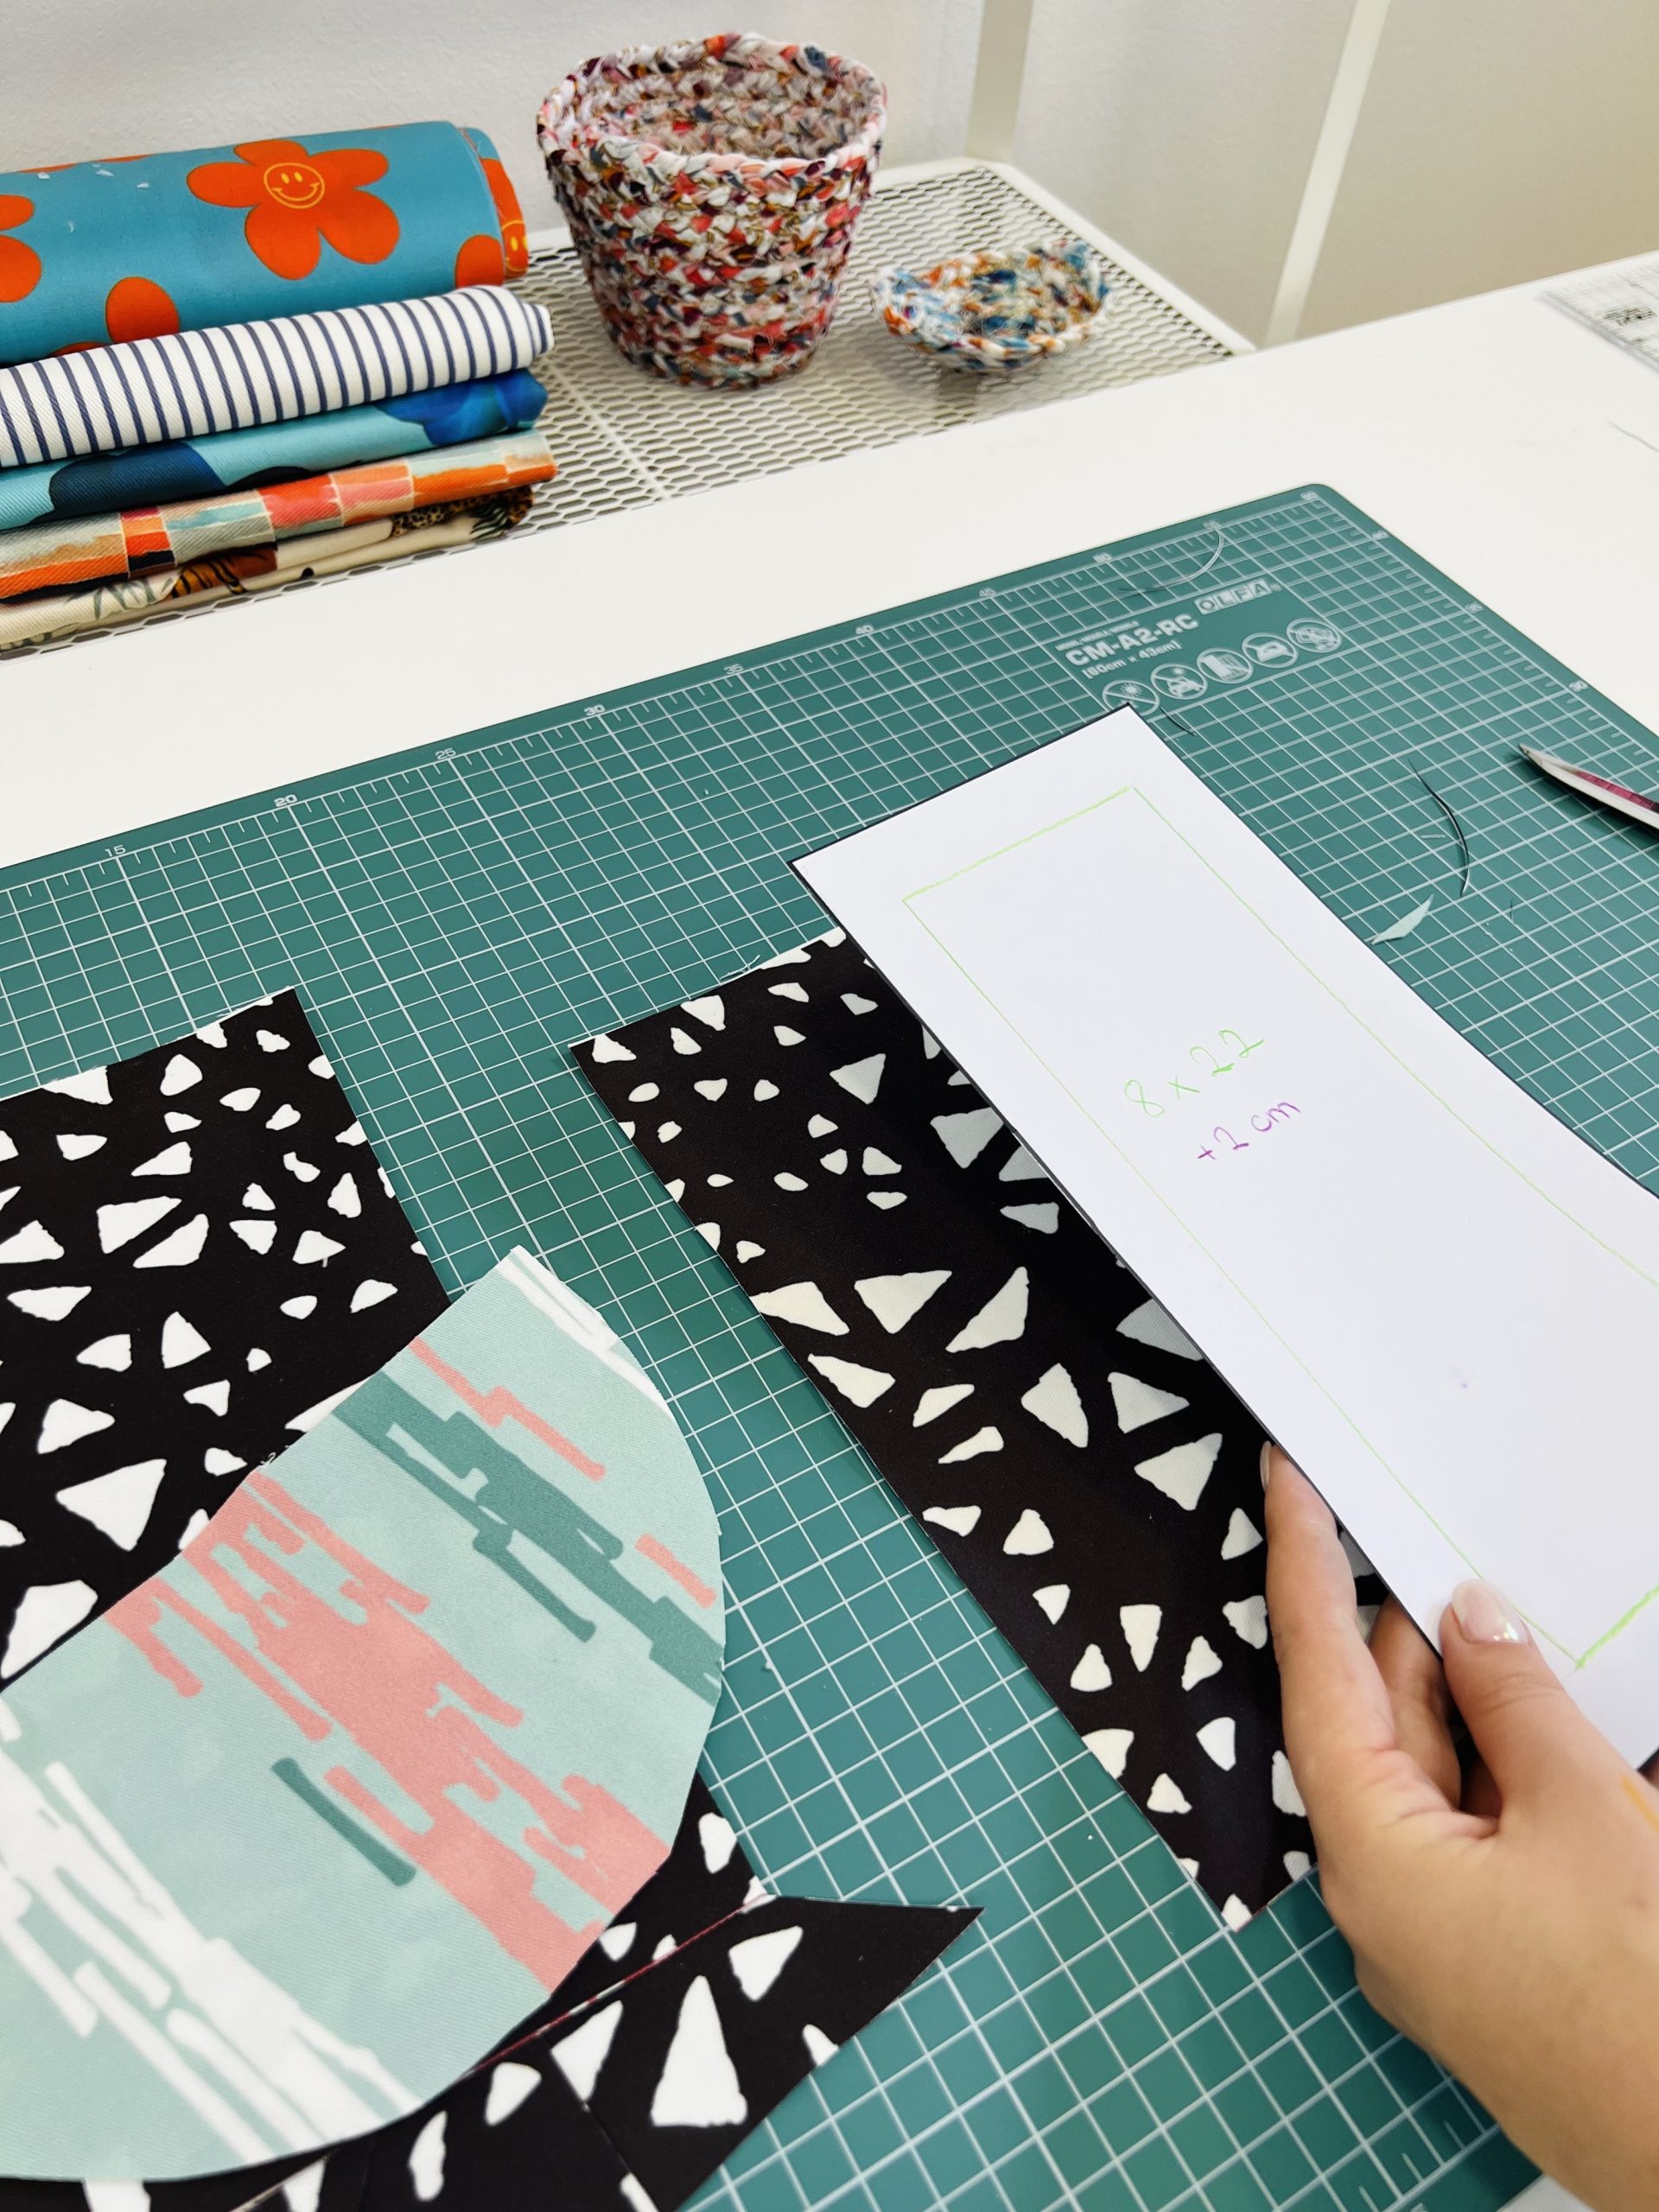
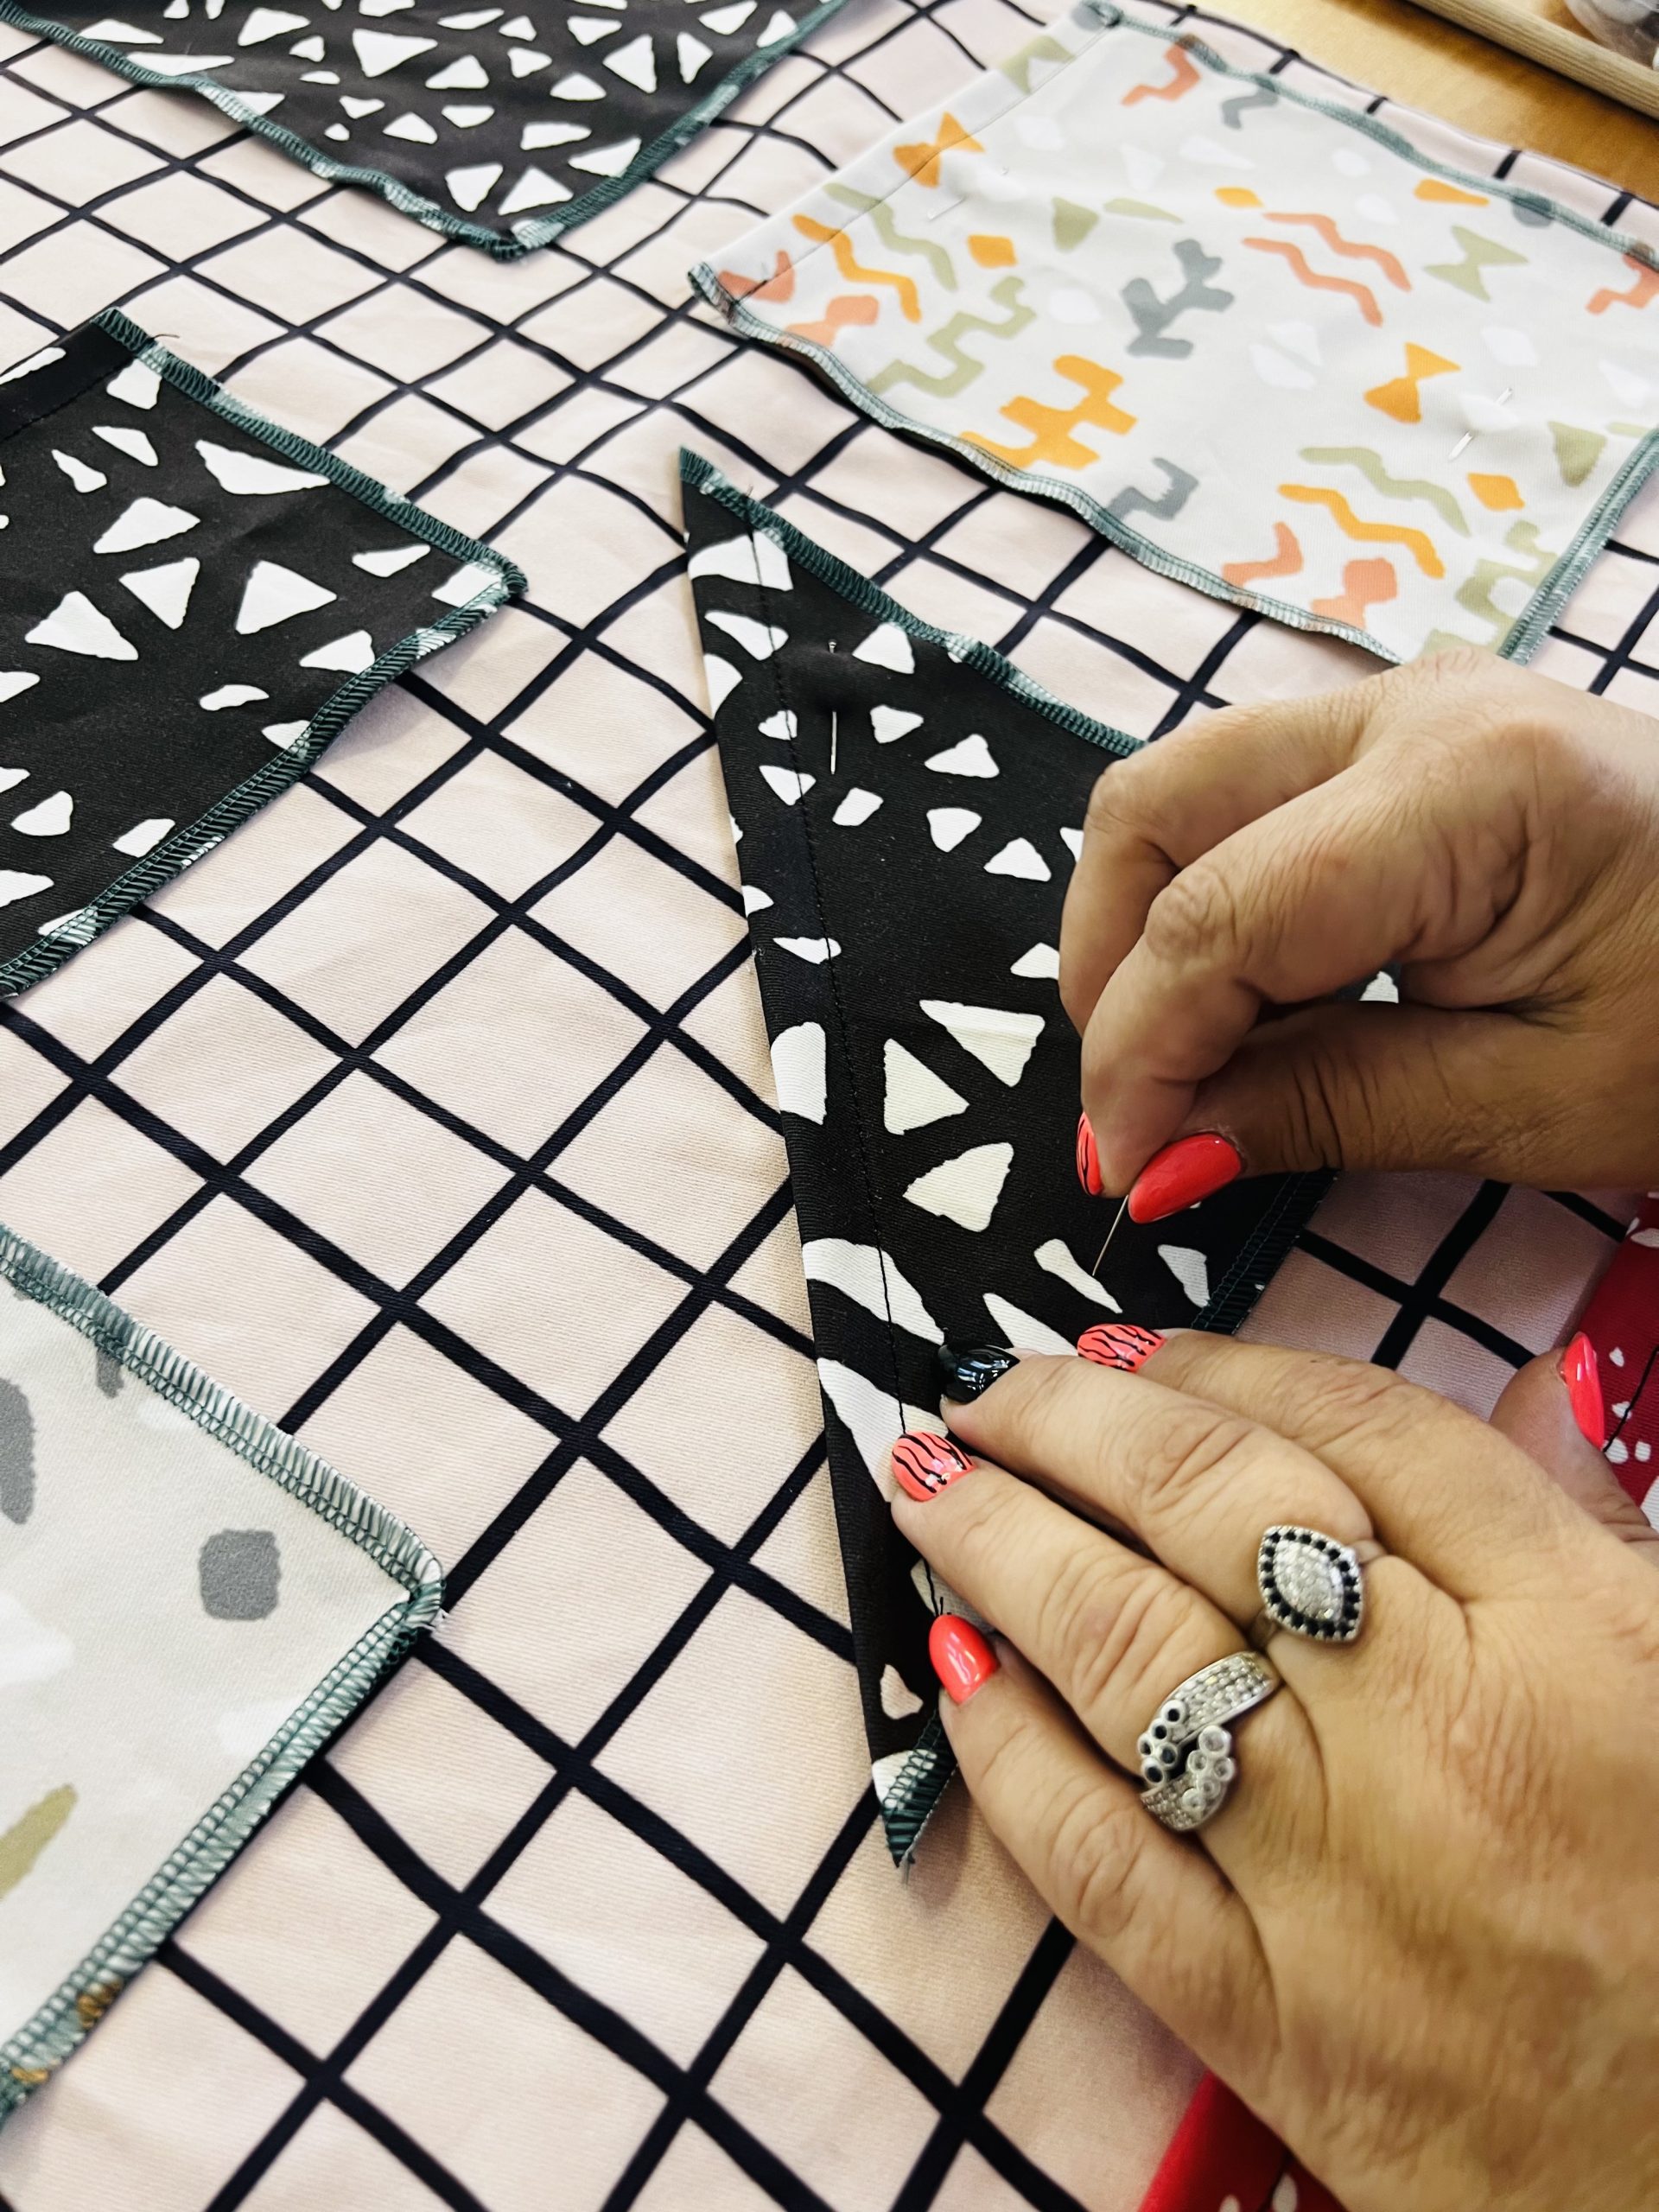
- One meter (100 cm x 146 cm) of Cotton Twill fabric (with different designs). You can choose your own designs, we used those from our design base – Optic illusion, Abstract moves, Parts deconstructed, Mosaic triangles and The bigger it gets.
- Rotary blade or fabric scissors
- Two wooden strips 60 cm
- String 90 cm
- Straight edge ruler
- Sewing machine
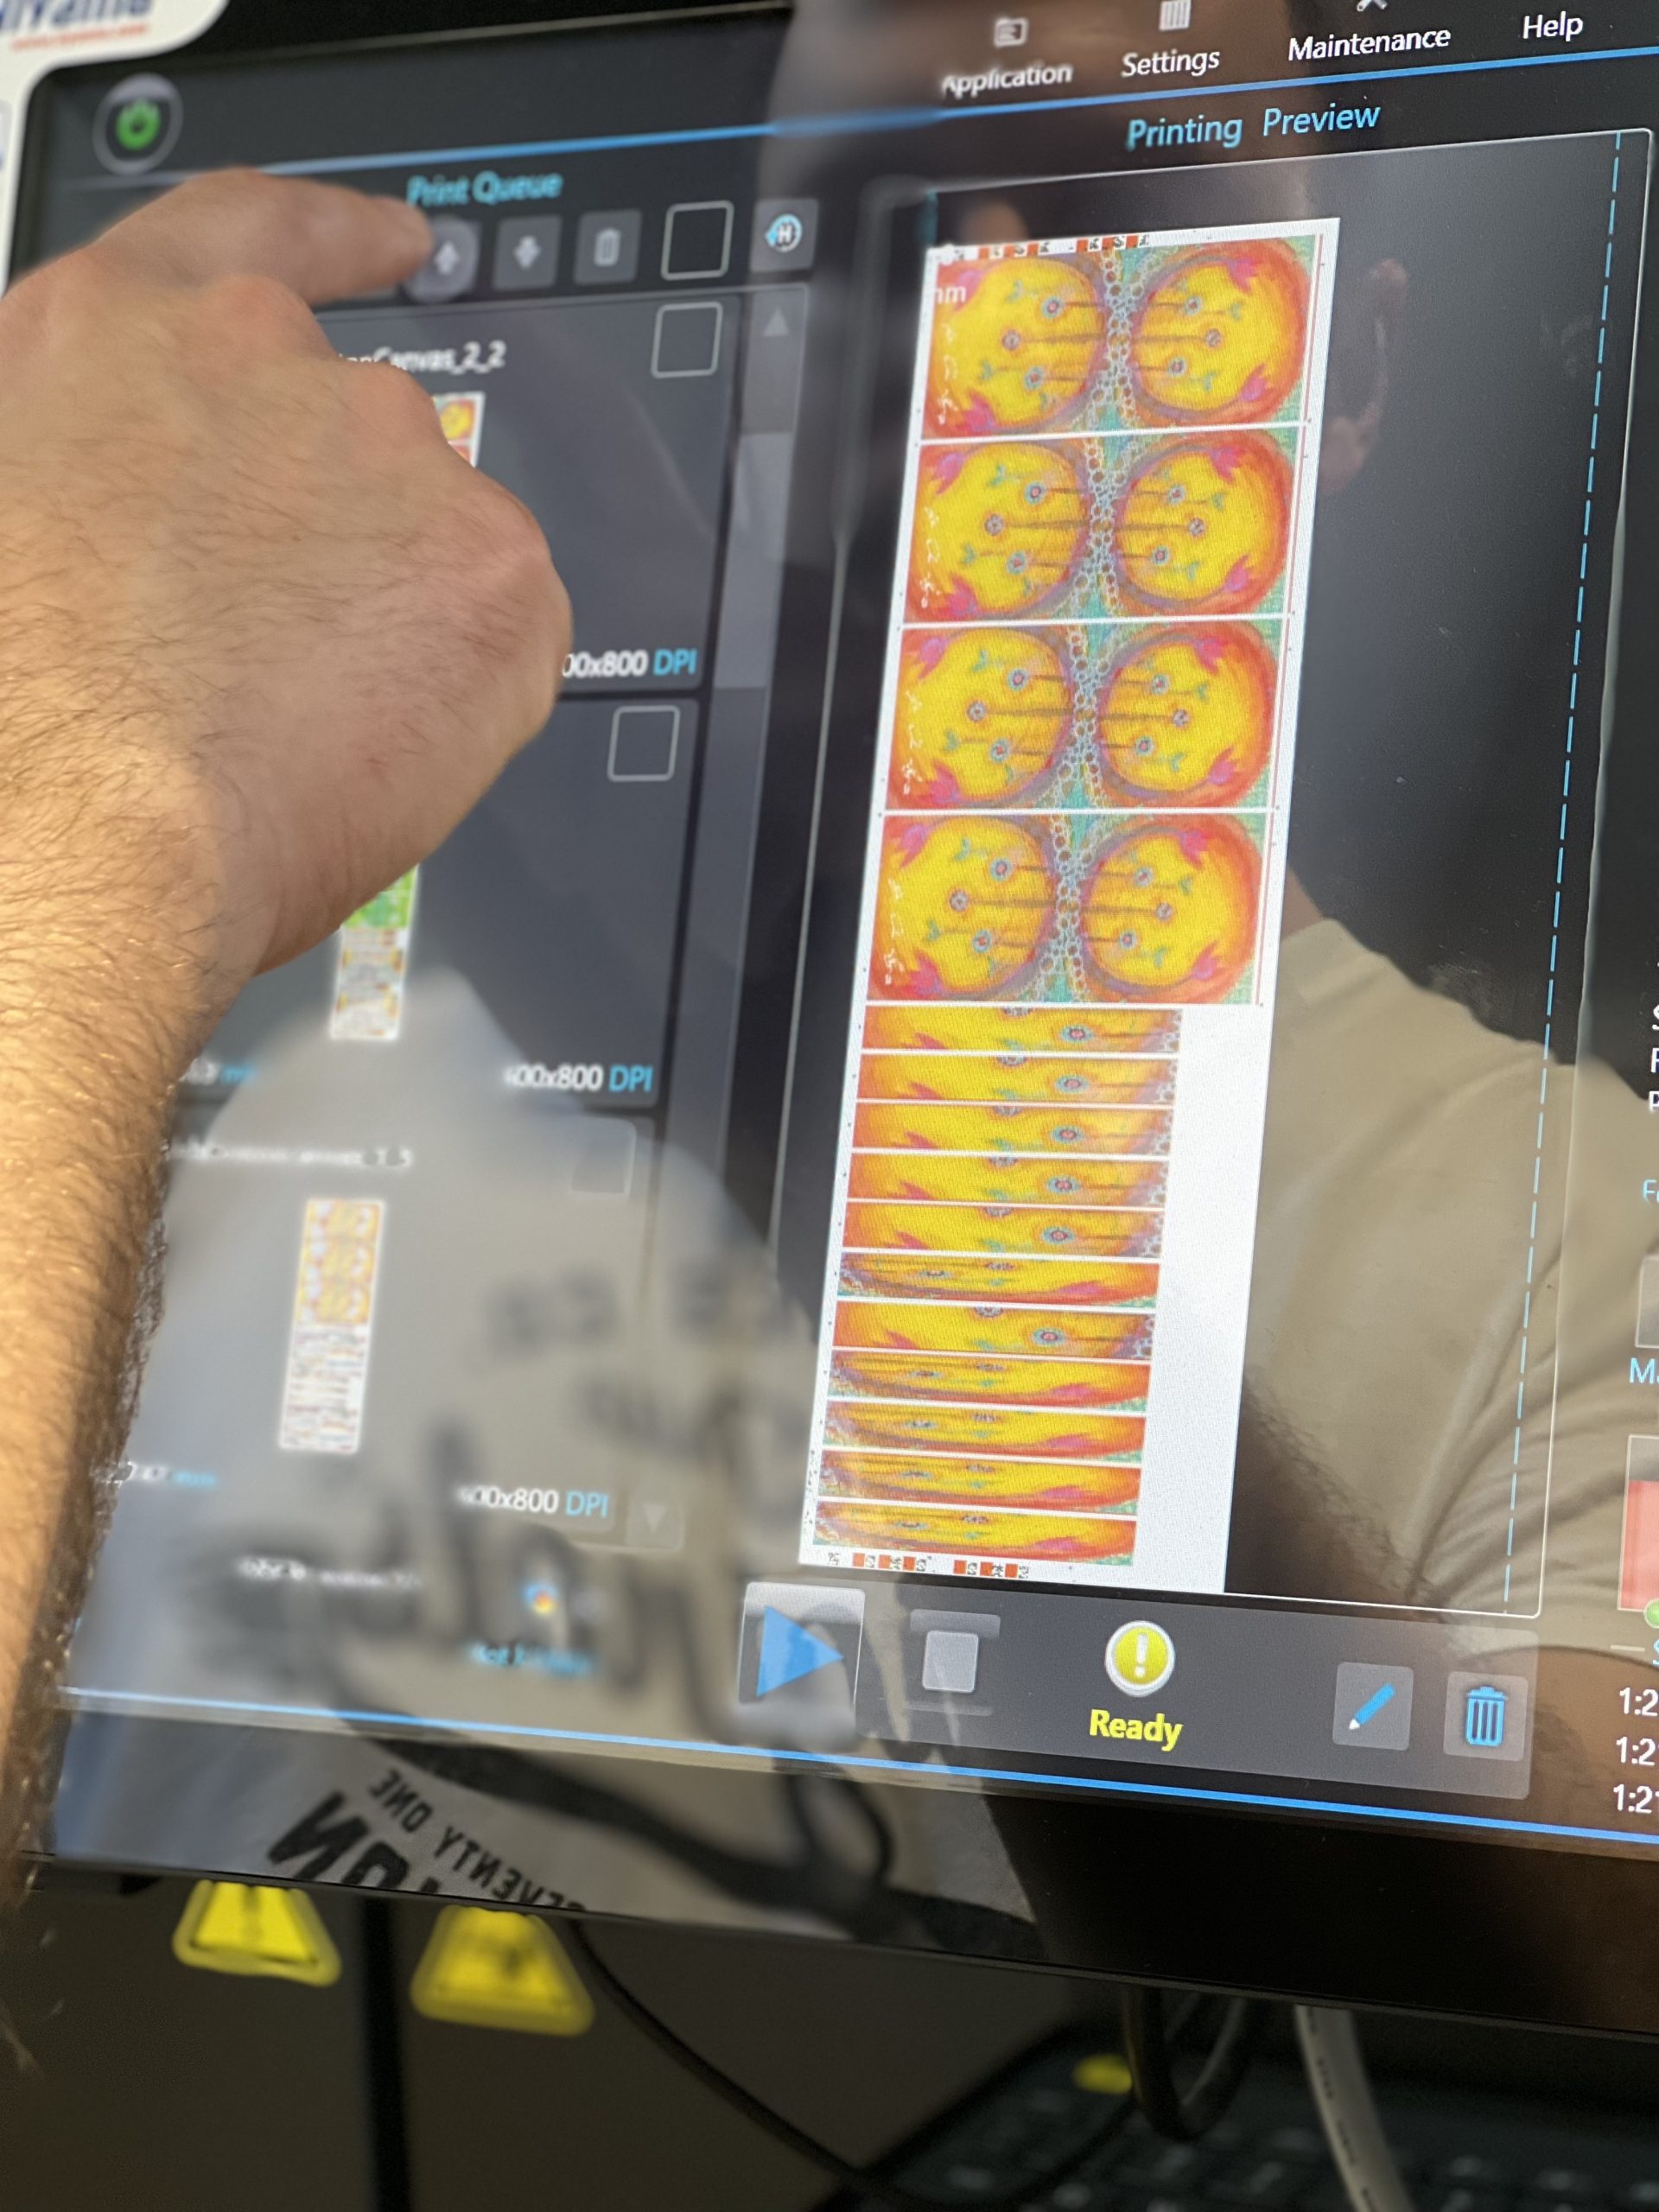
The picture below shows a preview of fabric with the designs and dimensions.
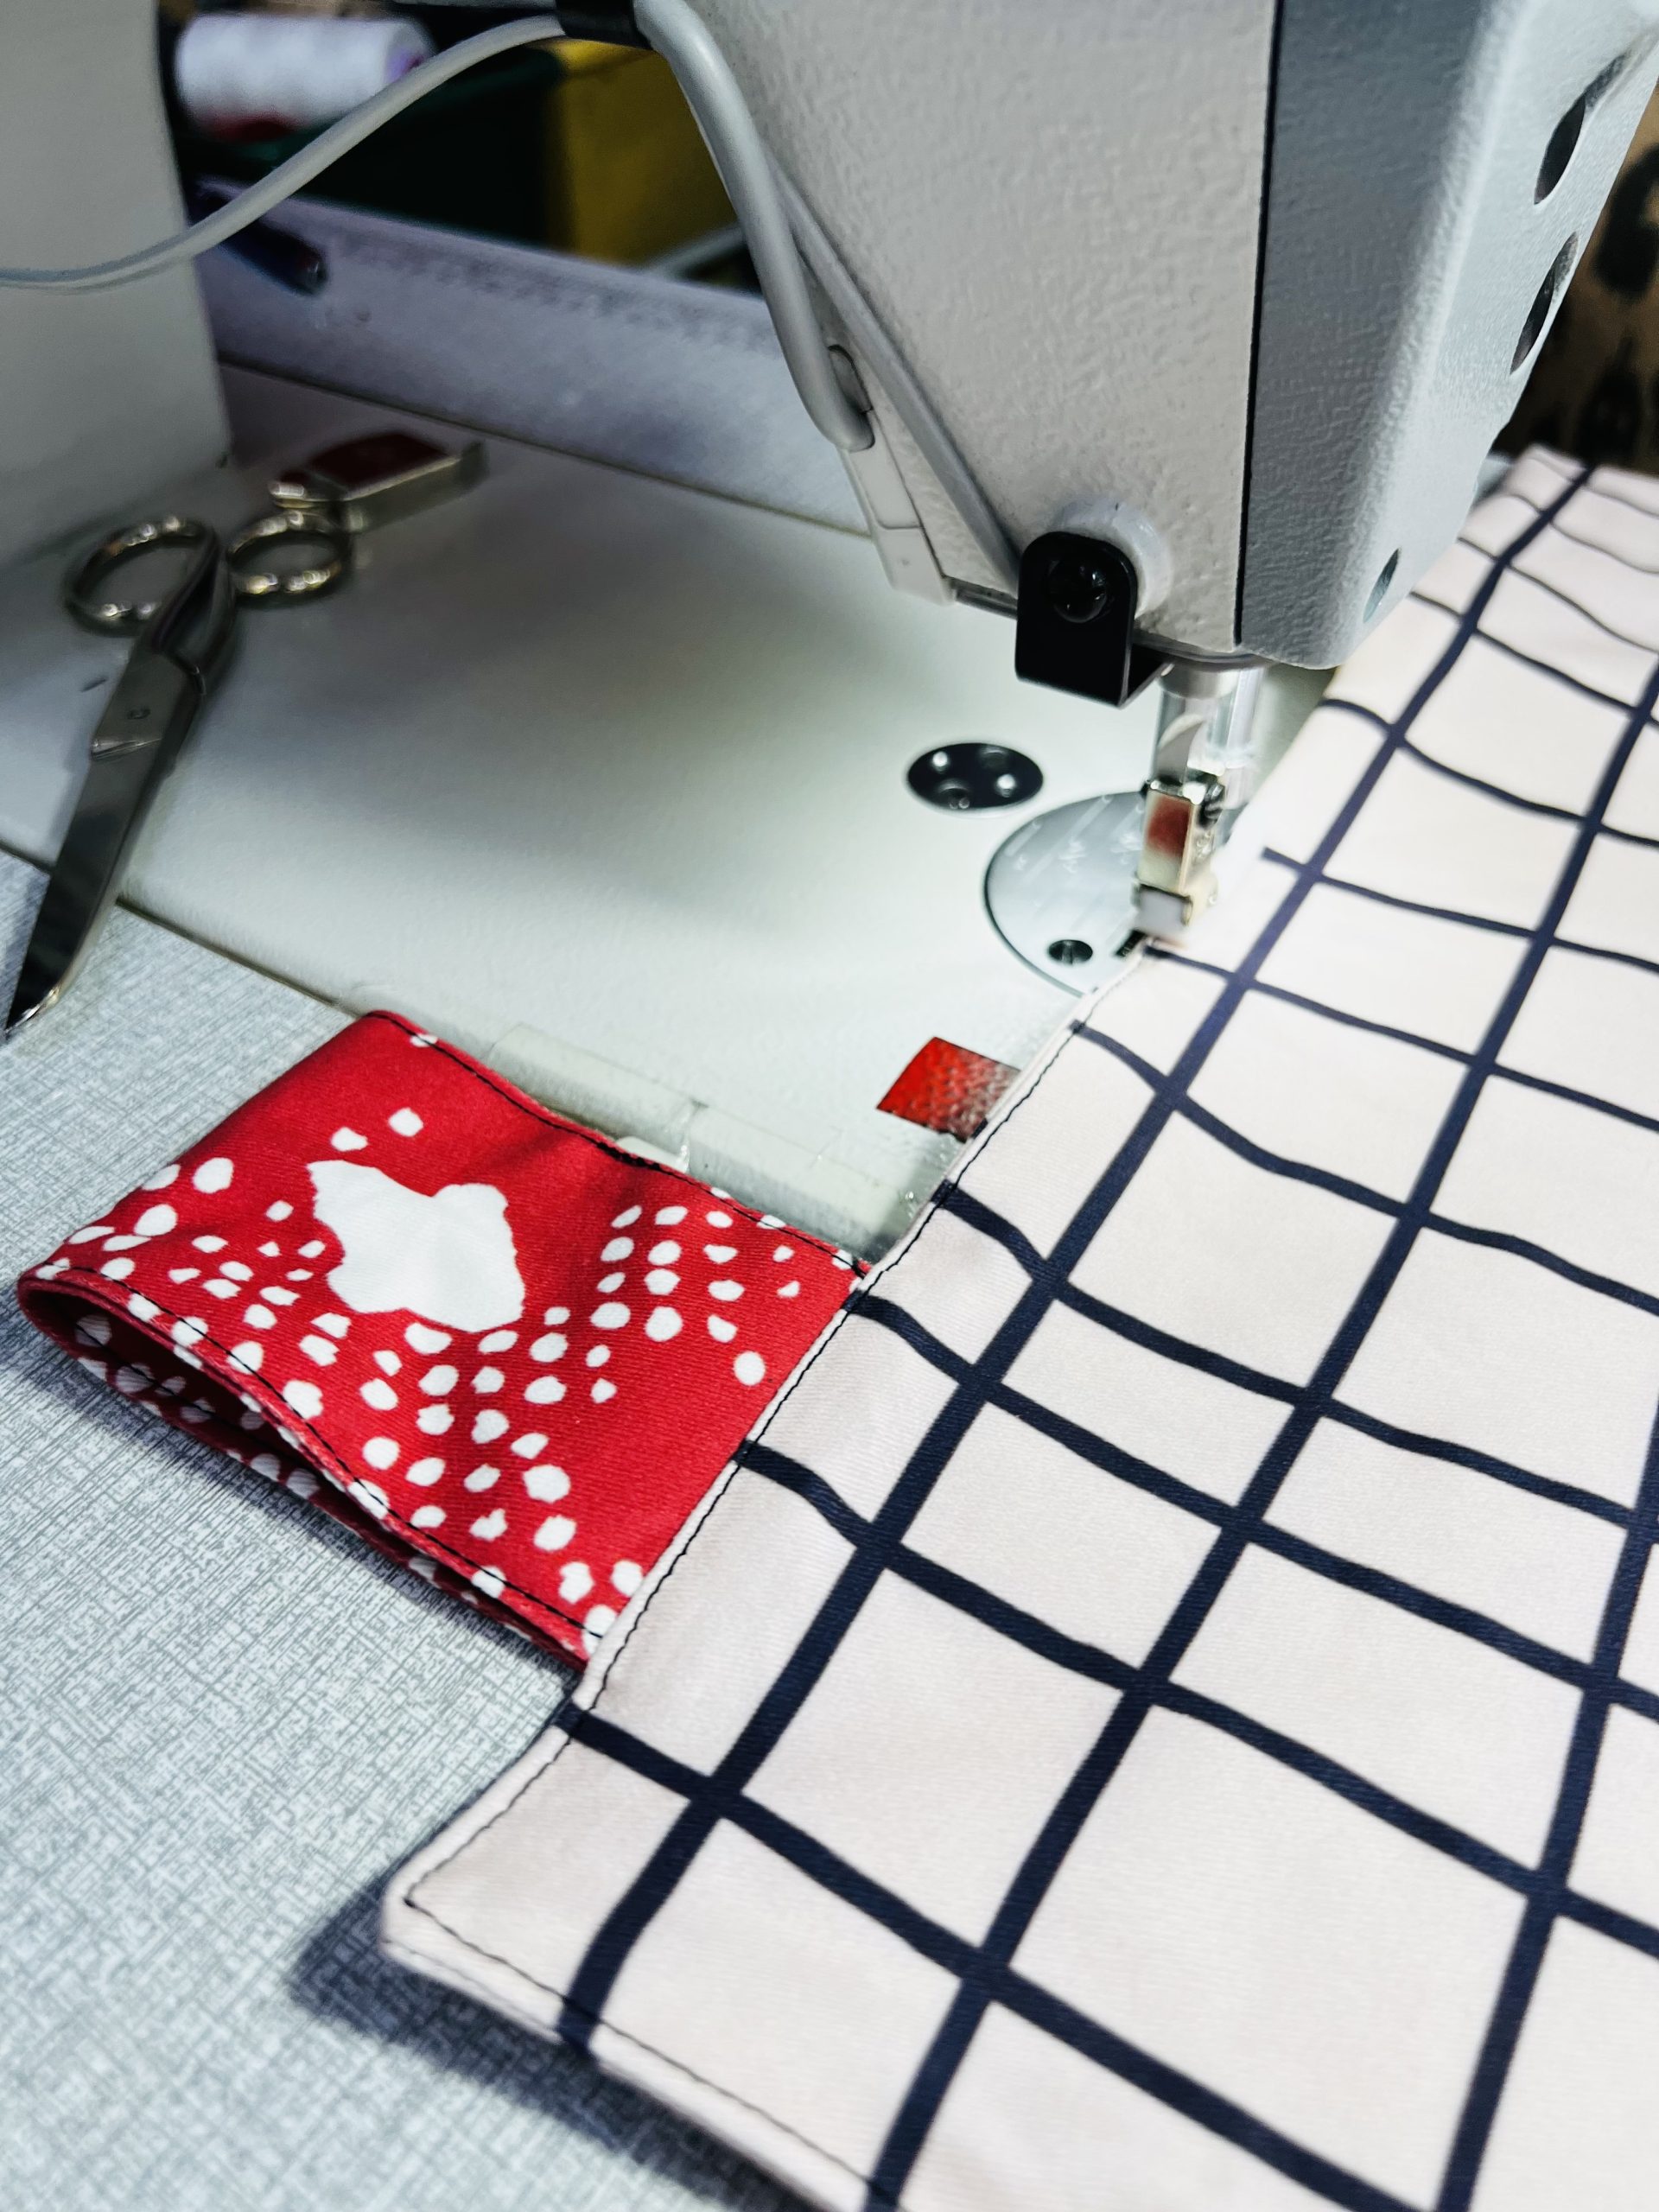
Step 1:
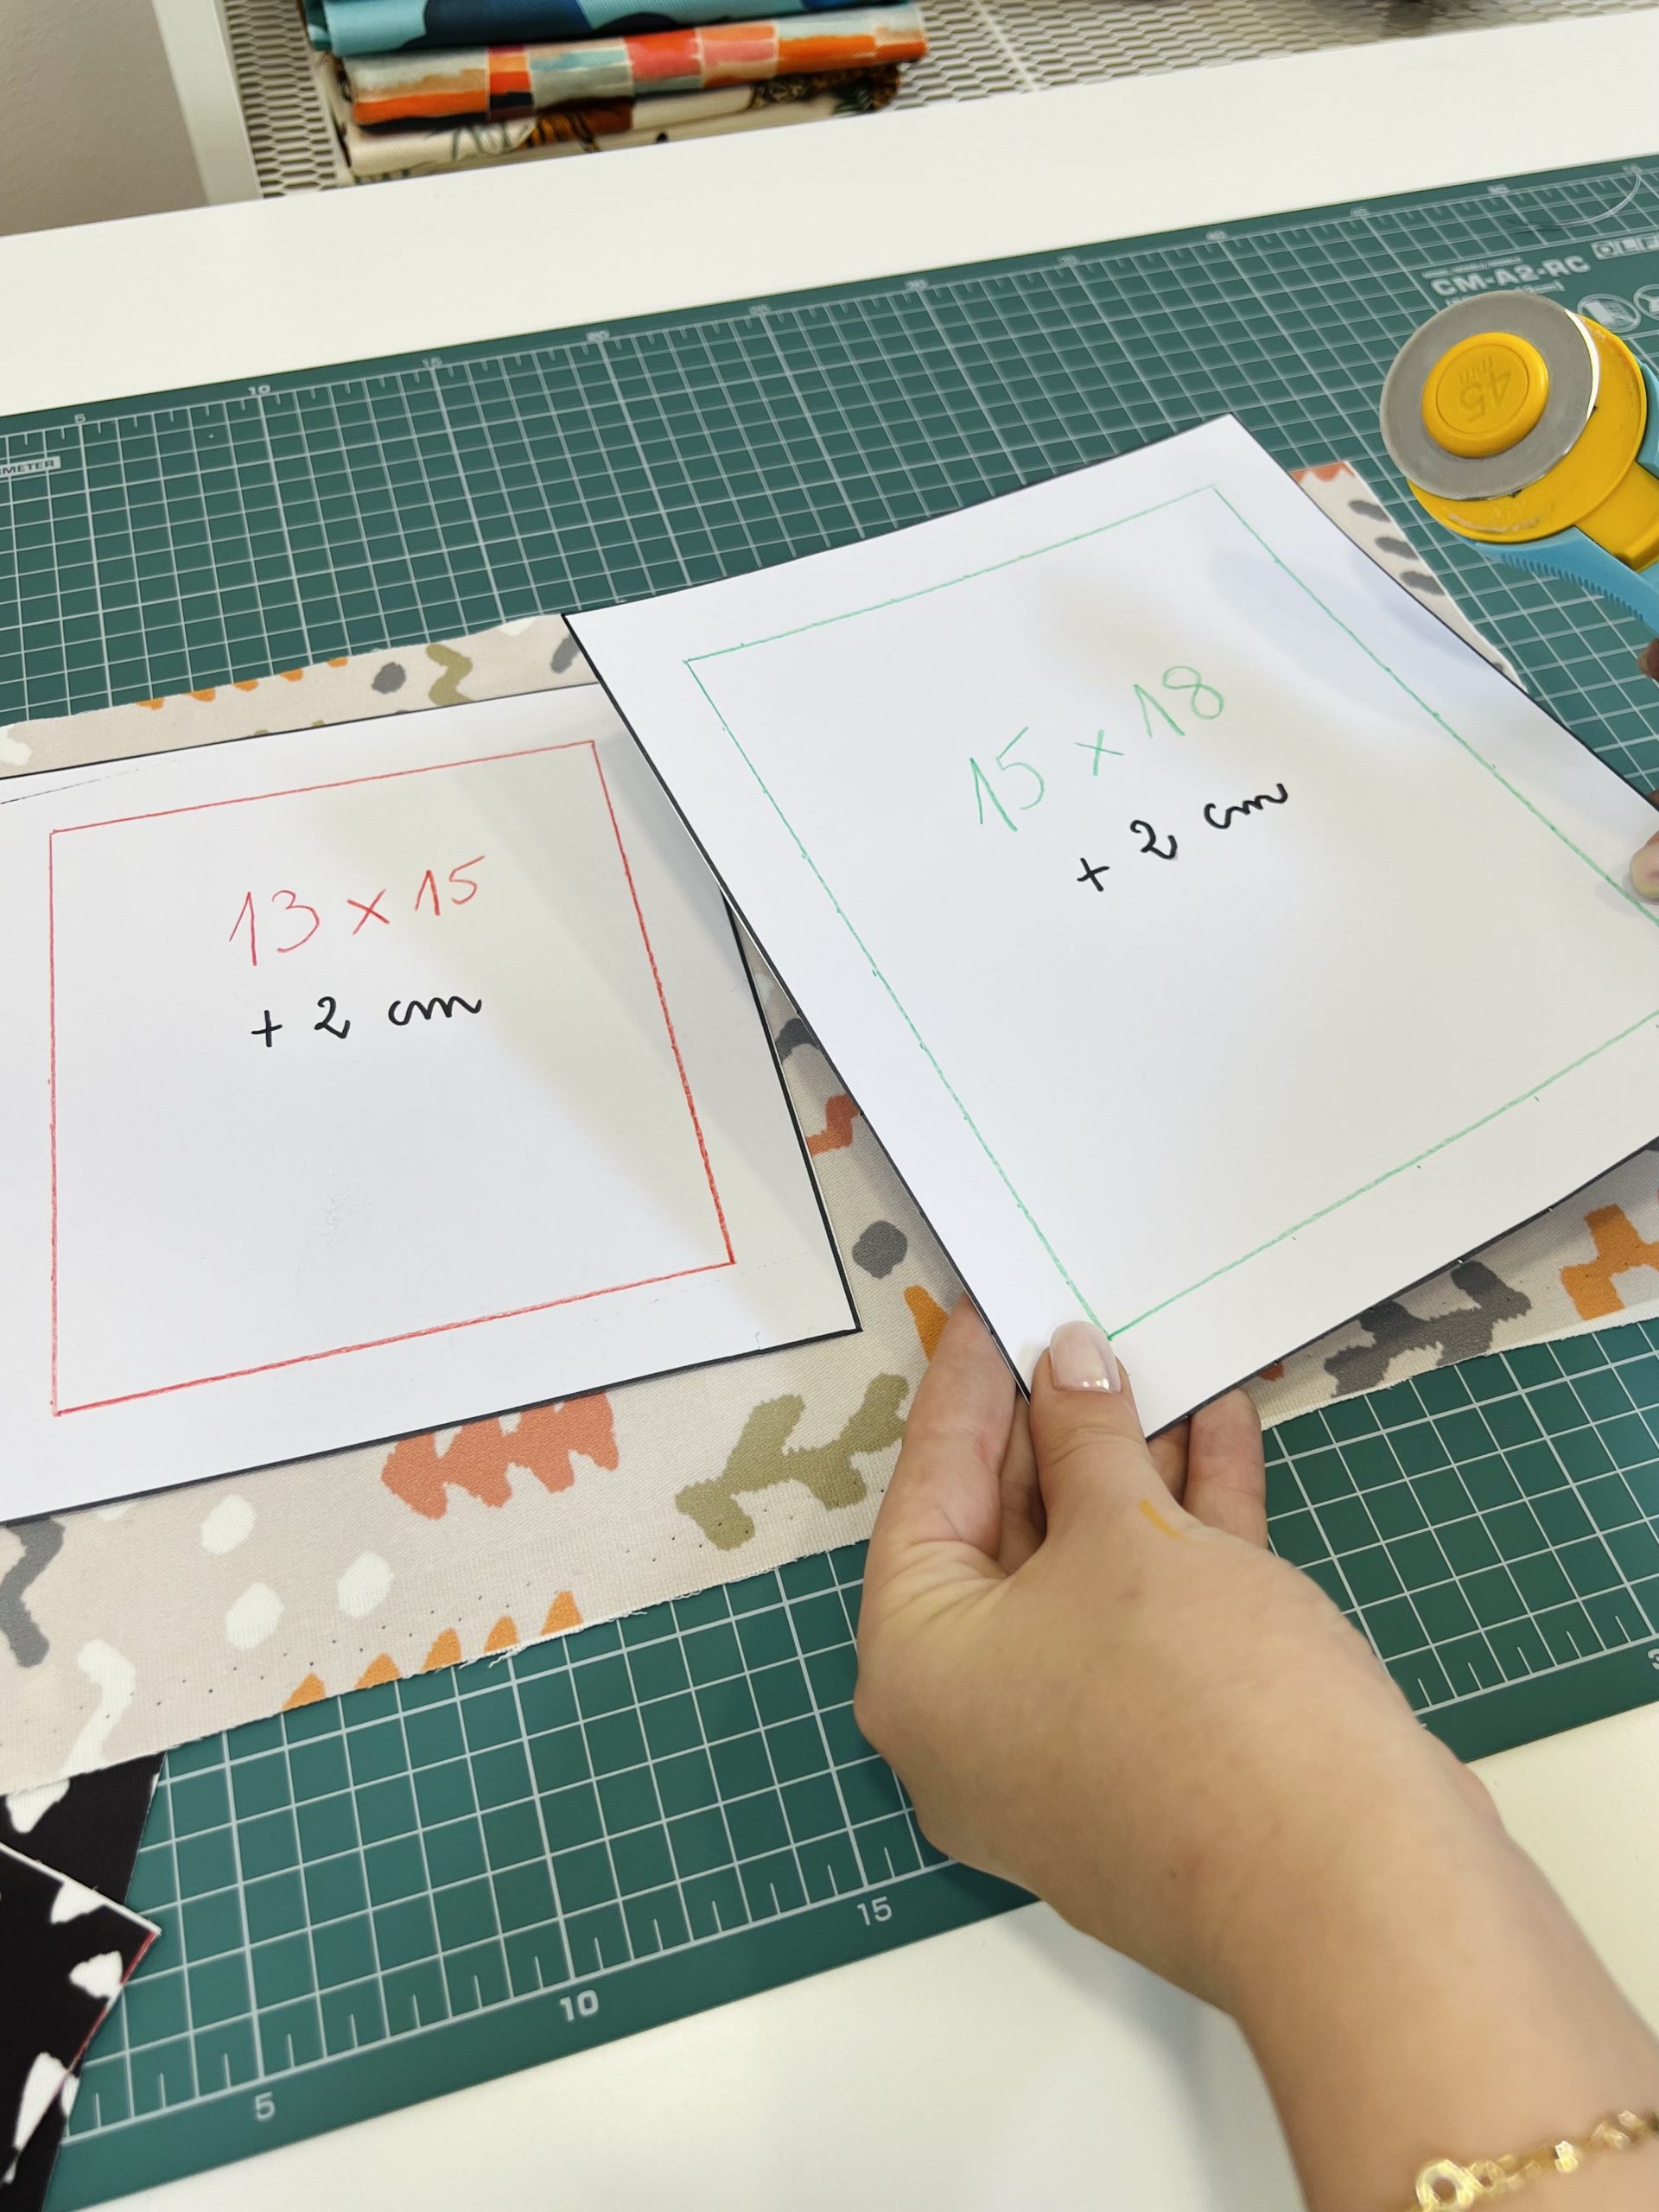
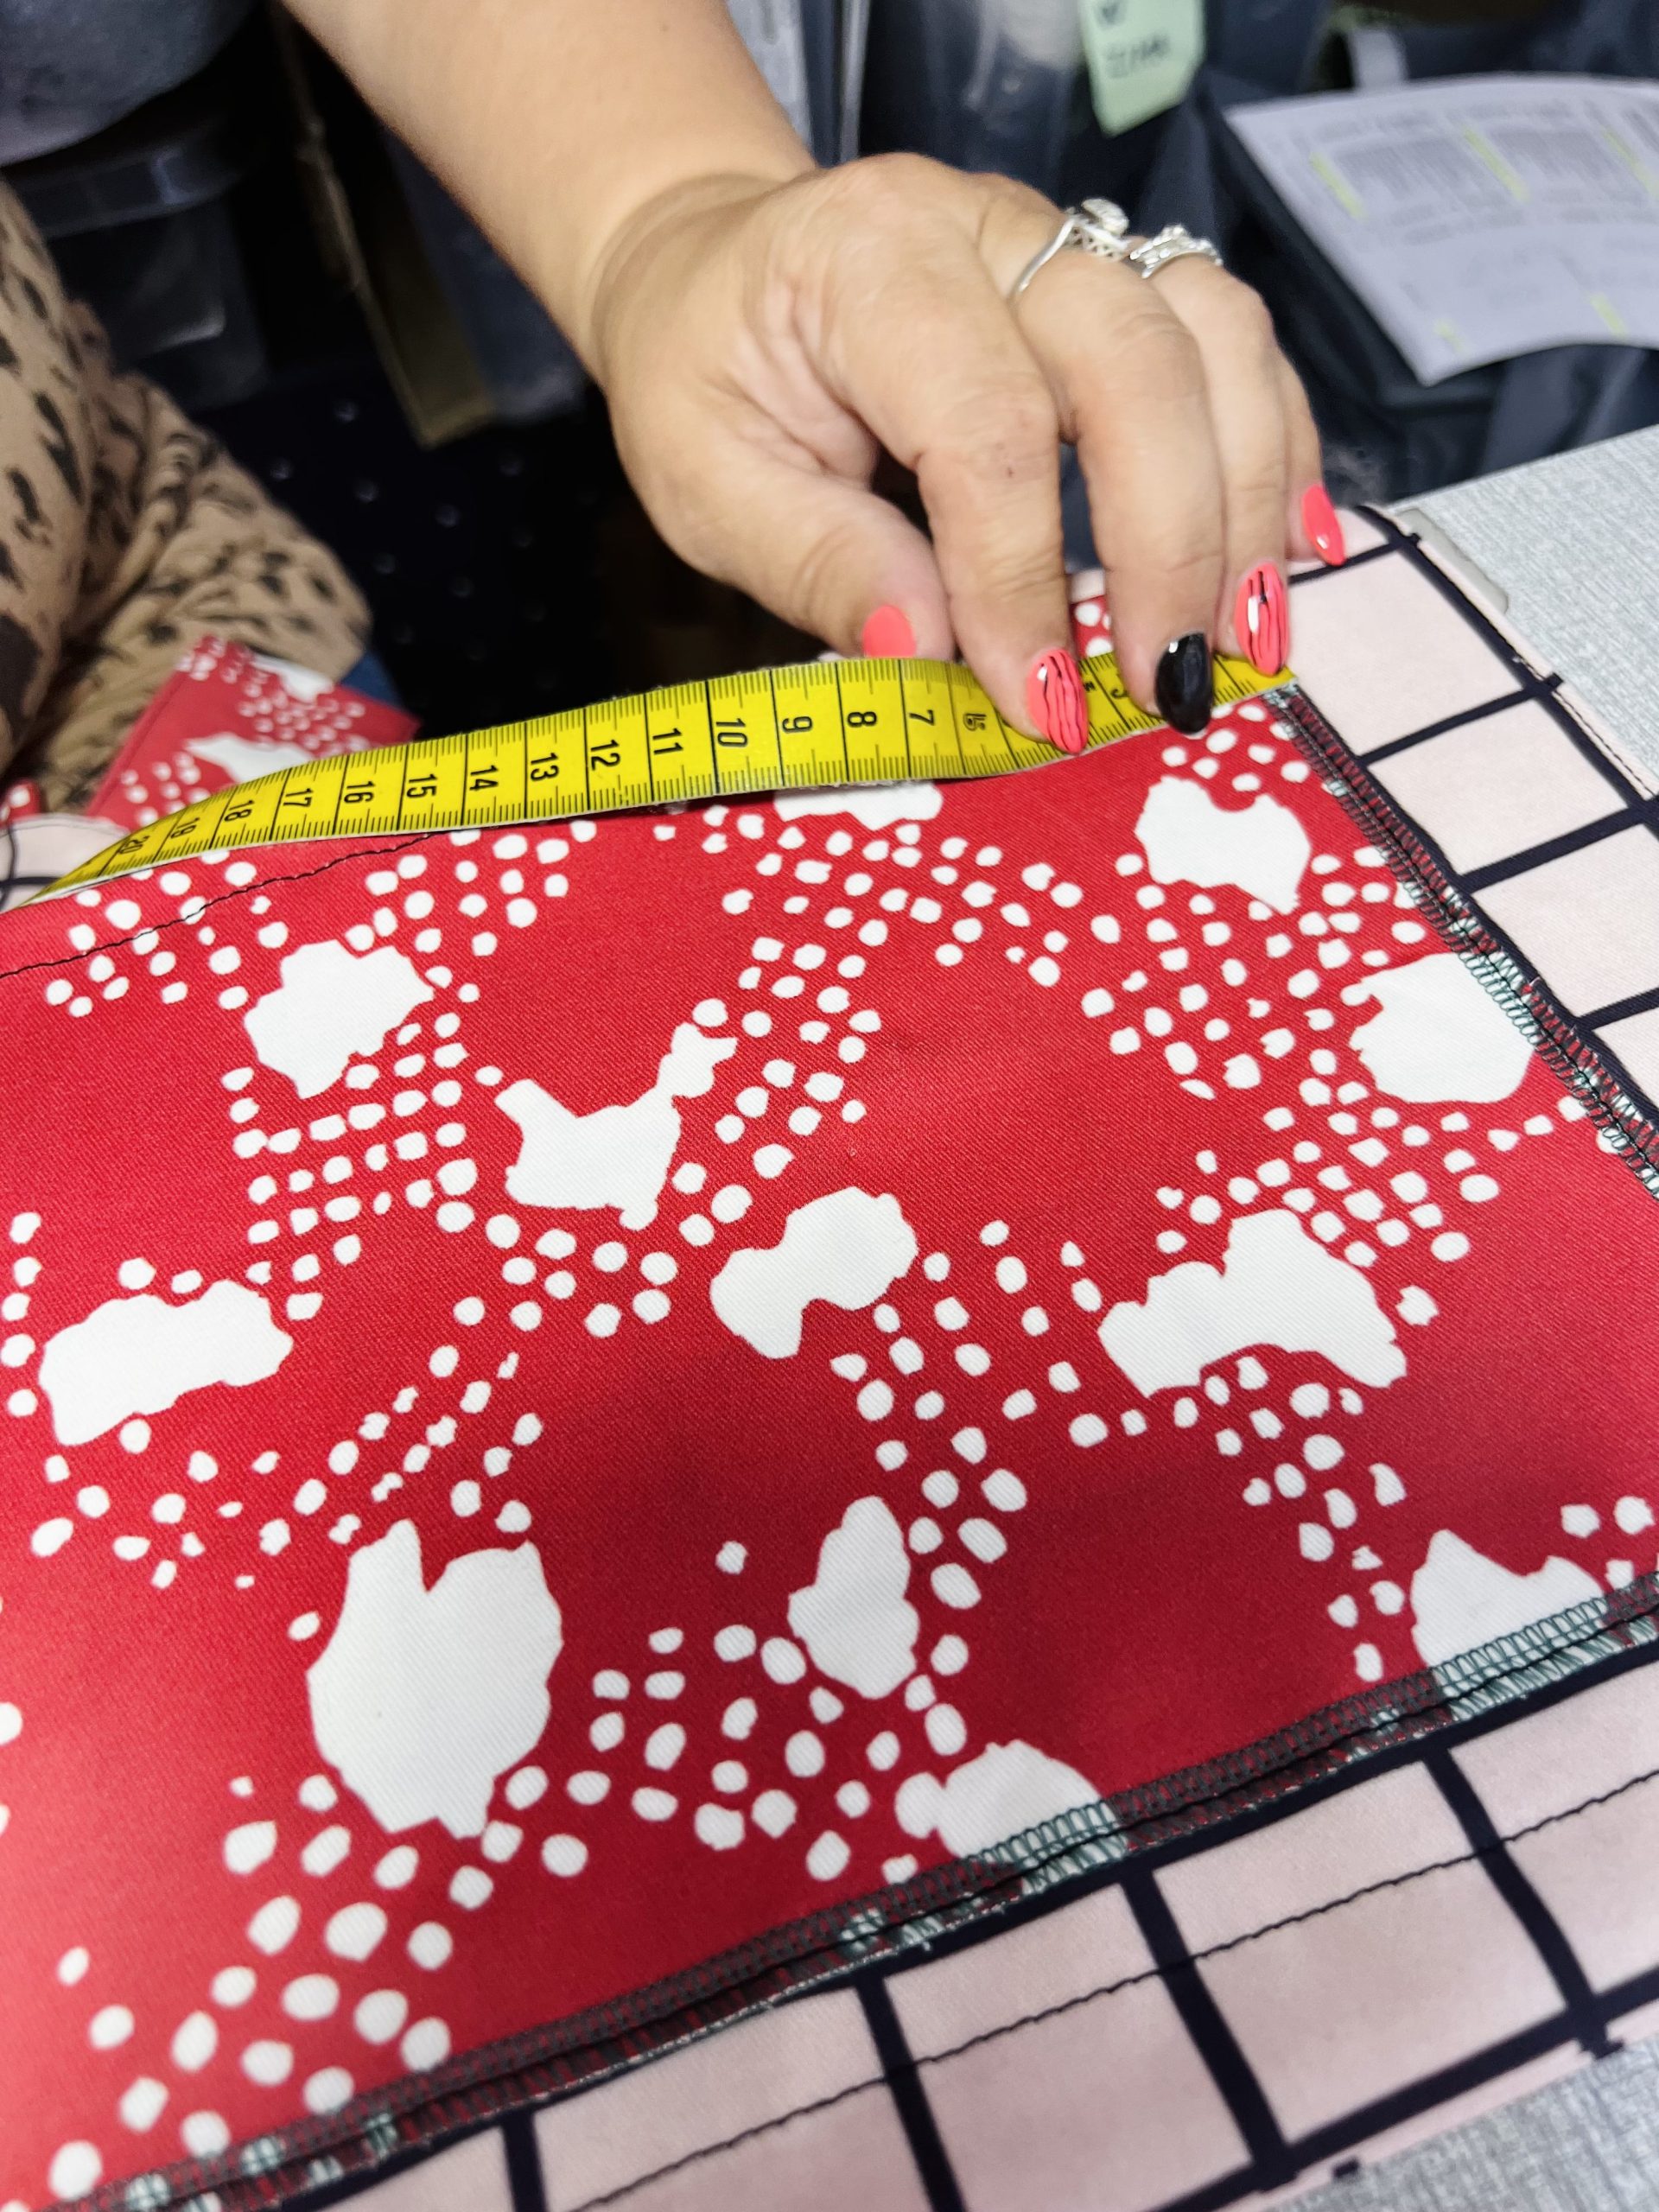
Measure and cut the fabric as is shown in the picture. We will use the large part as a base and sew smaller pockets onto it.
Tip for easier and faster cutting: you can cut shapes from paper and just use them to cut the fabric so you don’t have to measure with a ruler every time.
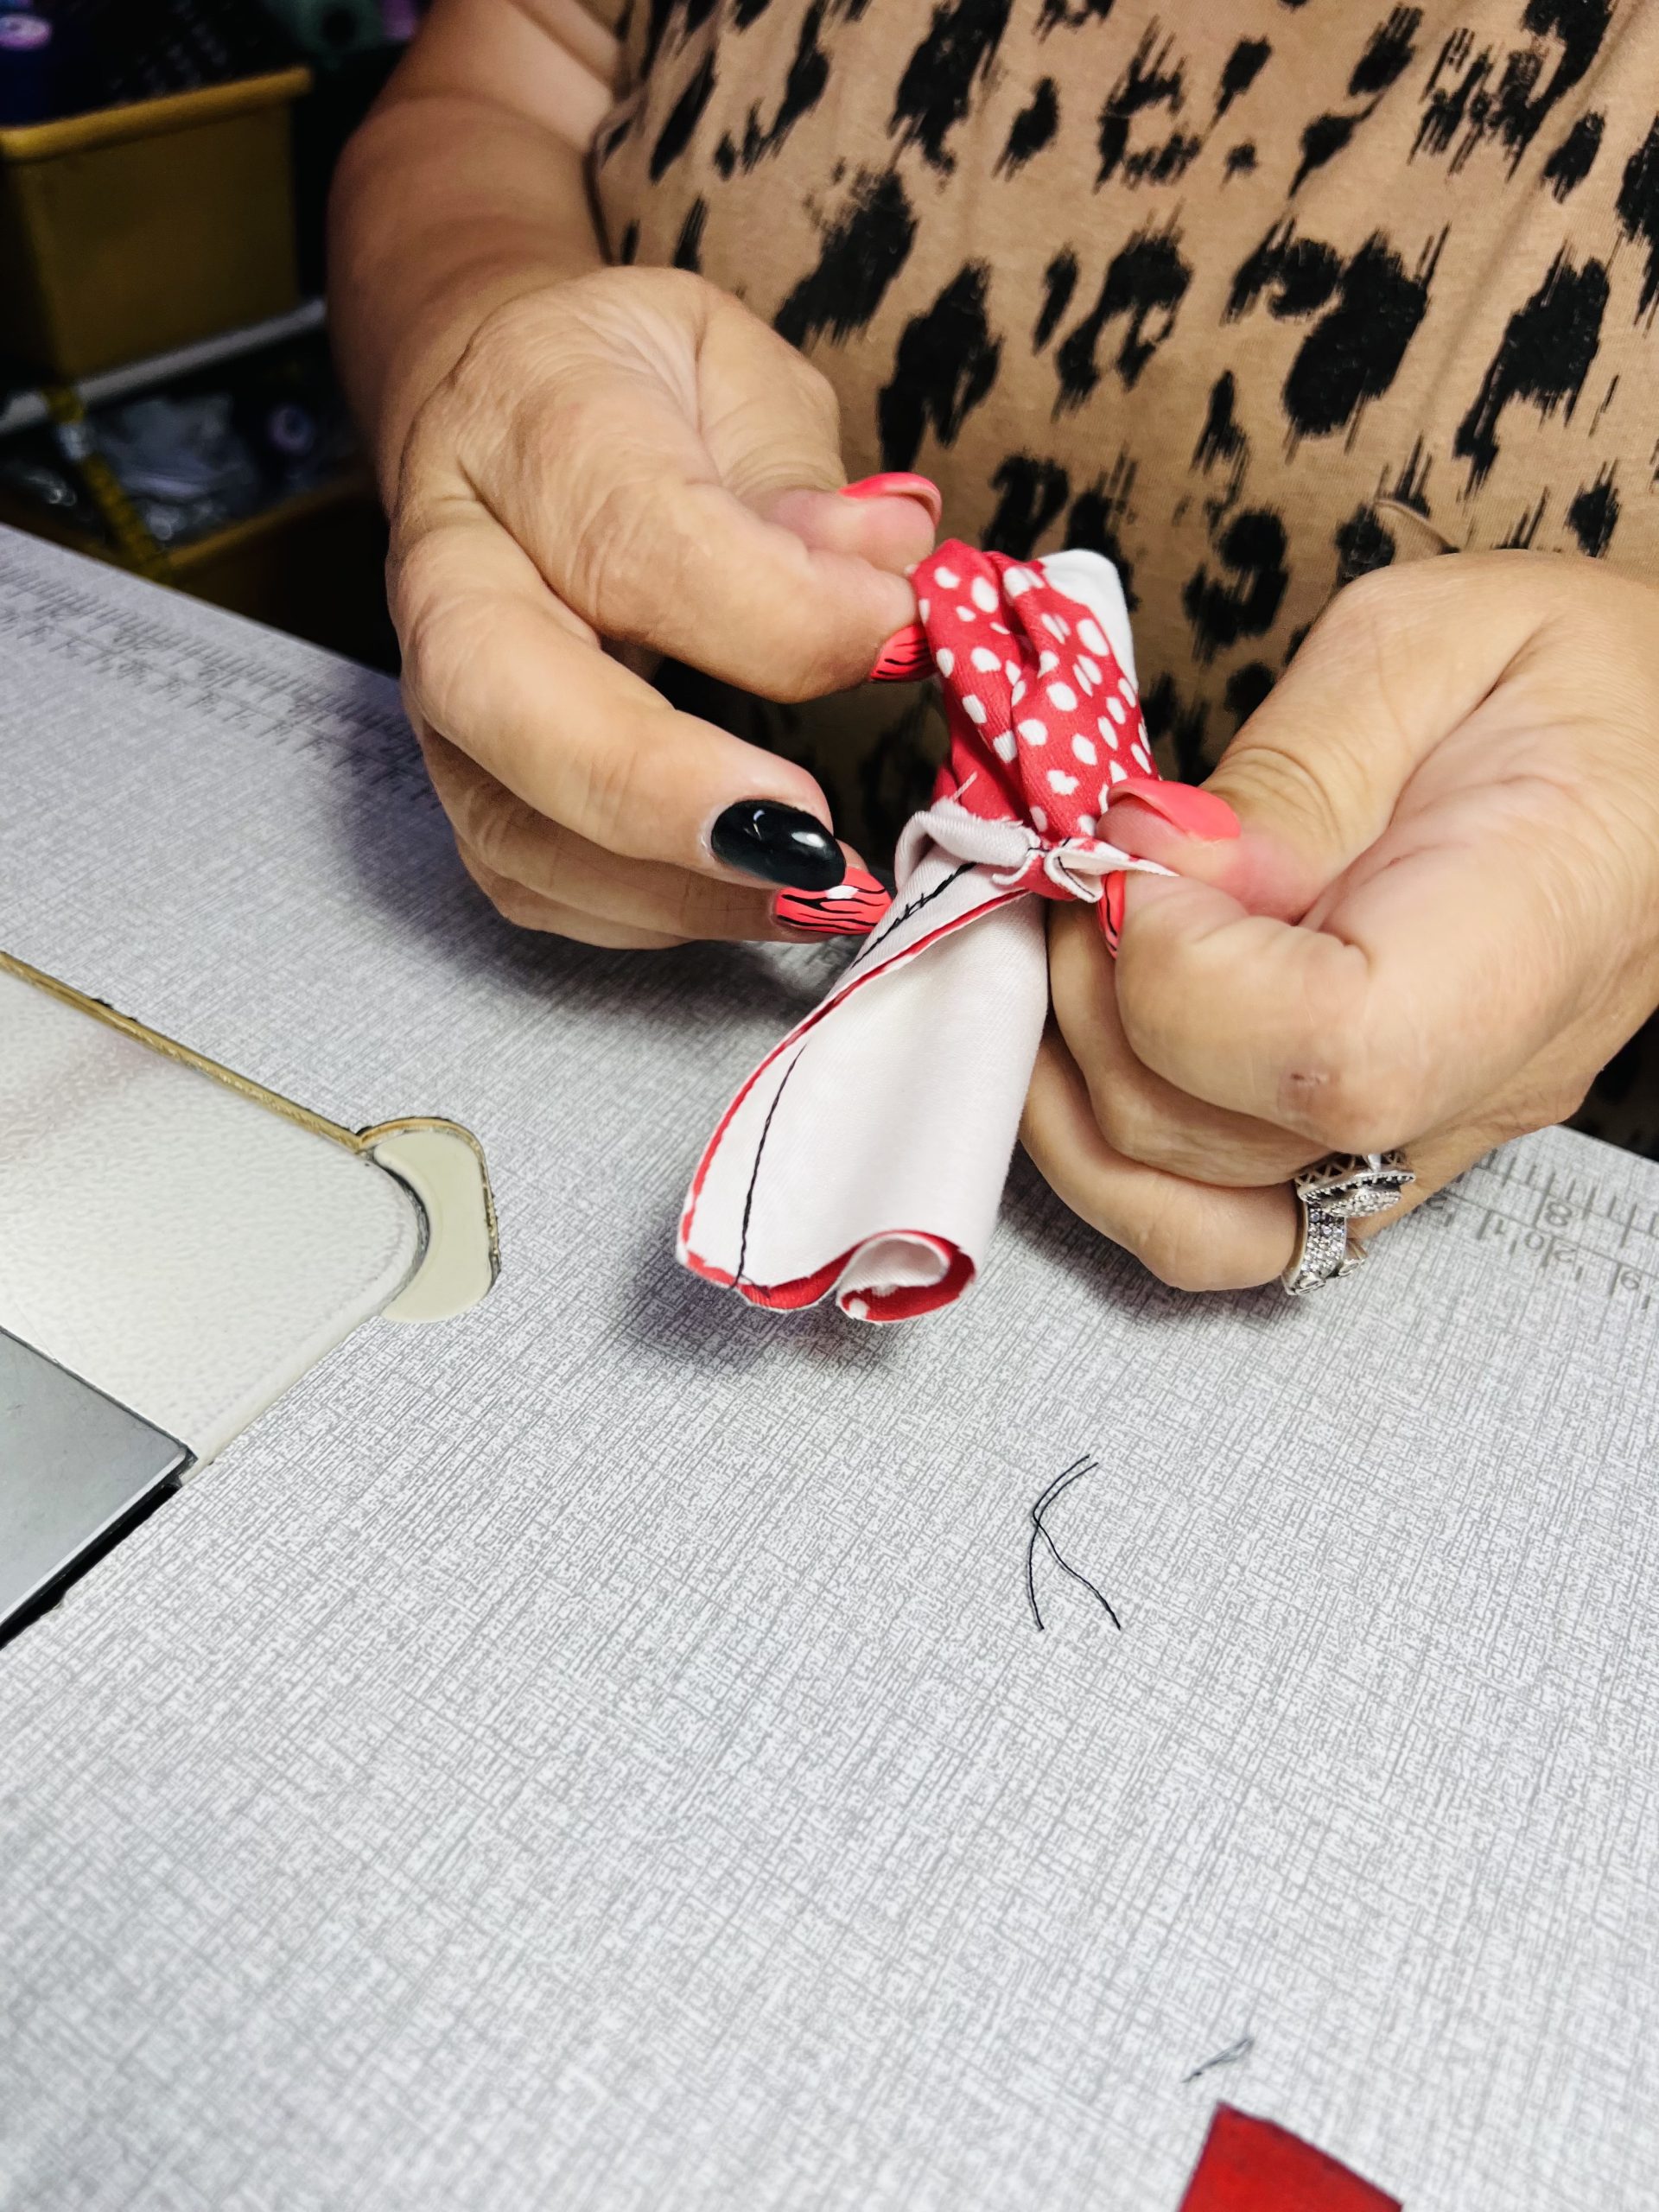
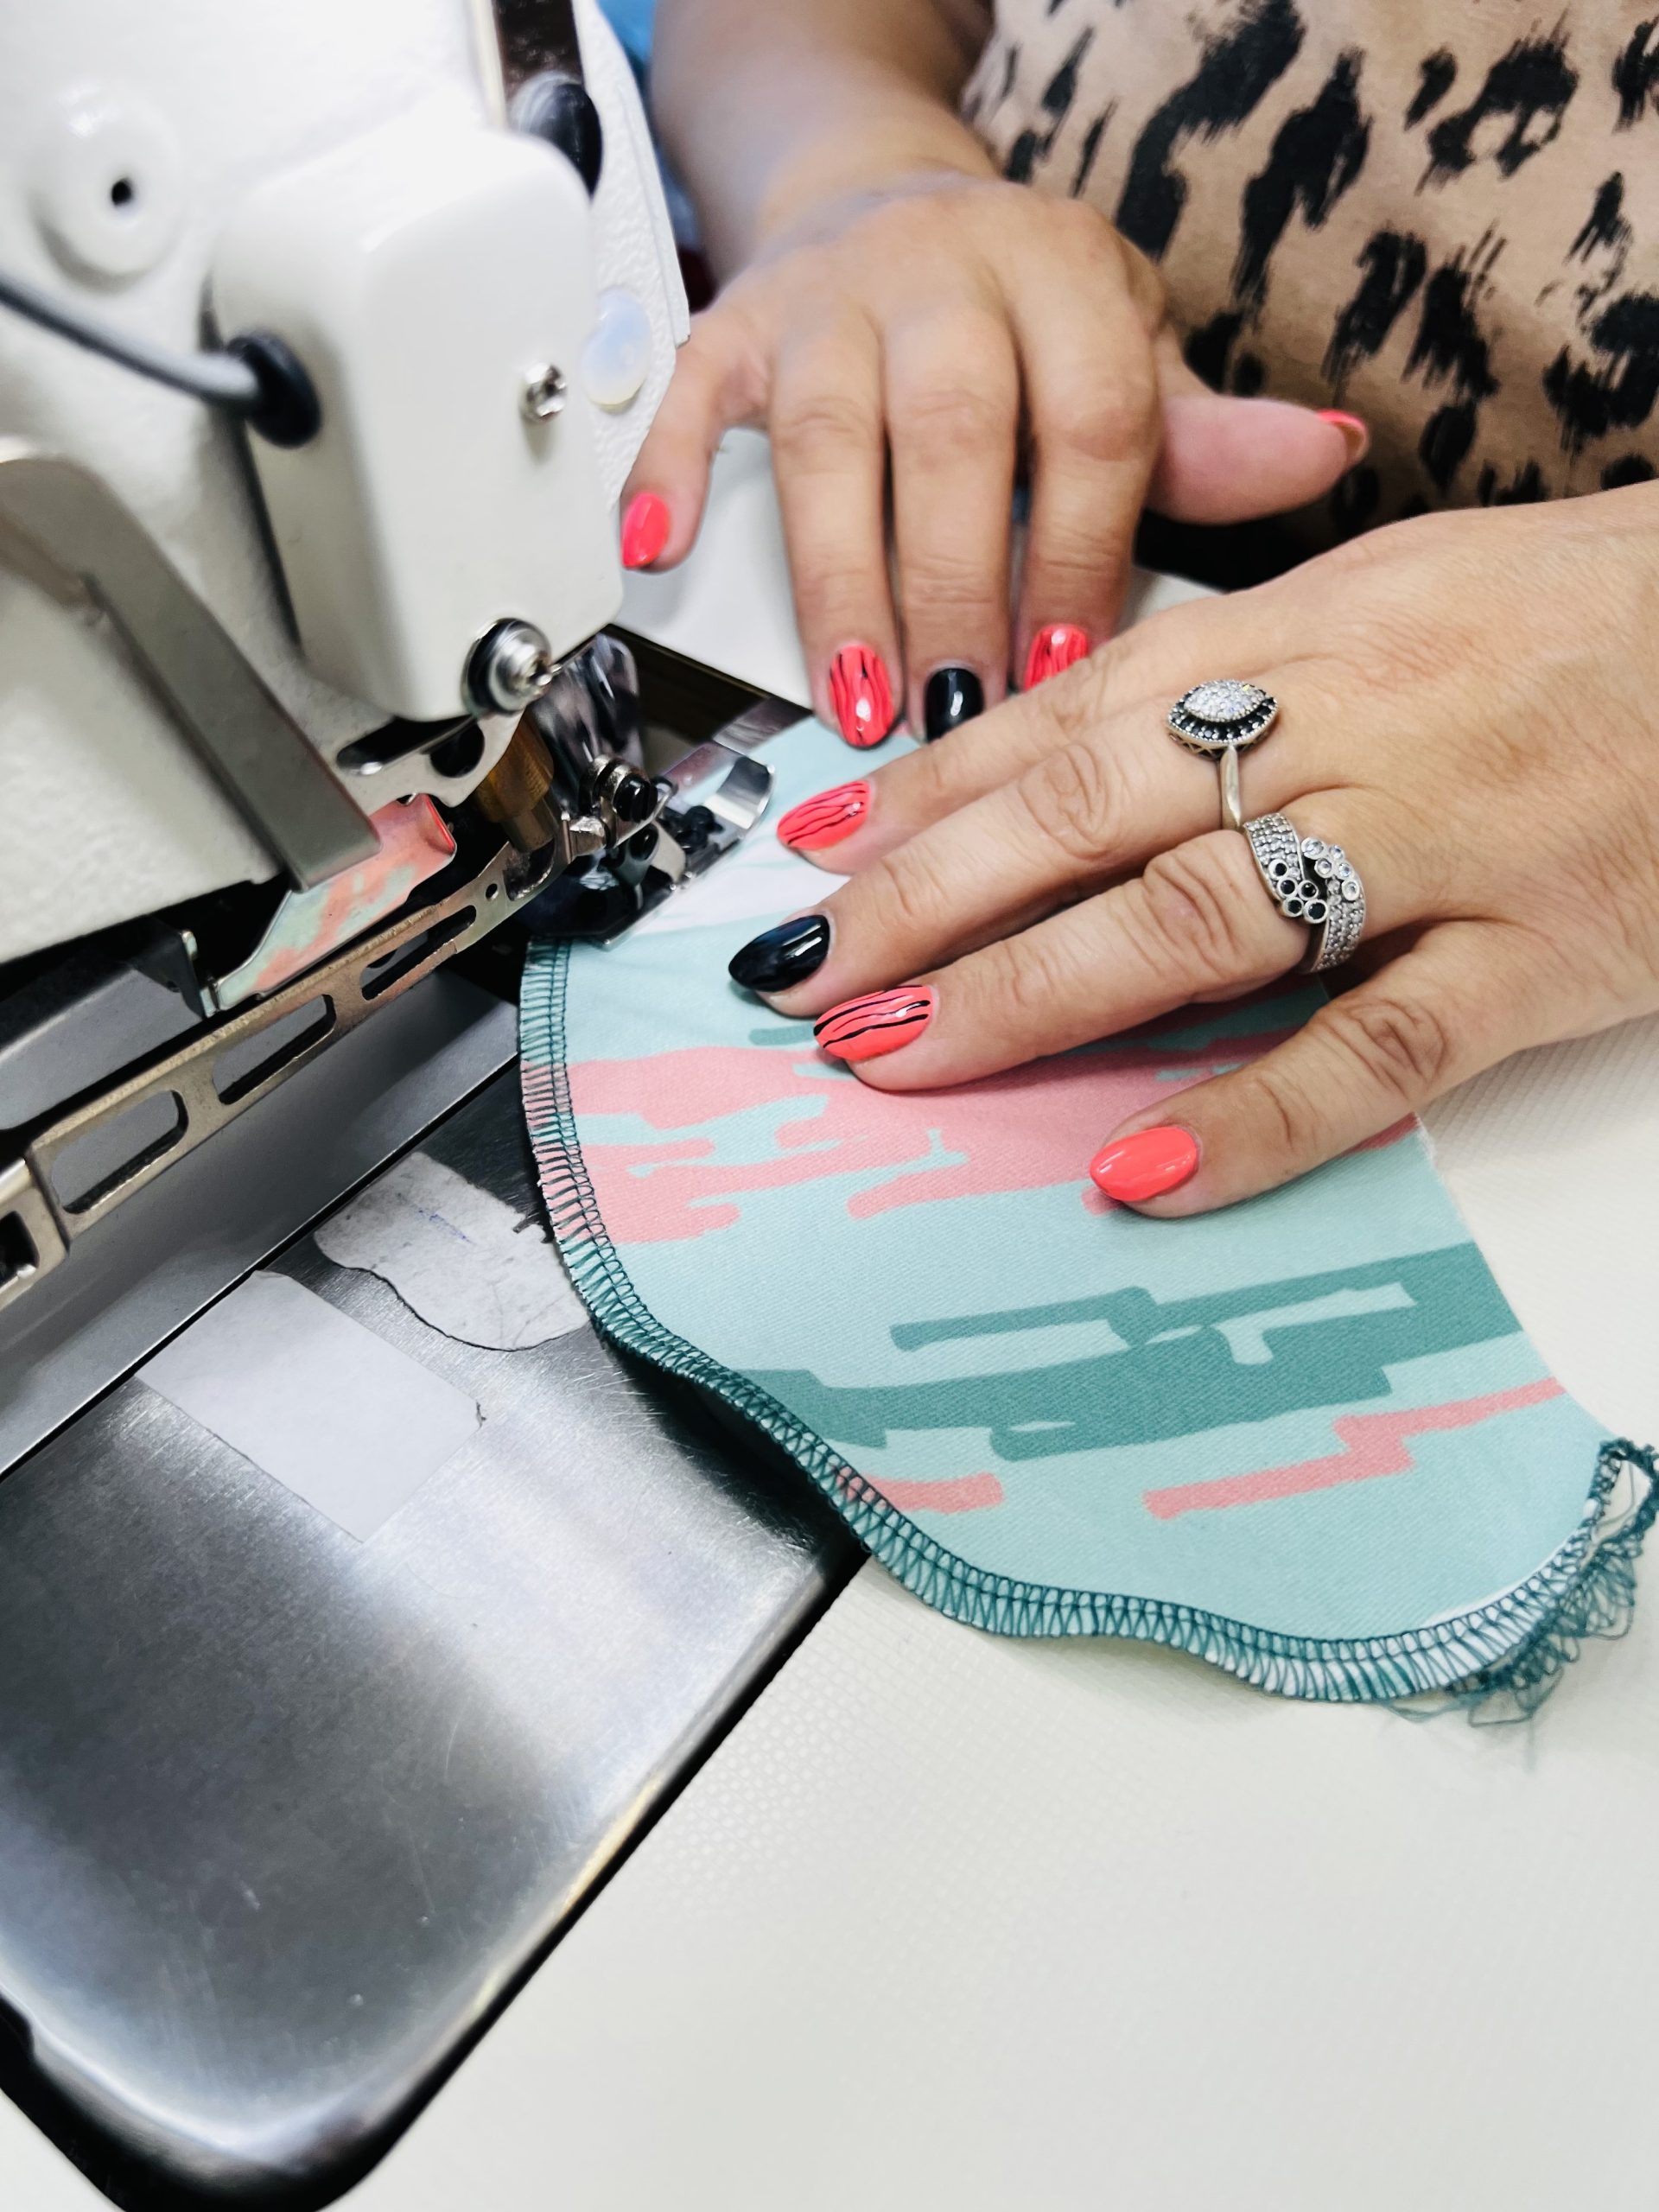
Step 2:
In this step, we must sew and start with the handles. We hem the edges of each handle from the wrong side and leave a space so that we can pull the fabric to the right side.
After that, we move on to the base. Joined the two sides of the fabric to make the organizer stronger. We hem the organizer on the bottom, left, and right sides and leave a little space on the left side so that we can pull the fabric and turn the organizer right side out.
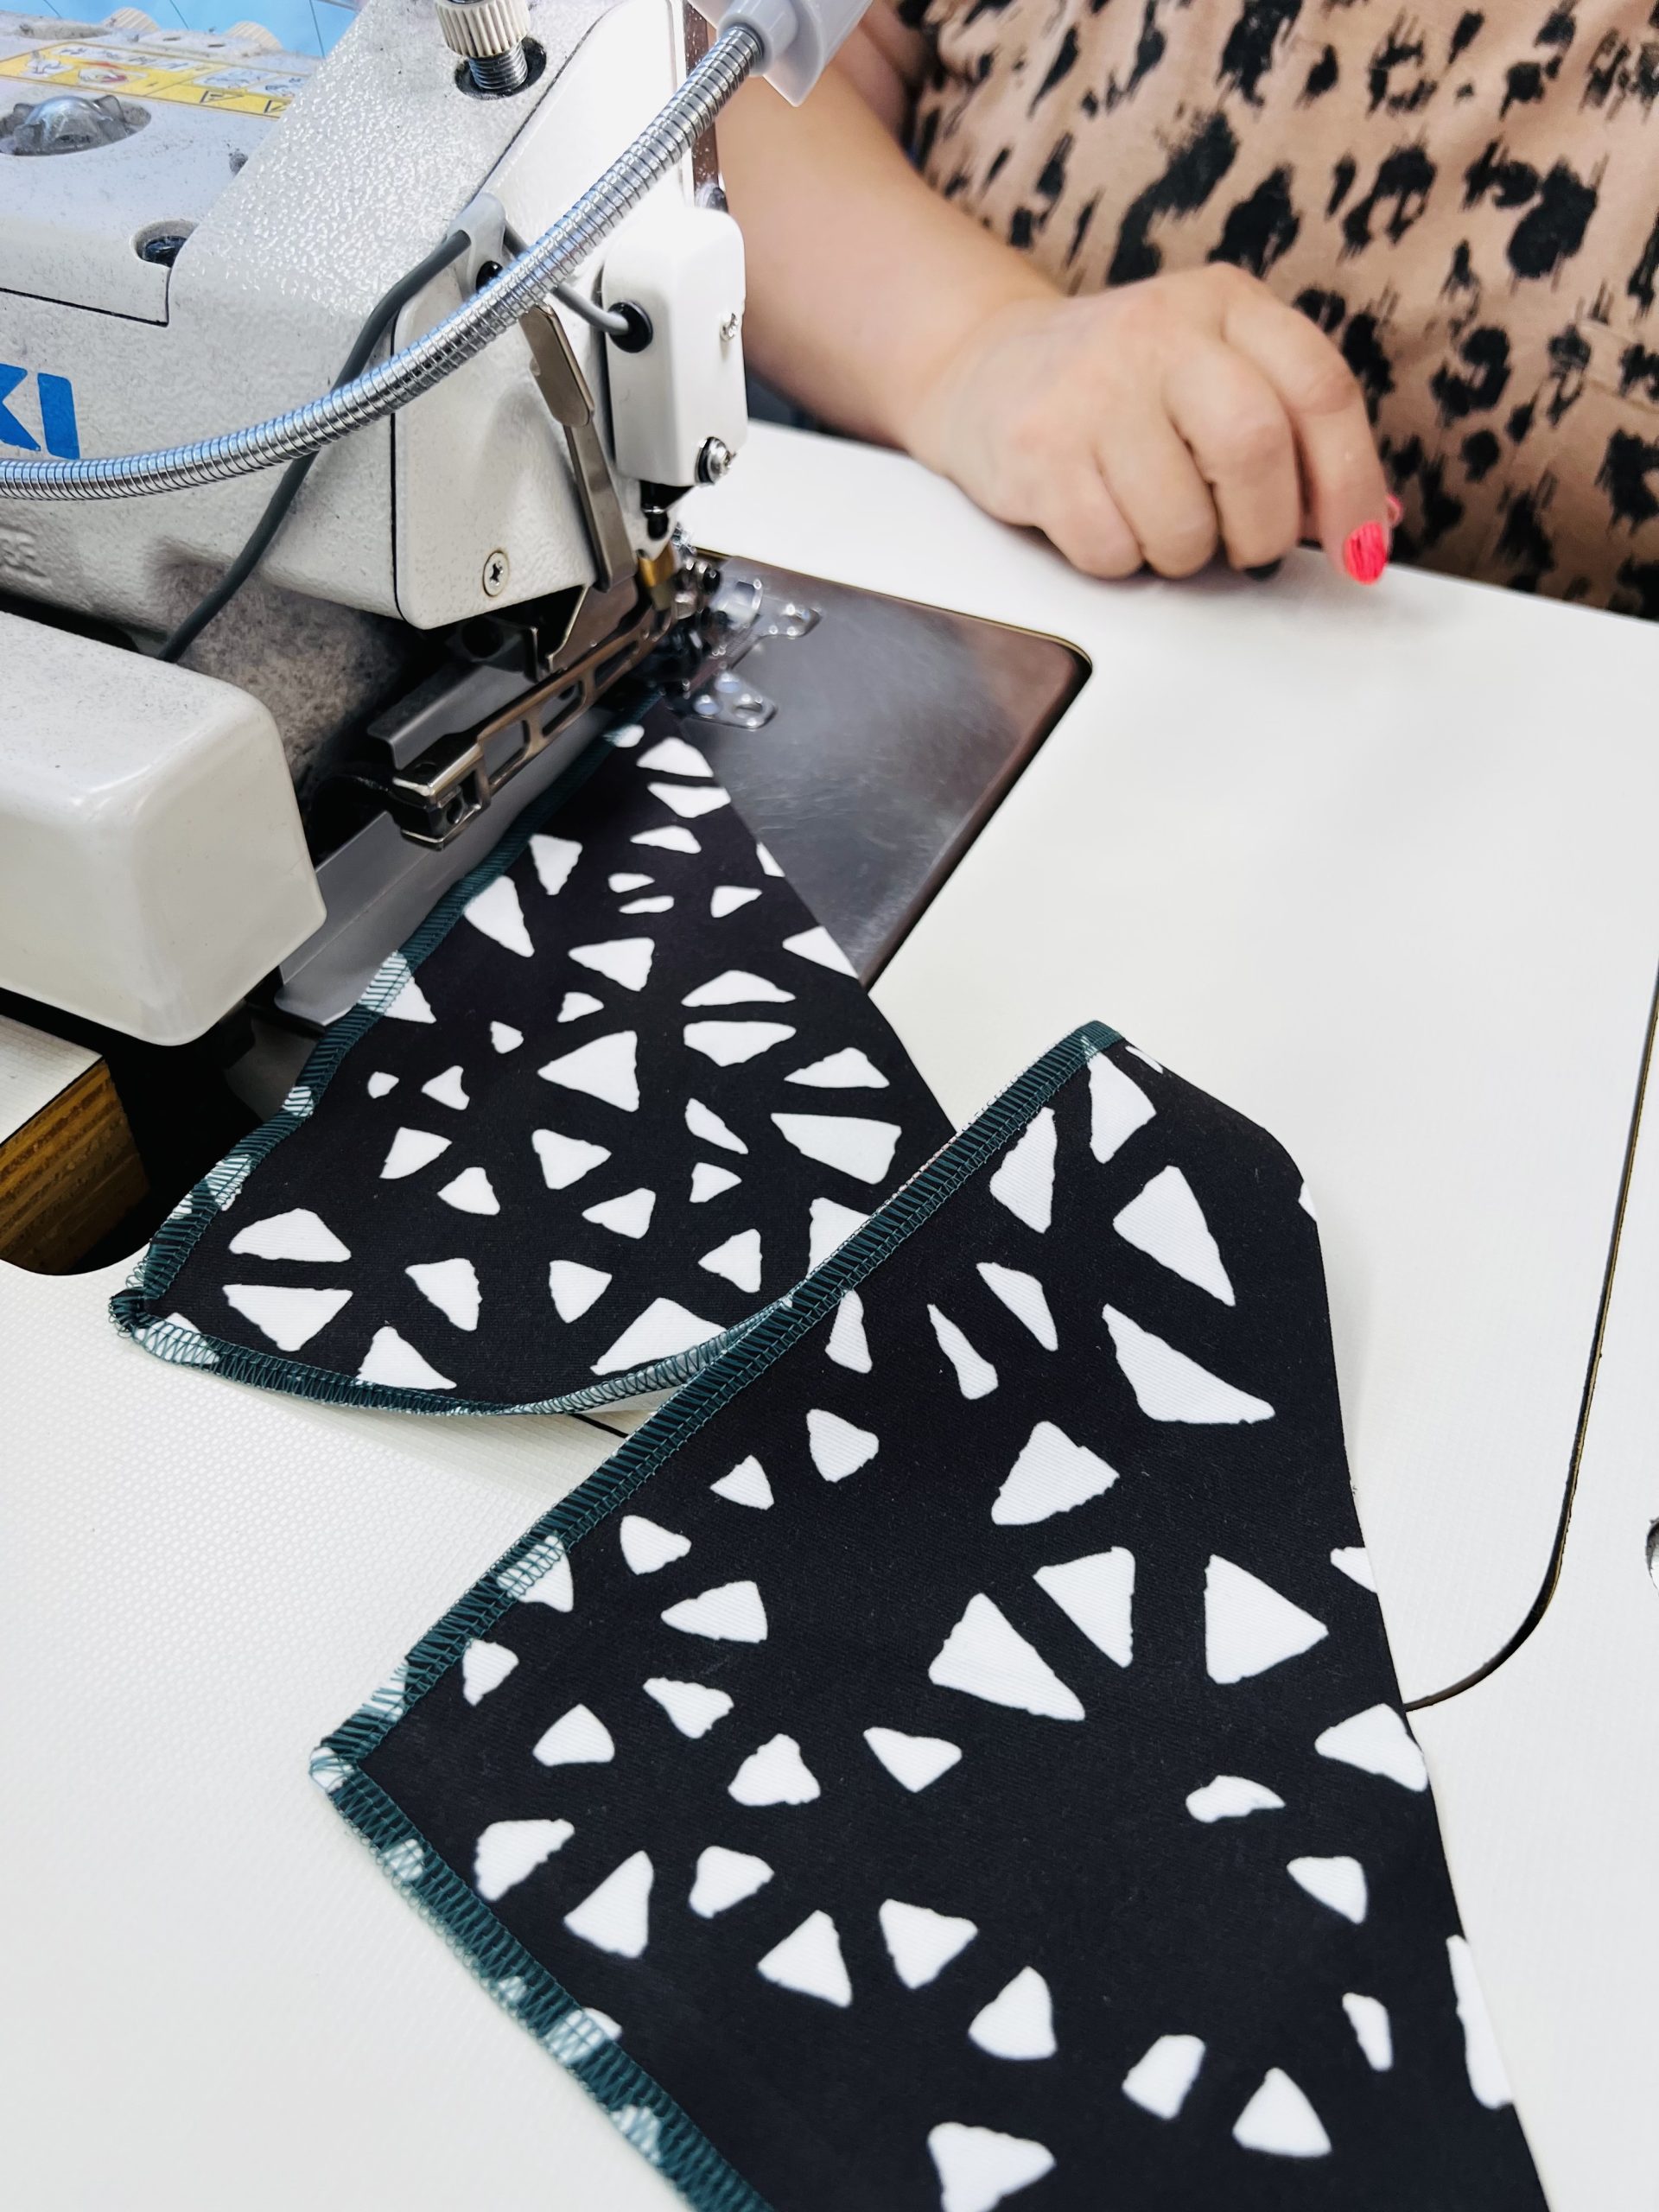
Step 3:
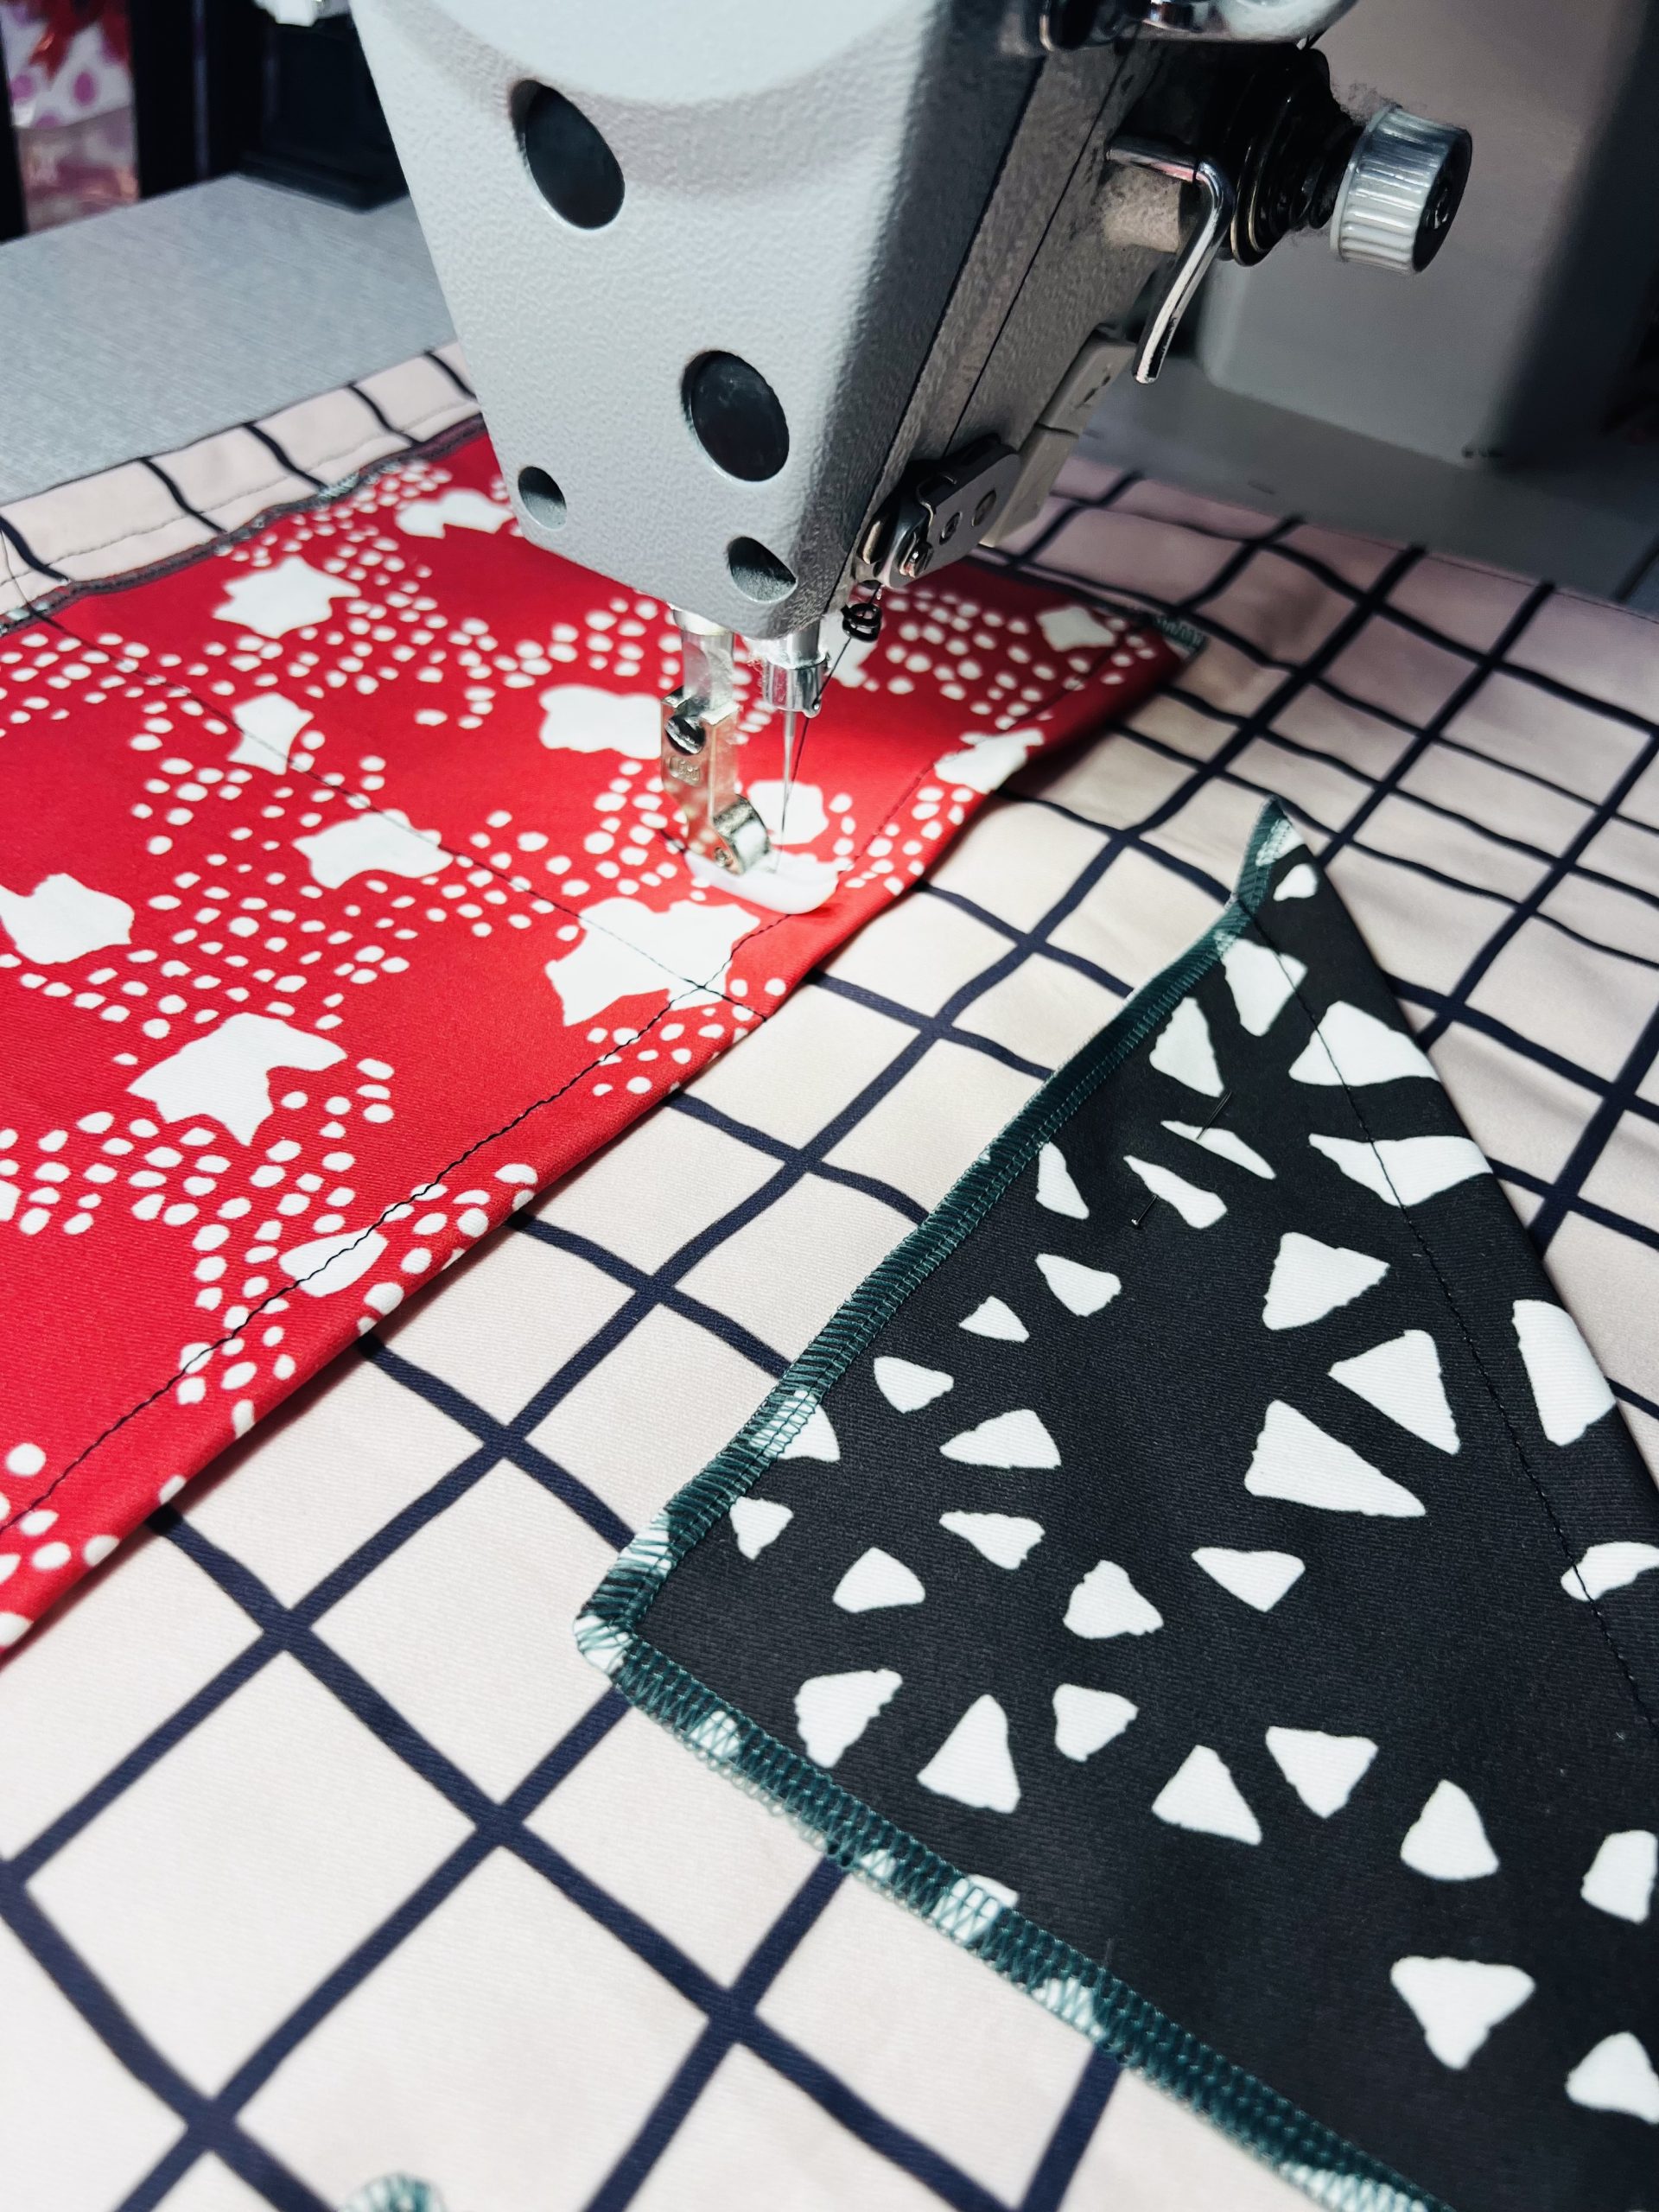
Now, we will sew the handles to the upper side of the organizer. The upper side is not hemmed before. Put the handles between the fabrics and sew them into an organizer.
After that, we pull the fabric through the space left before and turn the organizer to the right side.
Finally, the hardest part is done and we can start with the pockets. We hemmed each pocket separately and attached it to the fabric with pins to make it easier to sew on the base.
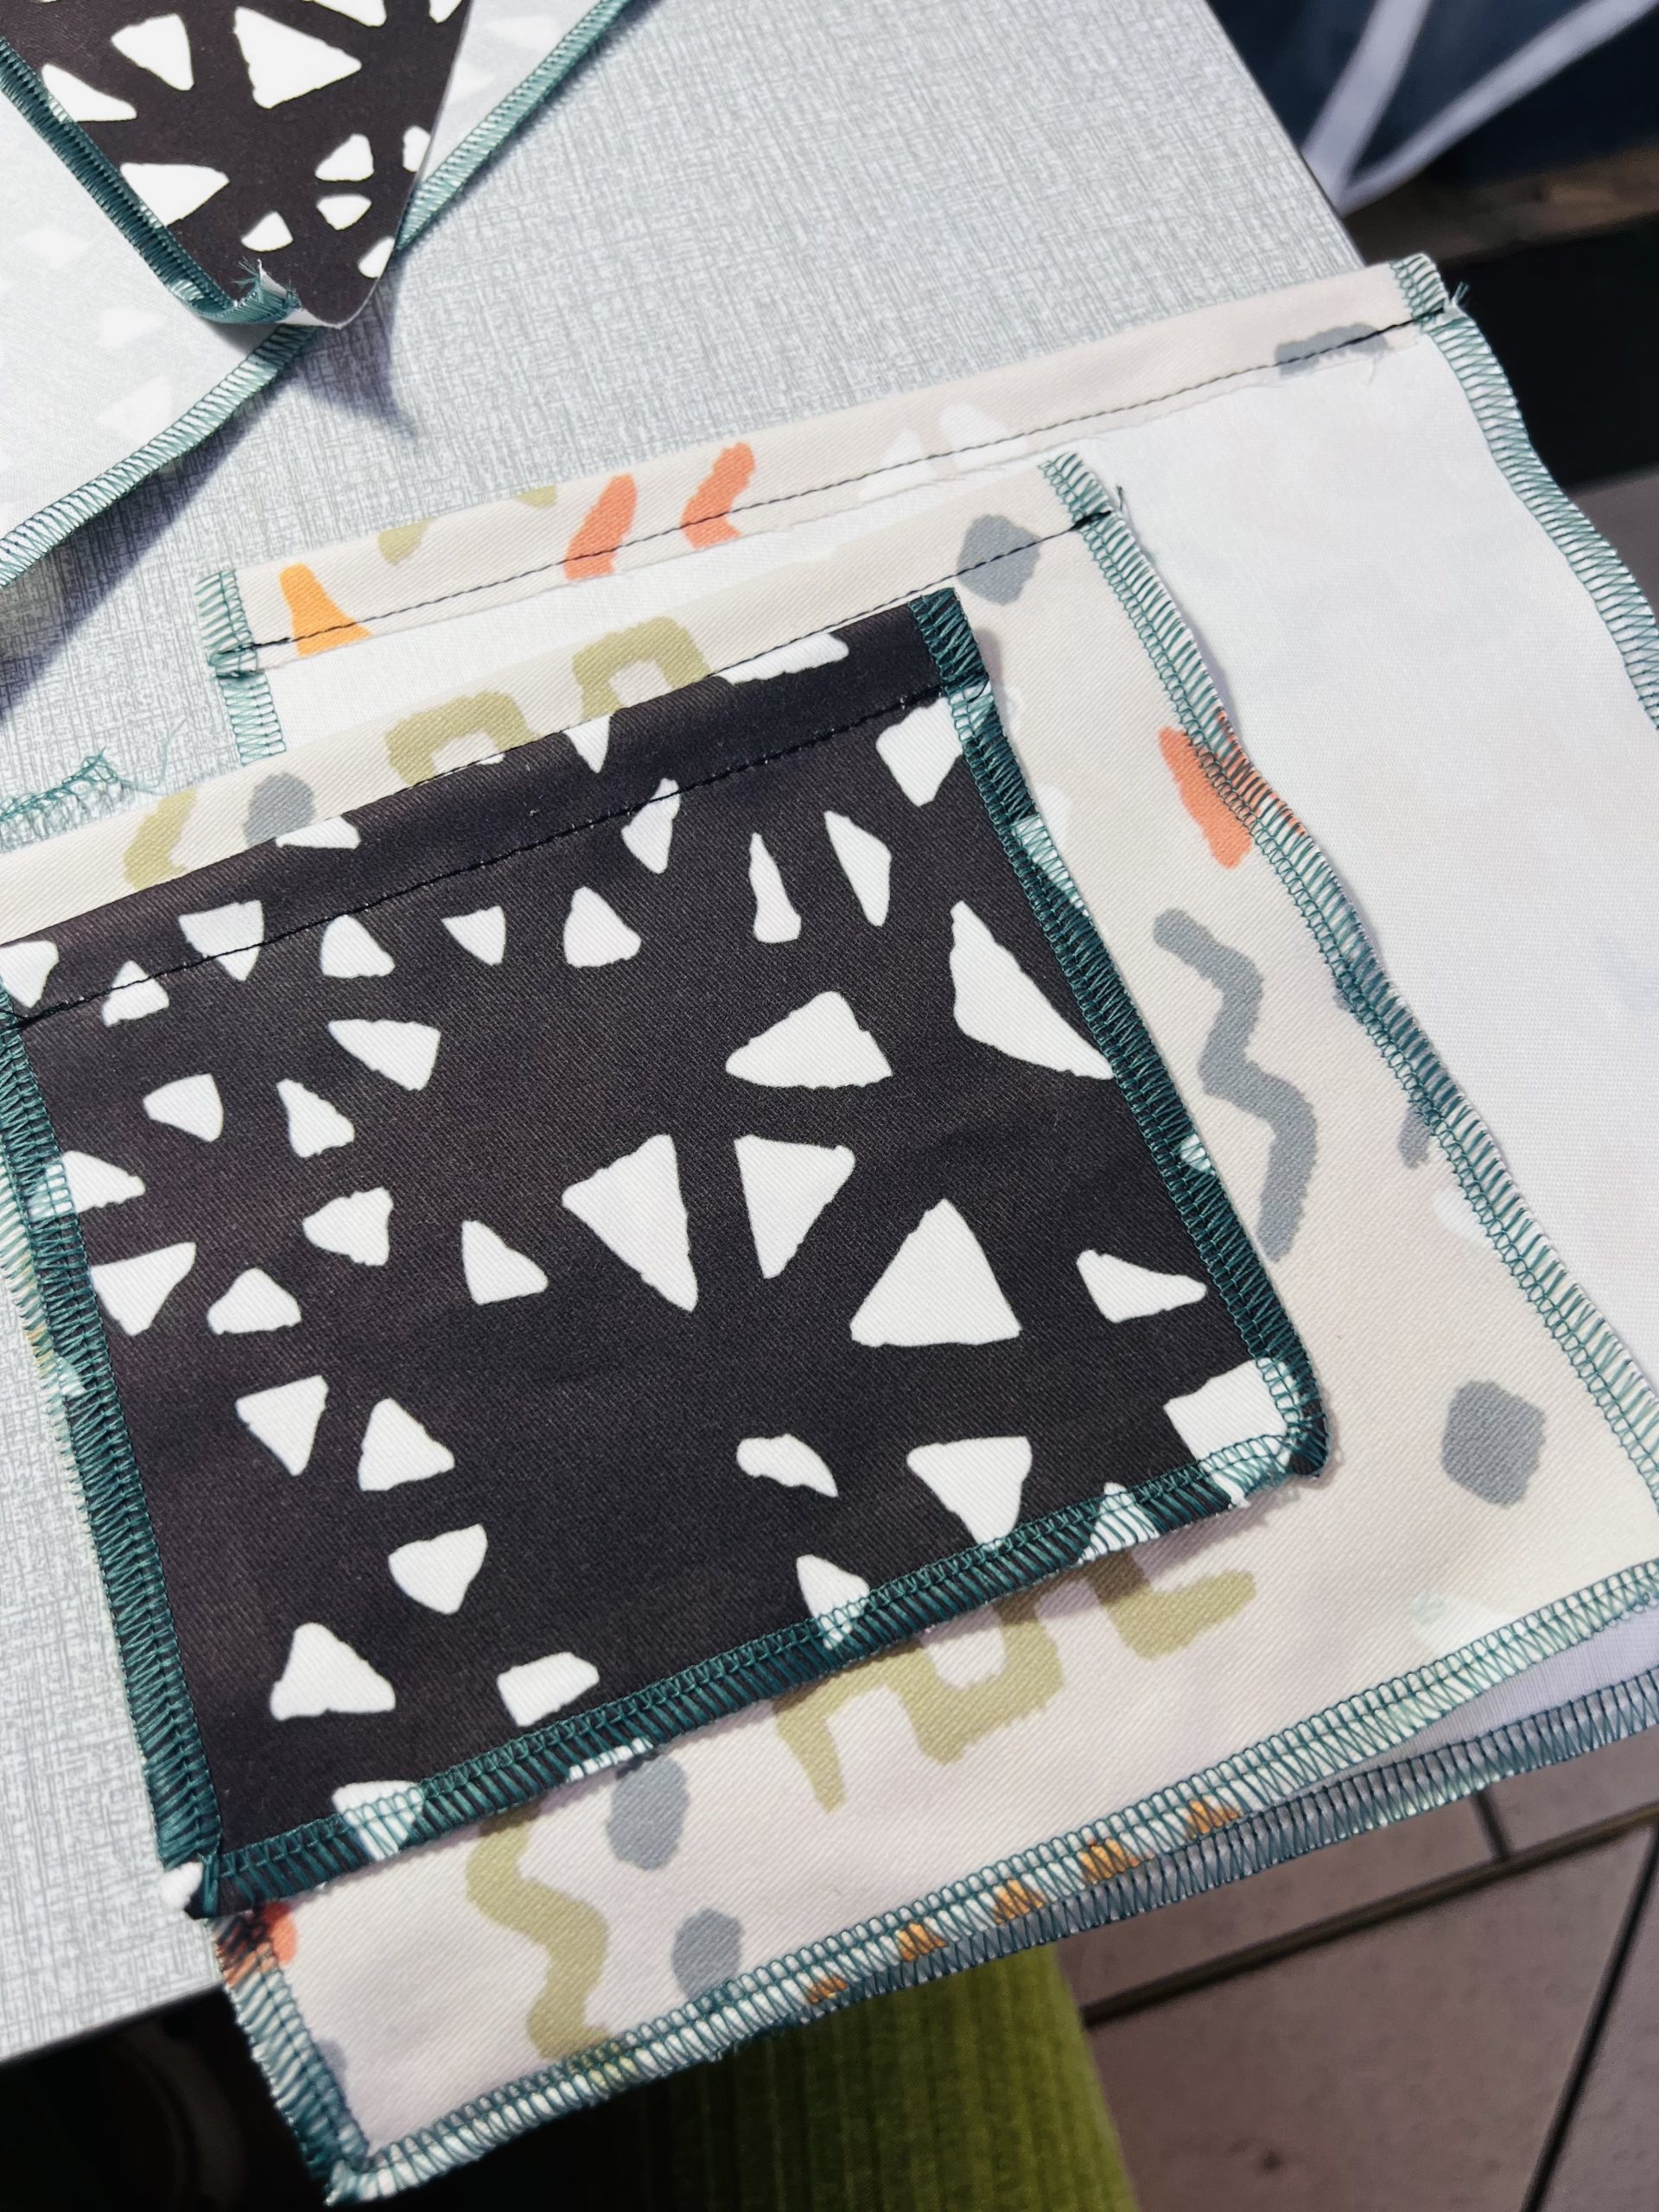
Step 4:
In the last step, on the bottom side, sew a centimeter from the edge to get a tunnel through which we will put the strip.
In the end, we put the string on the upper side and that’s it!
Watch the video below to make it easier for you to create a wall organizer.
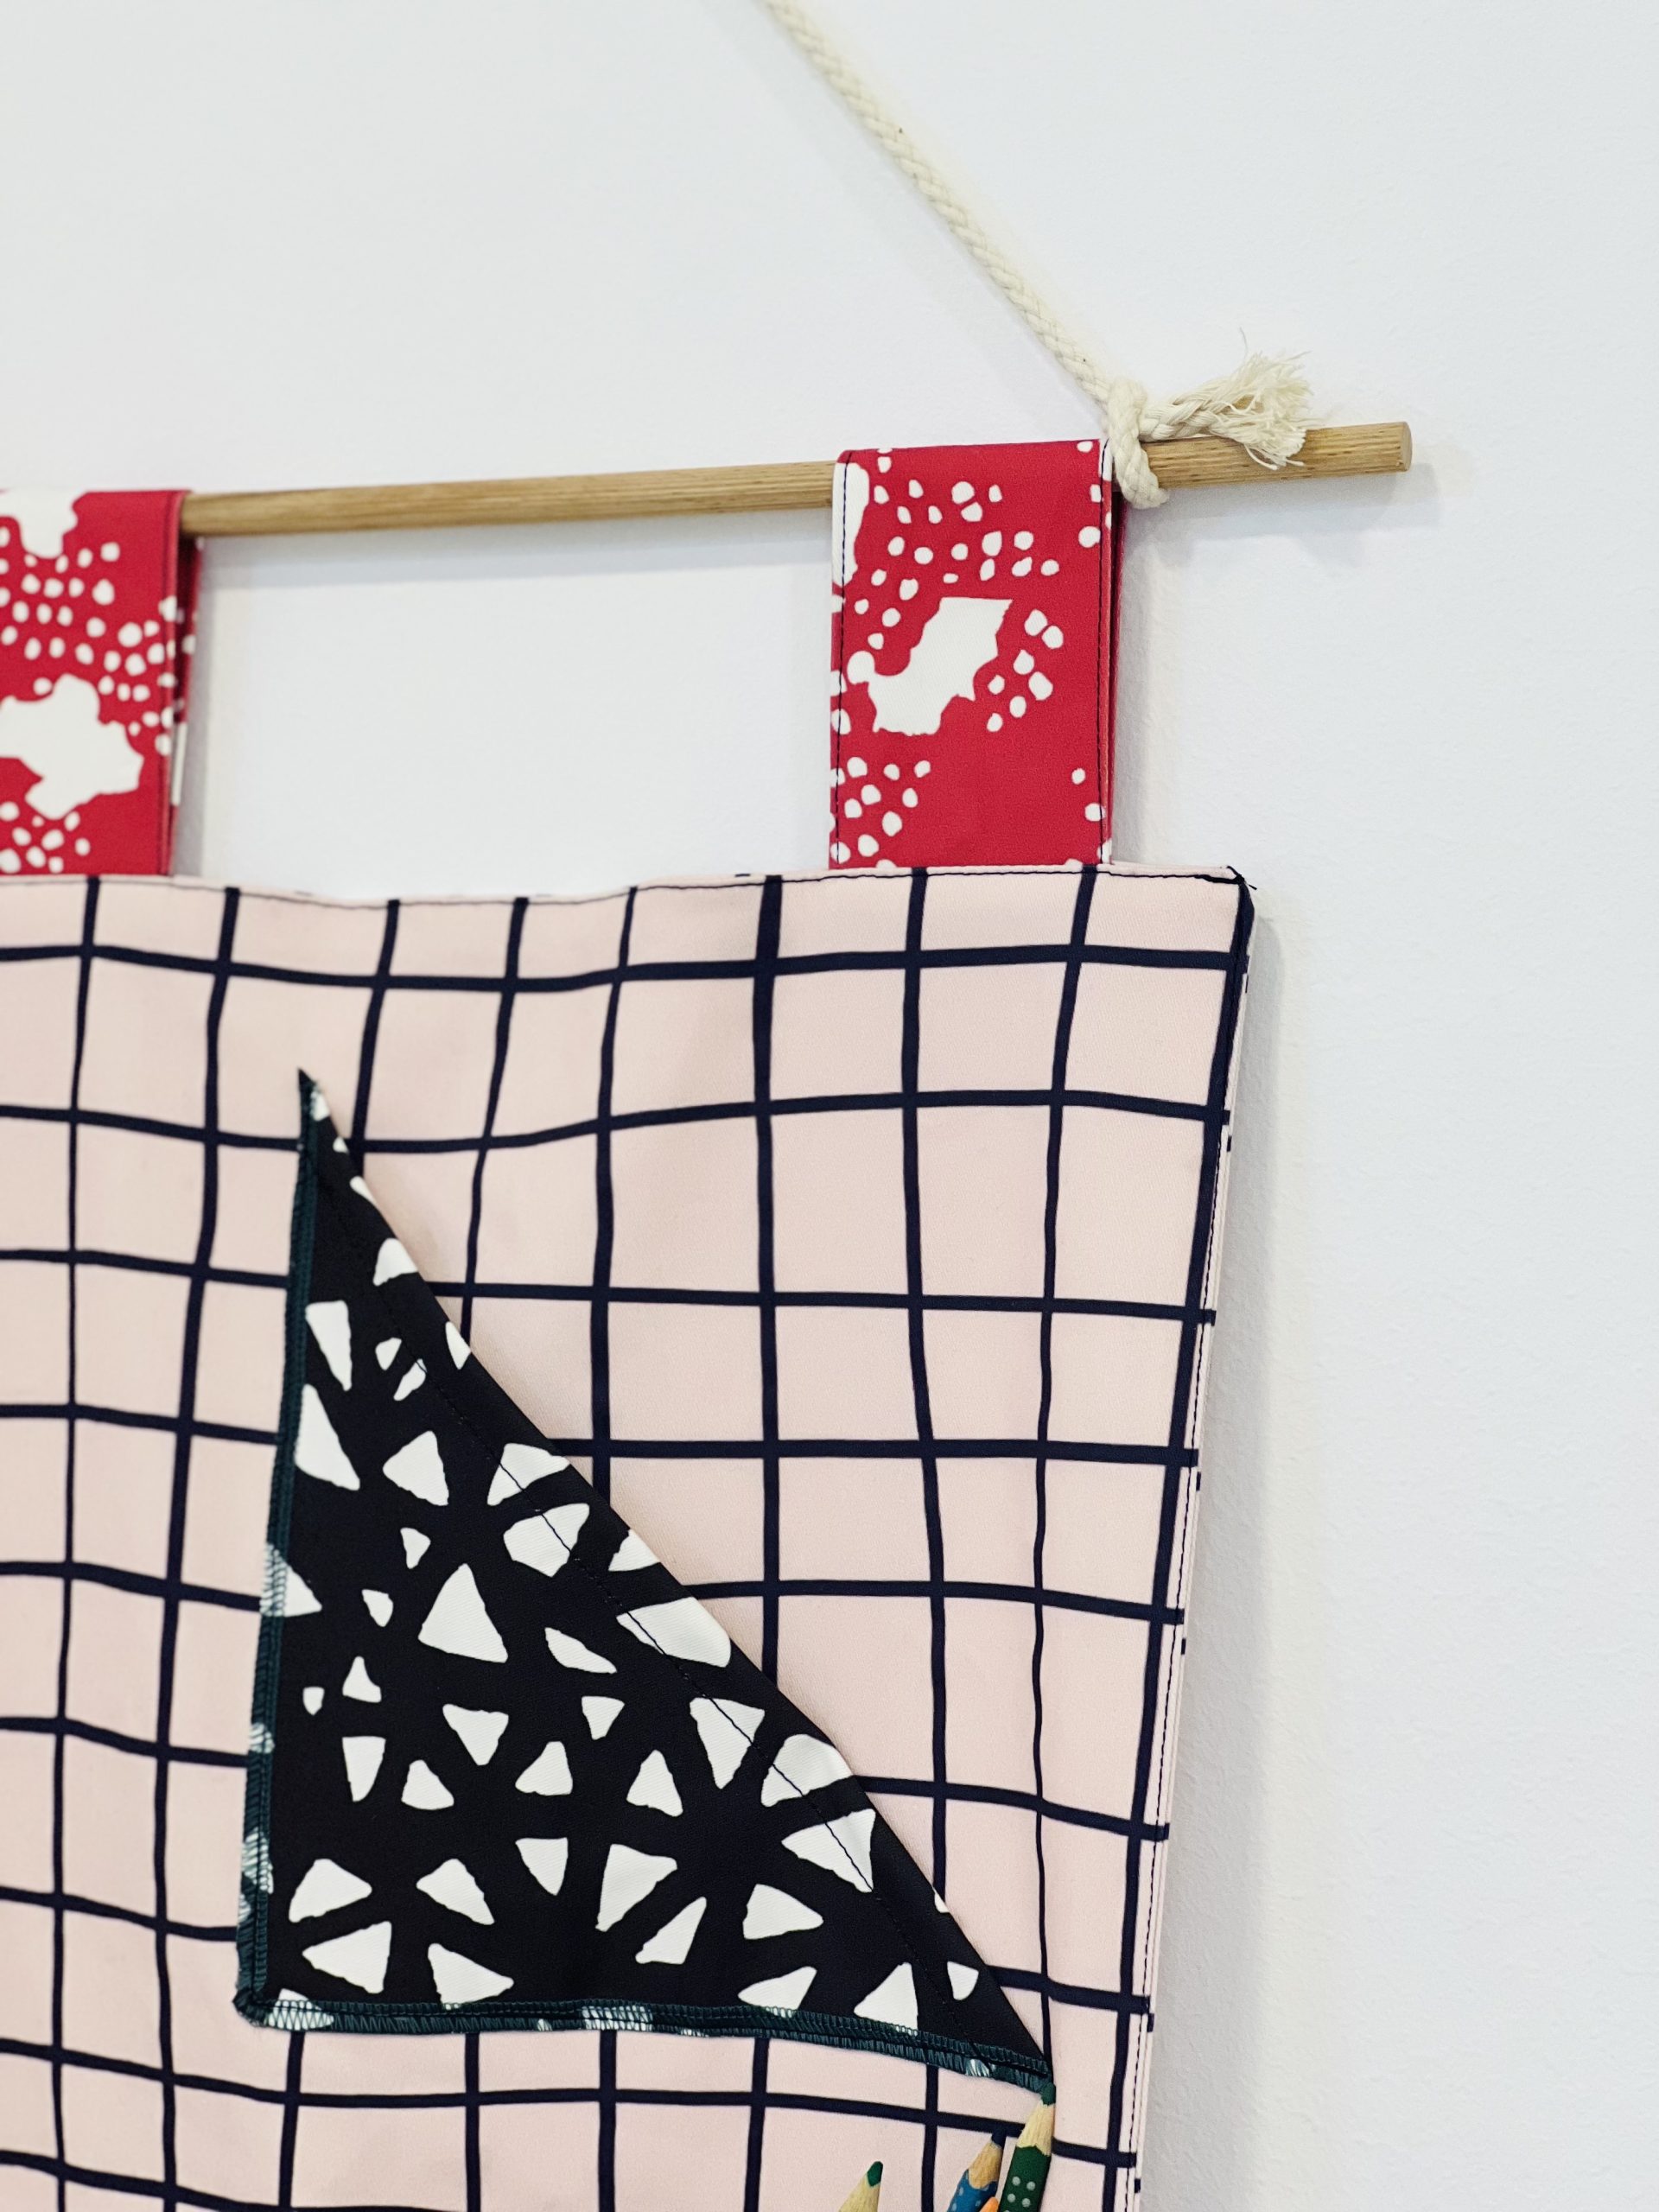

And our DIY project is finished!
Choose the wall where you want to place it and fill it with pens, papers, and other accessories!
If you want to try this DIY project, click on the Fabric Types page and select Cotton Twill.
After that, choose design you want – you can pick several, one for the fabric and the others for the pockets, so your organizer will be colorful.
Send us pictures and videos of your wall organizer or
post them on Instagram with the hashtag #caspardiy.
Can’t wait to see your lovely DIY projects.
The post DIY Wall Organizer appeared first on Caspar.
]]>The post Single Cotton Jersey: Why Do We Love This Fabric So Much? appeared first on Caspar.
]]>Where do we start with the description of Single Cotton Jersey?
We all know and own that one classic, breathable, light cotton shirt which we, because of its feeling on the skin, want to wear for the whole day.
Well, that’s Single Cotton Jersey – a material with a very interesting story we’ll tell you more about.
Let’s start at the beginning.
We don’t know about you, but at Caspar we really like fun facts, so let’s begin with some of those.
How was Single Cotton Jersey first created?
The history of Single Cotton Jersey and its name begins in the Middle Ages.
It was first manufactured on Jersey Island in the English Channel where fishermen used it to make sweaters, and it was made of wool. As time went by, jersey switched from wool to cotton and became the material used for underwear.
As is always the case in the fashion world, something is perceived as ordinary until it’s made popular by someone famous.
In 1916 that was Coco Chanel, who included Single Cotton Jersey in her women’s collection. Of course, the use of underwear material on fashion runways was pretty shocking at the time, but thanks to Coco, the world realised the benefits of this material, which can be used to make casual clothes too.
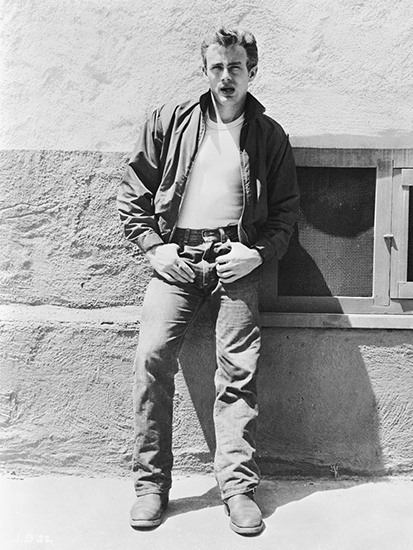
And then Marlon Brando enters the scene in 1951 with the movie ‘A Streetcar Named Desire’ along with James Dean in ‘Rebel Without a Cause’ in 1955. What did they have in common? That classic white jersey shirt. Thanks to these iconic looks, endorsed by the popularity of aforementioned movies, jersey T-shirt quickly became a hit across the globe. Today, this material is used for a wide range of clothes, not only shirts.
Starting with fishermen’s clothes, walking through fashion runways, and ending up in our closets today.
Who would say, right?
What makes Jersey cotton special?
Jersey is a material made by knitting – it has a special way of thread overlapping. Every loop is dragged through the loop under, which results in light vertical lines on the front of the fabric, and “cross” pattern on the back.
Jersey is lighter than the rest of knits and it stretches in the direction of these lines.
Like other cotton fabrics, it’s very breathable so it creates a light and soft feeling on the skin. Cotton is also a material known for – and here comes another fun fact – its absorbing power. It can absorb about 25 times its weight in water! Such power means you will have no problems with sweat staying on your skin, this being another reason why jersey is just so comfy!
In other words, jersey is pure comfort made for casual clothes that will be worn at home, at the gym, while taking a walk or on any other occasion that requires comfort, flexibility and lightness.
Suma summarum?
Single Cotton Jersey is everybody’s favourite knit.
It’s a good match for everything ranging from T-shirts, jersey dresses, underwear to comfortable bed sheets and we can wear it all year long – it’s perfect for both summer and winter.
Its maintenance is simple: it’s enough to wash it on 30℃ (don’t put it on higher temperatures because it will shrink) and use a mild detergent. Another advantage of cold washing is its eco-friendliness – colder water needs less energy required for heating, which reduces the carbon footprint.
After washing, shake it lightly to return it to its original shape and avoid direct sunlight when drying (to avoid color fading).
In the end, turn it on the opposite side and iron it to avoid eventual creases – and that’s it folks! You can enjoy the softness again.
Shhh – there’s also a blog post which explains our care instructions in detail 
We also have another one about classic cotton T-shirts that really like Single Cotton Jersey!
The post Single Cotton Jersey: Why Do We Love This Fabric So Much? appeared first on Caspar.
]]>The post Digital Print and Pigment Inks – Get to Know Caspar Manufacturing Process! appeared first on Caspar.
]]>On several occasions we’ve mentioned how our production is environmentally friendly and sustainable. We believe in a better tomorrow and know that we need to change the direction of the fashion industry.
In order to accomplish this, we’ve had to introduce new and advanced technologies in our manufacturing process.
We appreciate transparency in our business, so we’d like to explain the whole process to you, as well as the path the fabric goes through at our facility. More precisely, we’ll explain what digital print is, what are pigment inks and how and why we use them.
Don’t worry, we’ll use completely understandable vocabulary, without that bunch of technological terms.
Are you ready?
Here we go!
What type of print do we use?
First, we’ll explain what the printing process used to look like.
If you wanted to print a pattern, you needed to put it on printing plate first, or run it through a silk screen. Therefore, more material, more work. These technologies are still used, primary because they work well for larger amounts of products.
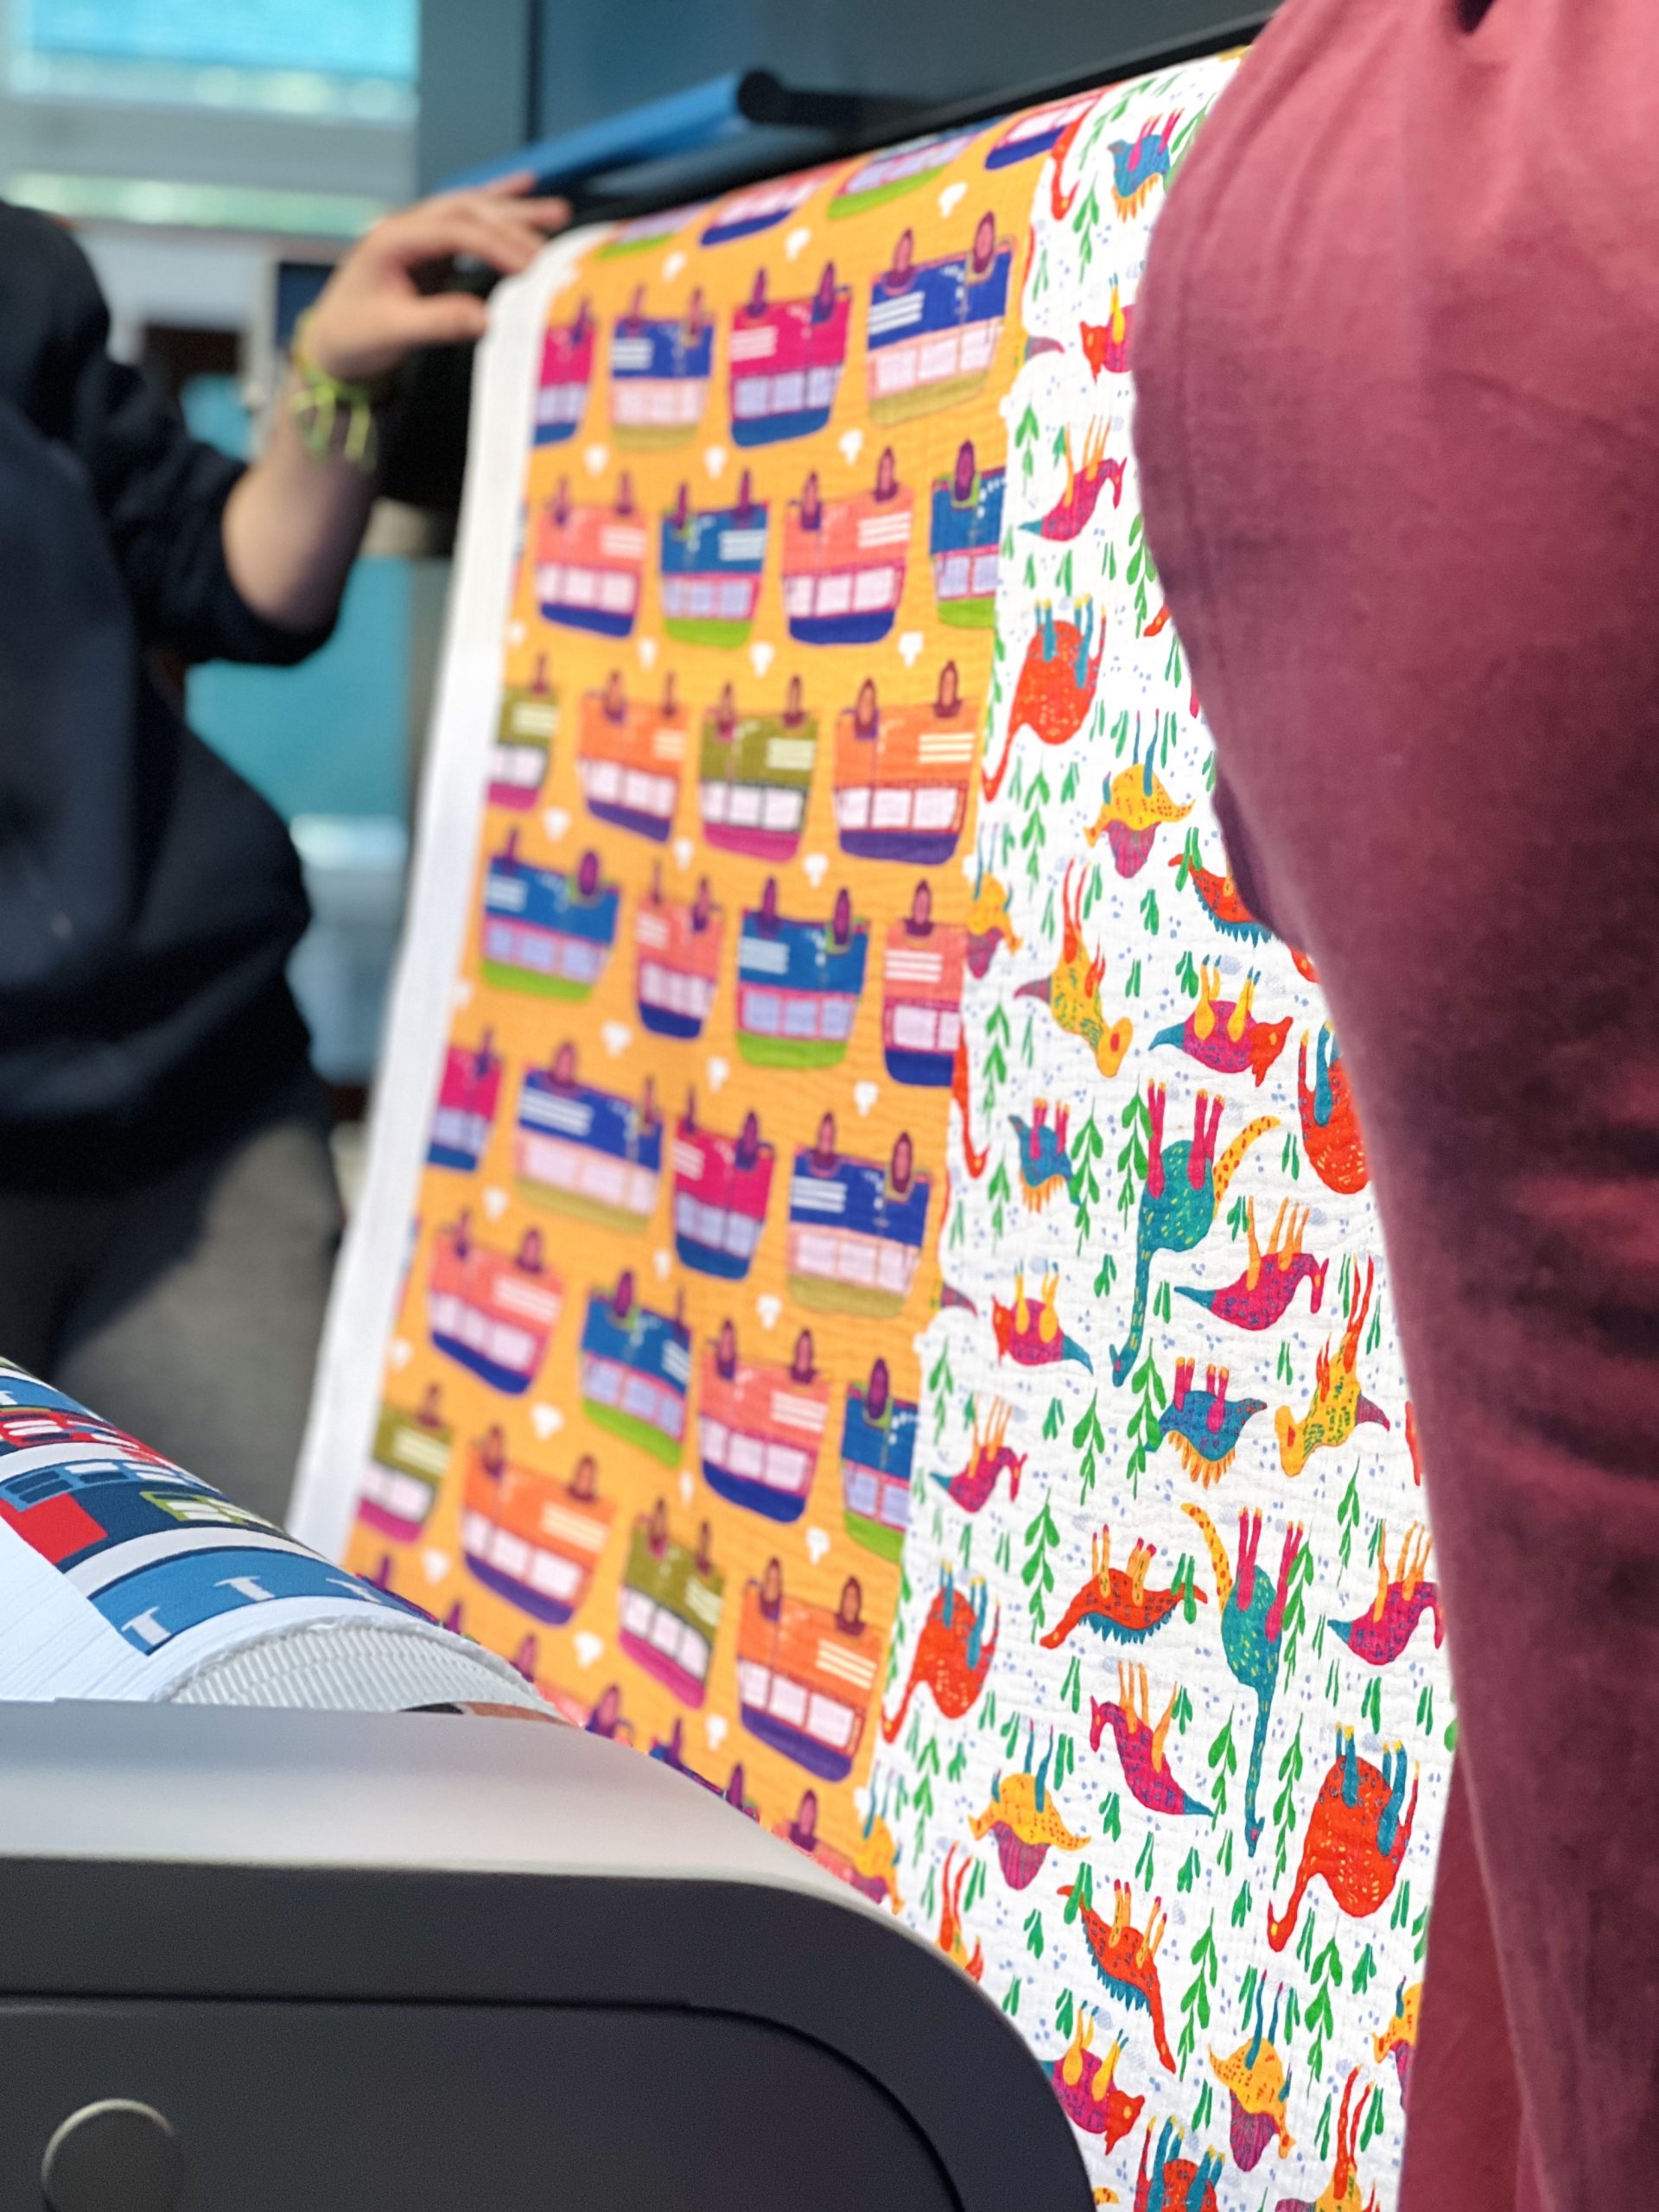
However, we opted for digital print.
How does it work? We input data (in our case colours and patterns) into the computer, while the computer transmits these data into the printing machines which do the rest of the work.
Why is digital print better for our way of doing business?
- No more printing plates or screens, meaning faster printing process.
- It’s suitable for all types of materials. From natural ones like cotton, to artificial ones like polyester, digital print guarantees vivid colours and good adhesion.
- Great solution for small and medium editions. With digital print, there are no “minimum quantities”. At Caspar you can even get one meter of a fabric or one piece of an item.
- It’s suitable for custom print, so it doesn’t produce unnecessary waste.
In conclusion, it’s clear that what we represent – a company that is here to help small and medium businesses and craftsmen, all the while maintaining a sustainable approach – digital print is the best option.
After we’ve chosen the type of print we want, the inks came next.
Print in the colours of sustainability
There are three types of inks we can use in digital print:
- pigment inks
- acid inks
- reactive inks
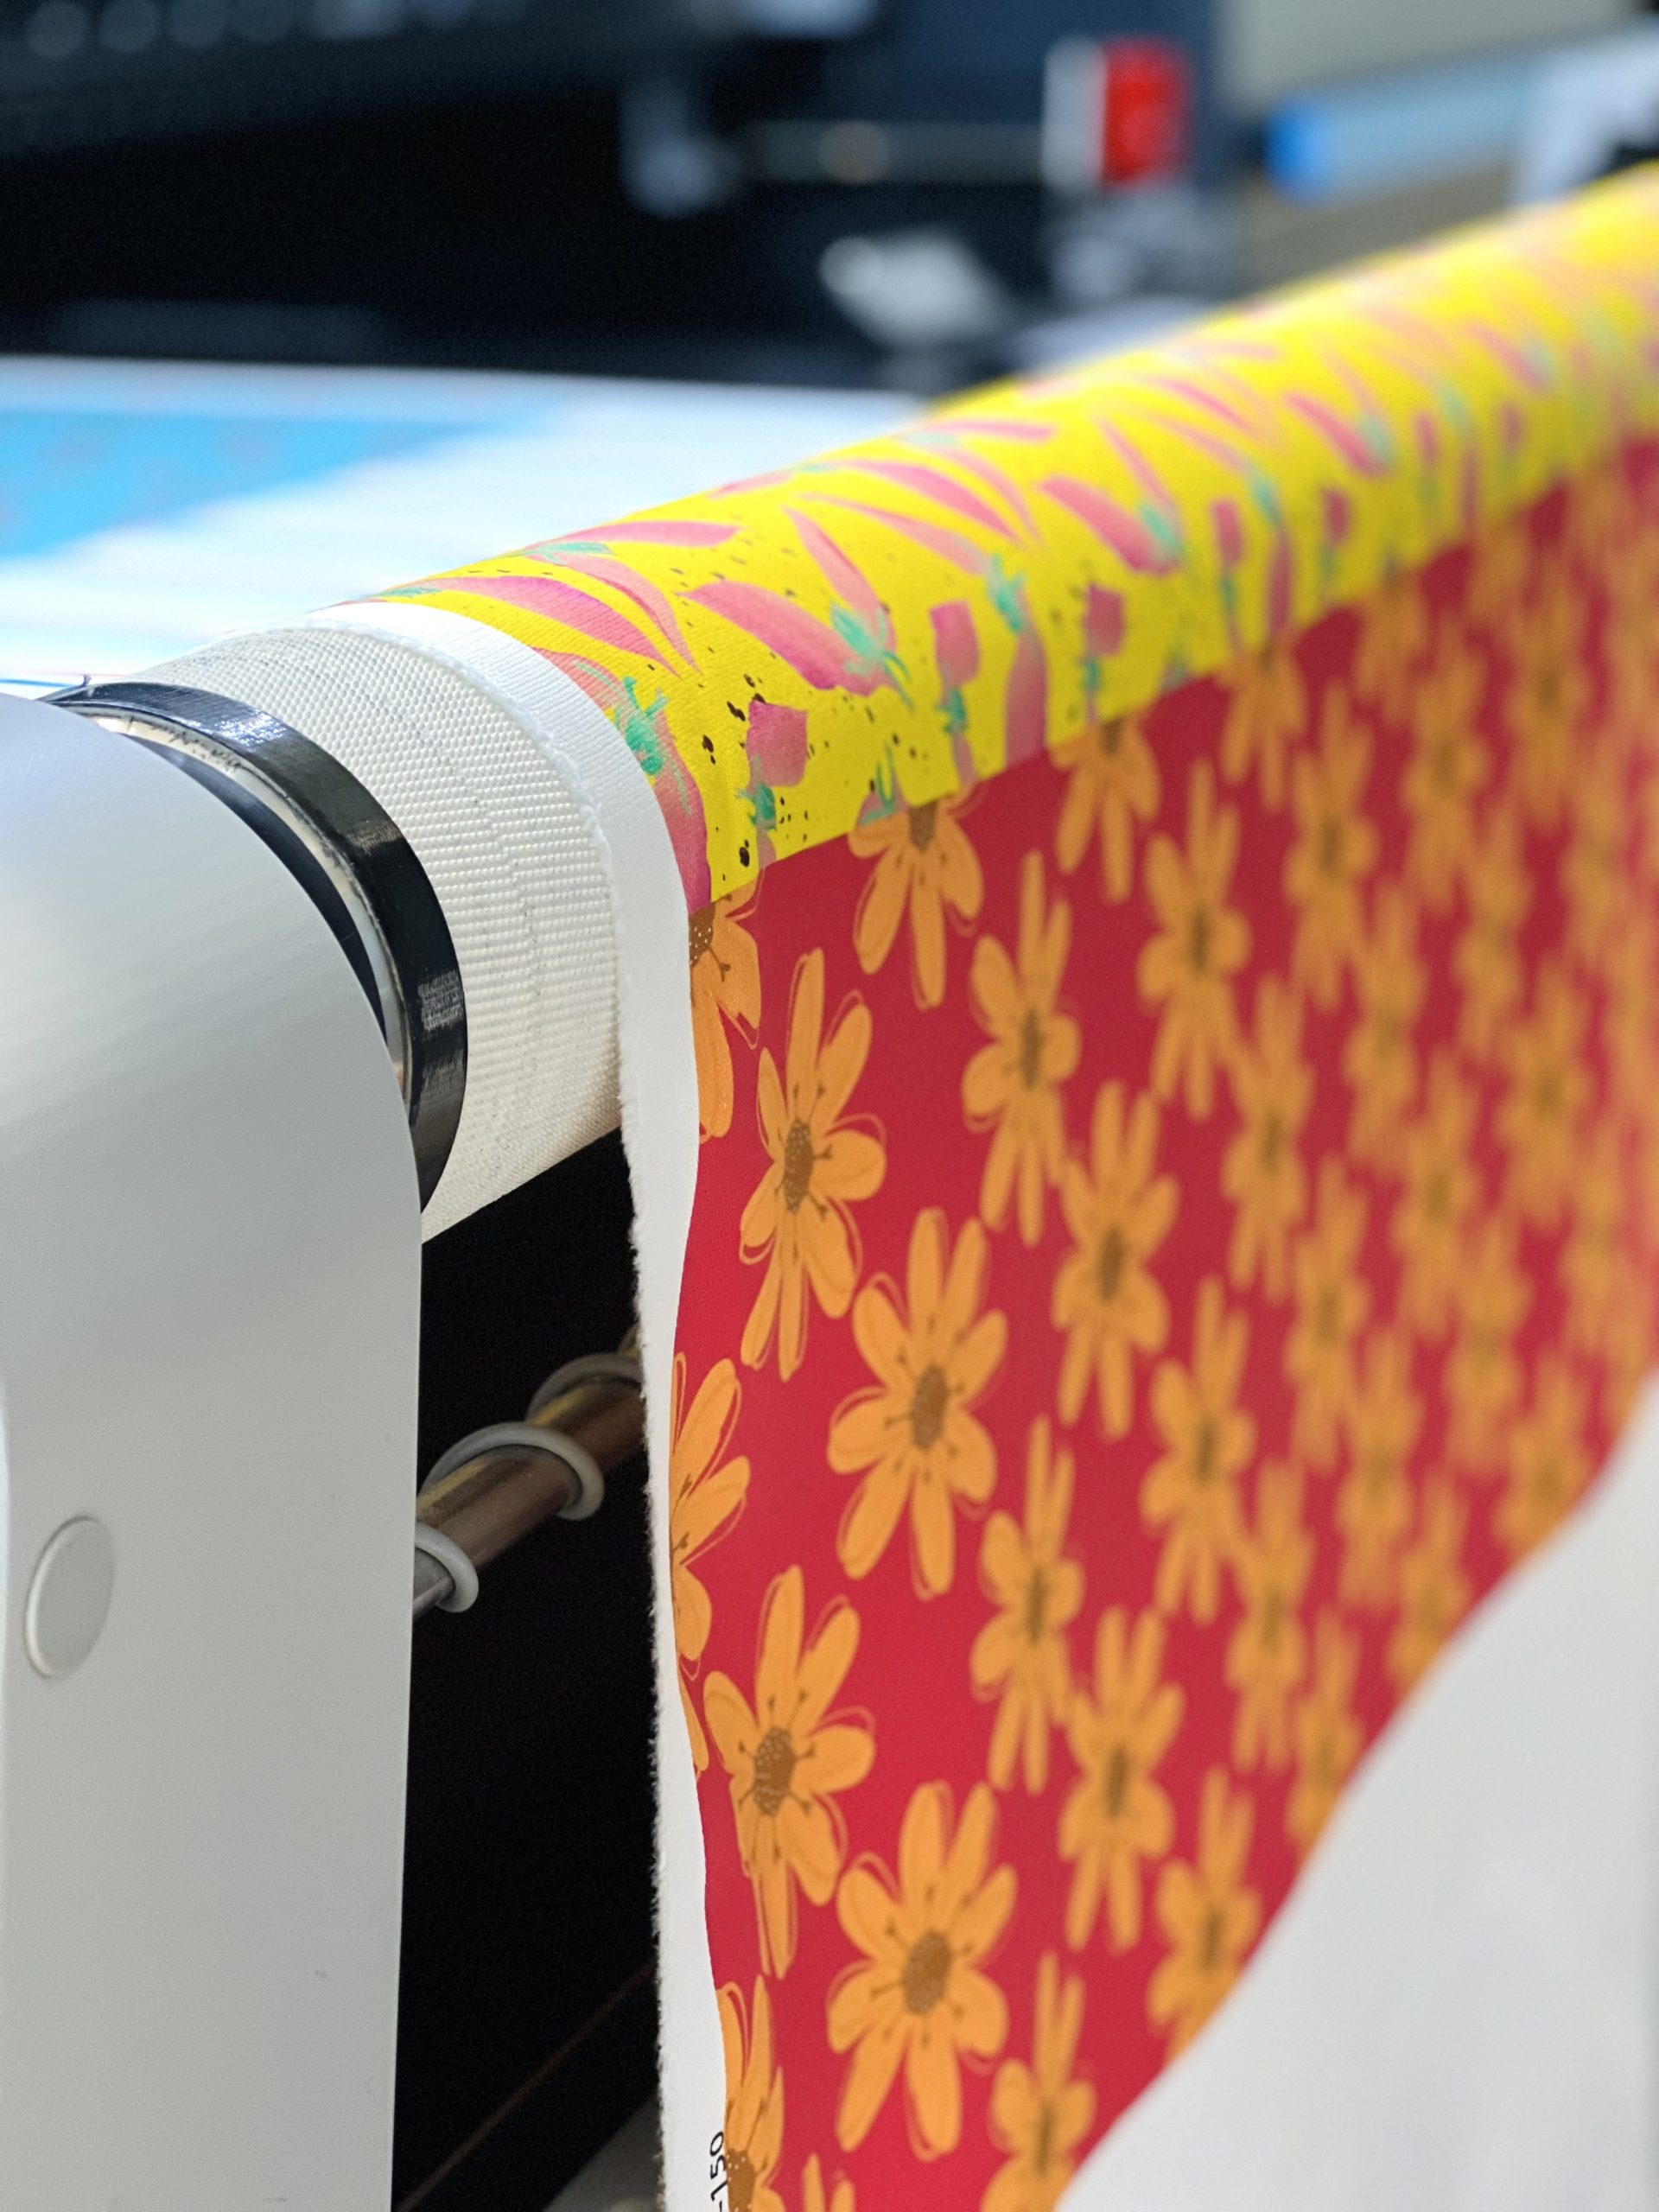
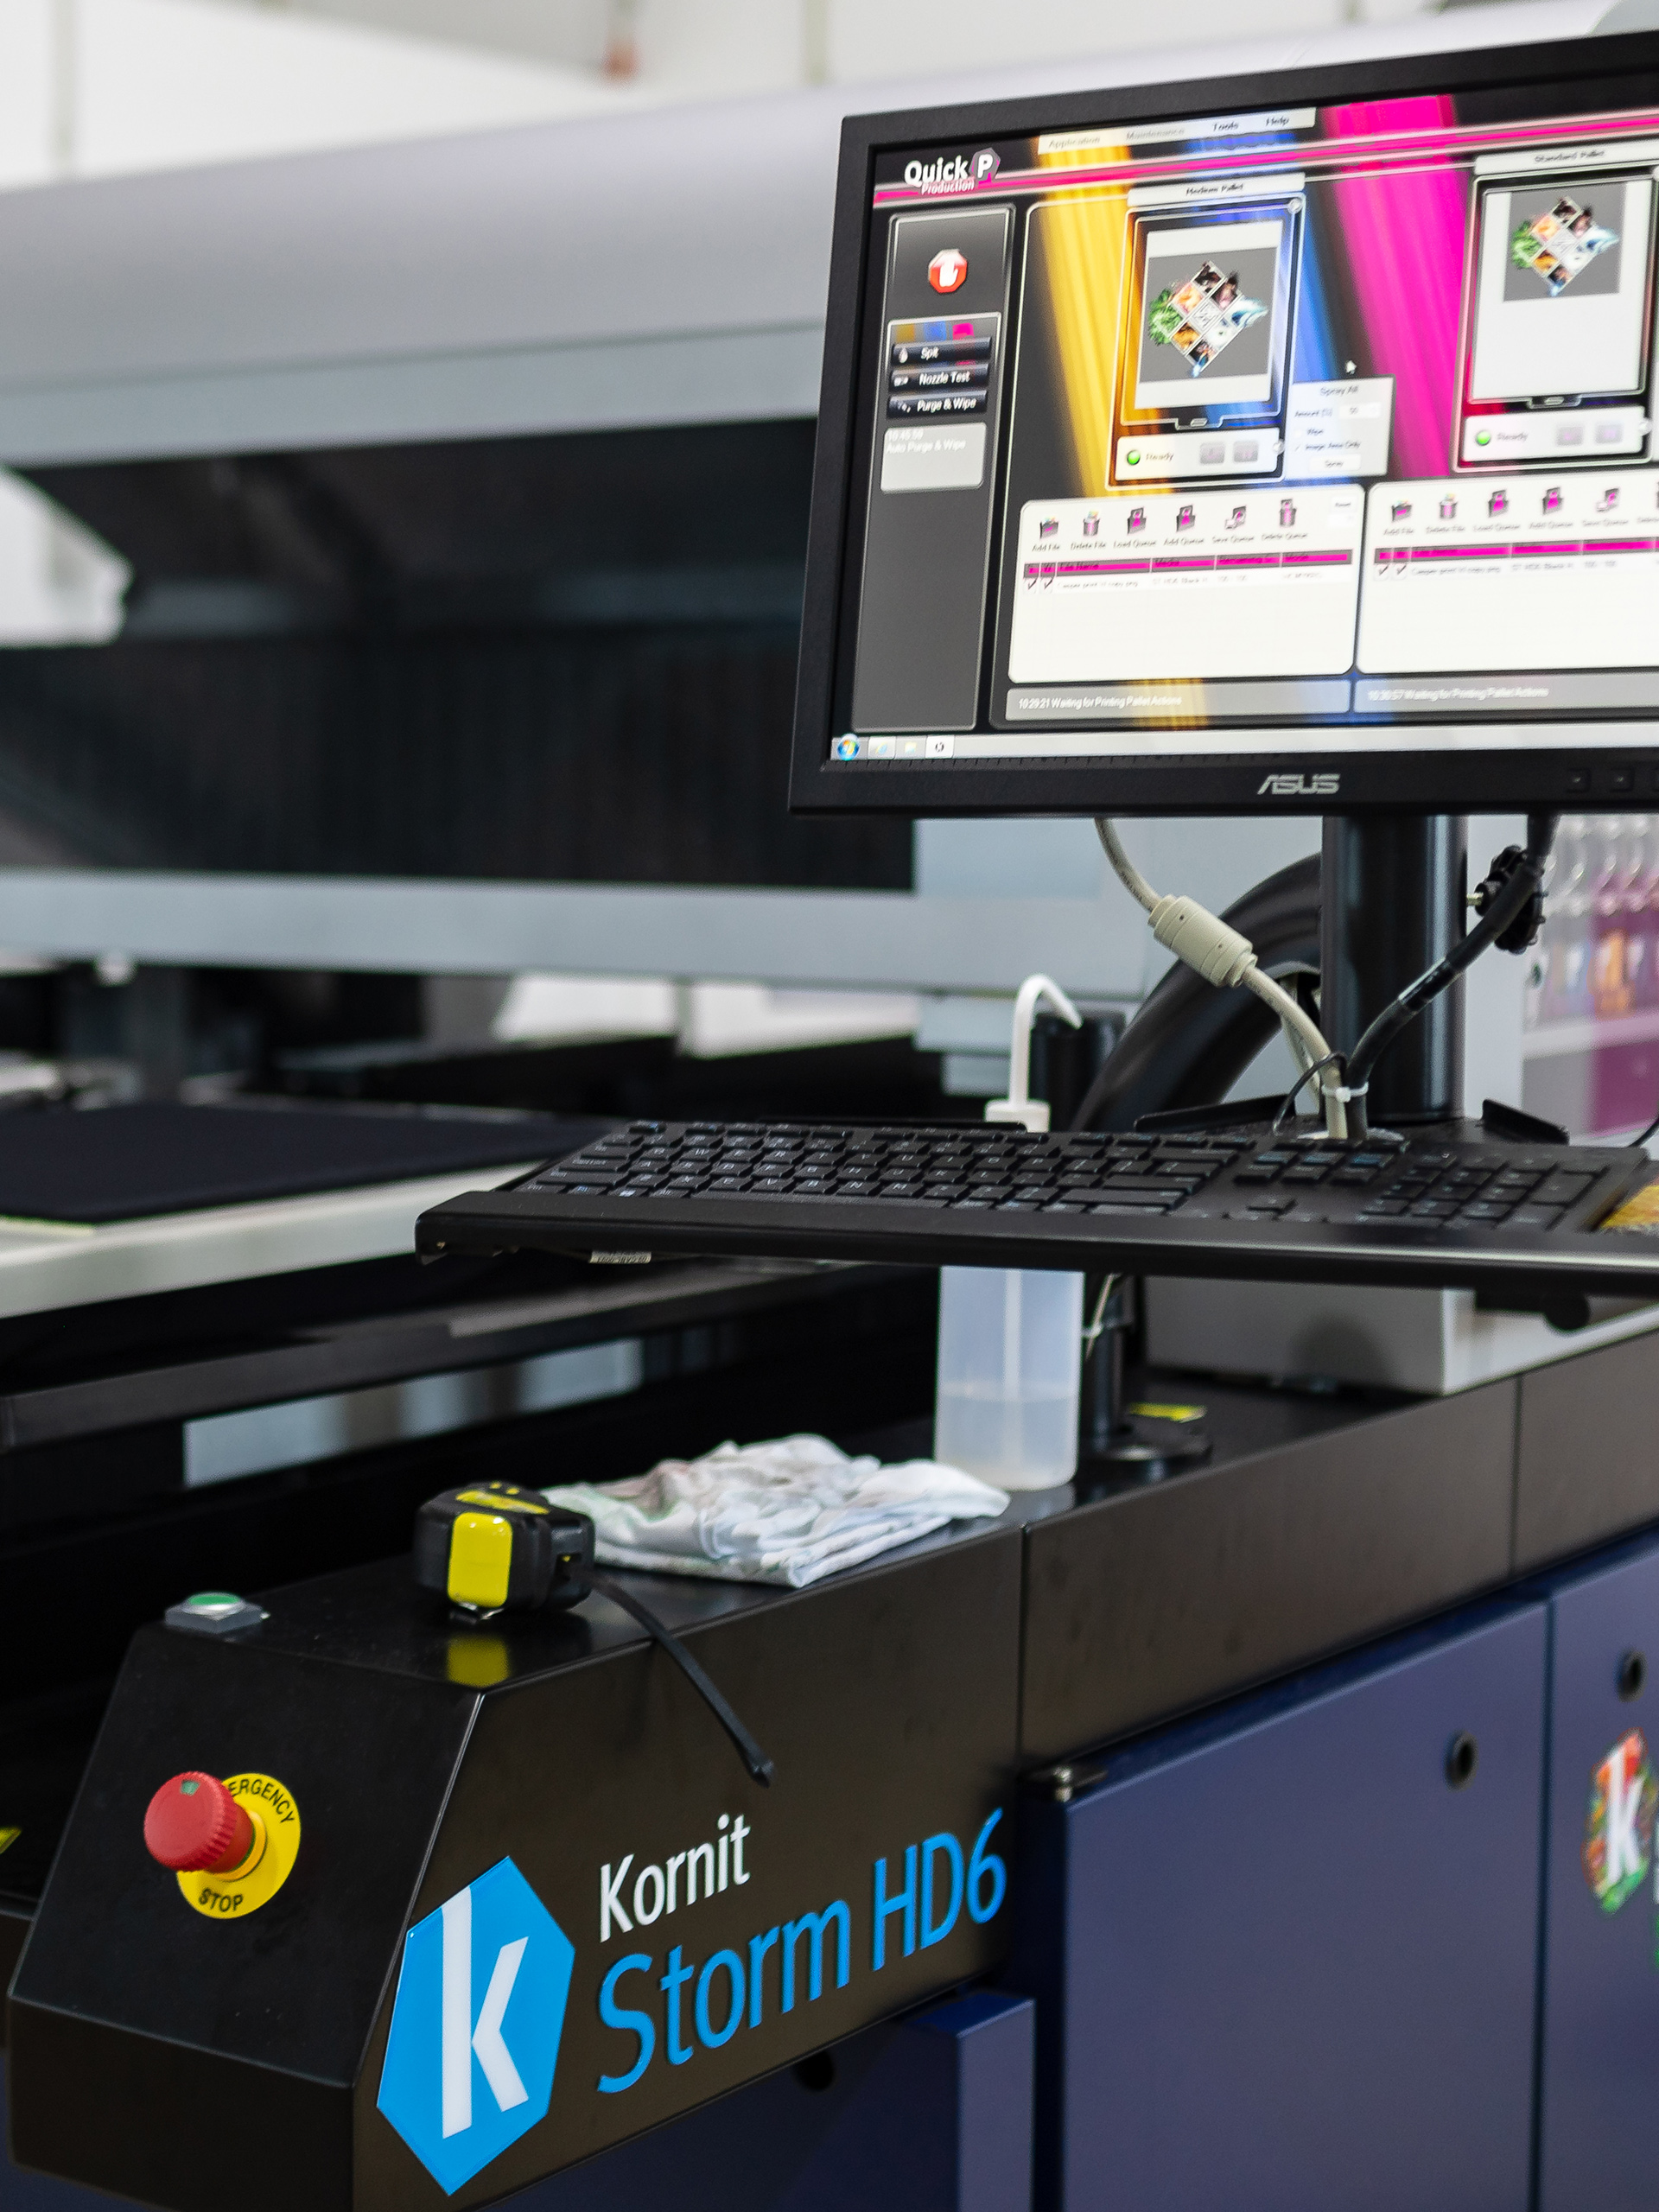
We’ve chosen a printing machine called Kornit Presto, which enables us to perform all of the processes related to digital print directly onto the fabric: print, softening and drying, all in one go.
By selecting the printing machine, we’ve chosen the type of inks we want, too.
Every ink is suited for a different type of technology, and our Kornit Presto comes hand in hand with pigment inks.
Still relatively new and unfamiliar in the world of print, pigment inks are not that popular, but we believe they’re going to take over the market soon, and we’re here to proudly represent them.
We believe in their advantages and we know that they are the best choice for our goals, but also the best option for textile industry in general.
Here’s why:
- Print and ink fixation are a part of the same process in production, which is not the case with acid and reactive inks.
- They have better UV endurance.
- They adhere magnificently and give intense results.
- They give excellent results when printing illustration patterns and photography.
Acid and reactive inks on fabric are first treated with chemicals, then printed, steamed and washed. The process is exactly as it seems – time consuming and wastes large amounts of water and energy. Since ecology is one of our main principles, this doesn’t suit us at all.
Pigment inks don’t acquire water (like the rest of them do) but only temperature in order to be heated up and fixed onto the fabric. Therefore, there’s no (large) consumption of water – this is what gives us sustainability.
Pigment inks can be used in different ways, and the final result is consistent, which gives us quality.
Now when we’ve cleared all of this, let’s conclude with all the advantages these technologies have when compared to the traditional ways of print.

Why do we do things this way?
Our factory is a proud microfactory.
In order to meet all custom print requirements (which is the way our factory works), we need to have a high level of technology, automatization and digitalisation. Digital print represents exactly that – since it works the same as classic printers (tiny drops of ink are placed onto the fabric), results are fast but efficient.
By doing custom print, we’re also reducing the amount of waste, while the use of pigment inks doesn’t require water in the printing process.
As a company which puts great emphasis on sustainability and eco-friendliness, this is of great importance for us, and we believe that it’s important for our costumers and clients, too.
We believe in the new direction of textile print which leads us to a brighter future!
Do you want to talk more about our production? Contact us – we’ll gladly have a cup of coffee with you!
The post Digital Print and Pigment Inks – Get to Know Caspar Manufacturing Process! appeared first on Caspar.
]]>The post Create Fabric Baskets in 3 simple steps appeared first on Caspar.
]]>We all have a lot of things at home that we need every day but don’t have a specific place for this stuff. These are the things we usually overlook – gadgets, chargers, keys, stationery…
To prevent constantly looking for these things, we prepared and tested one simple DIY project – the fabric baskets.
In addition to being practical, they can fit perfectly into any space. We can put one basket in the living room, for TV remote control, chargers, and various USBs, the second in the bathroom for hairpins, rubber bands, and hair accessories, and the third in the bedroom for stationery…
If you have pets, make one for their toys.
The possibilities are endless, you only must choose the size and design.
How to make Fabric Baskets?
This DIY project includes a little bit of sewing, but nothing complicated.
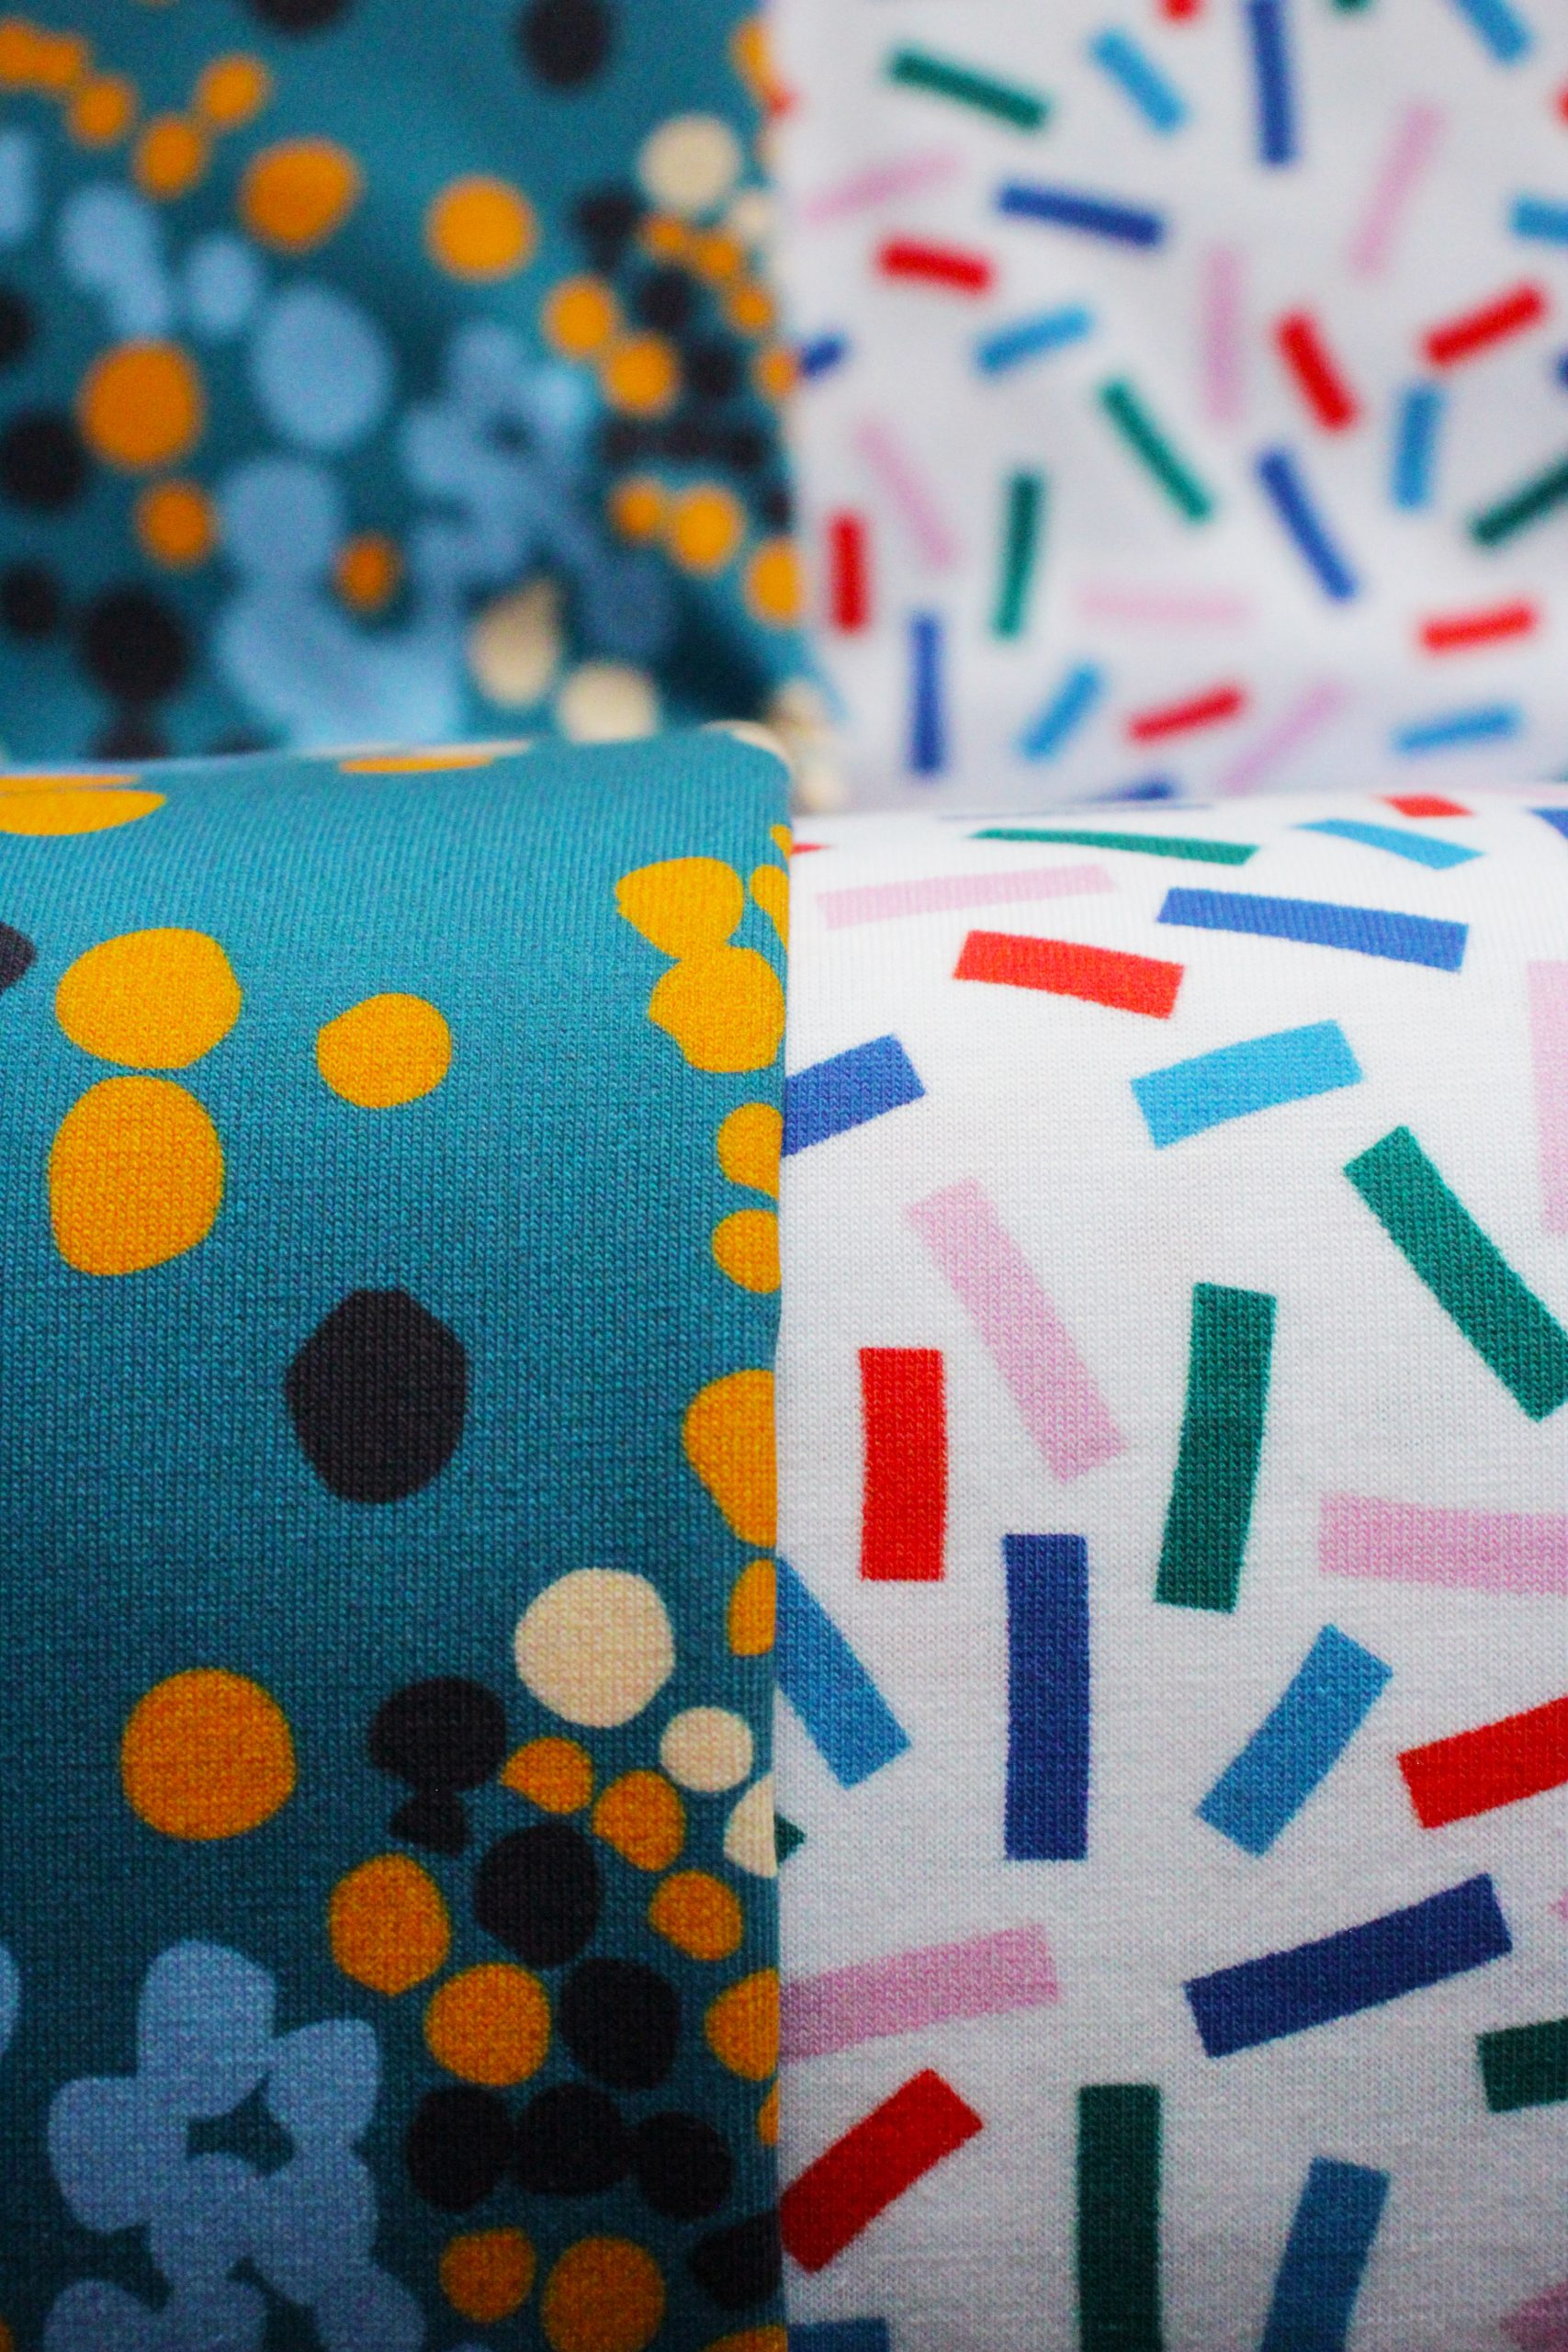
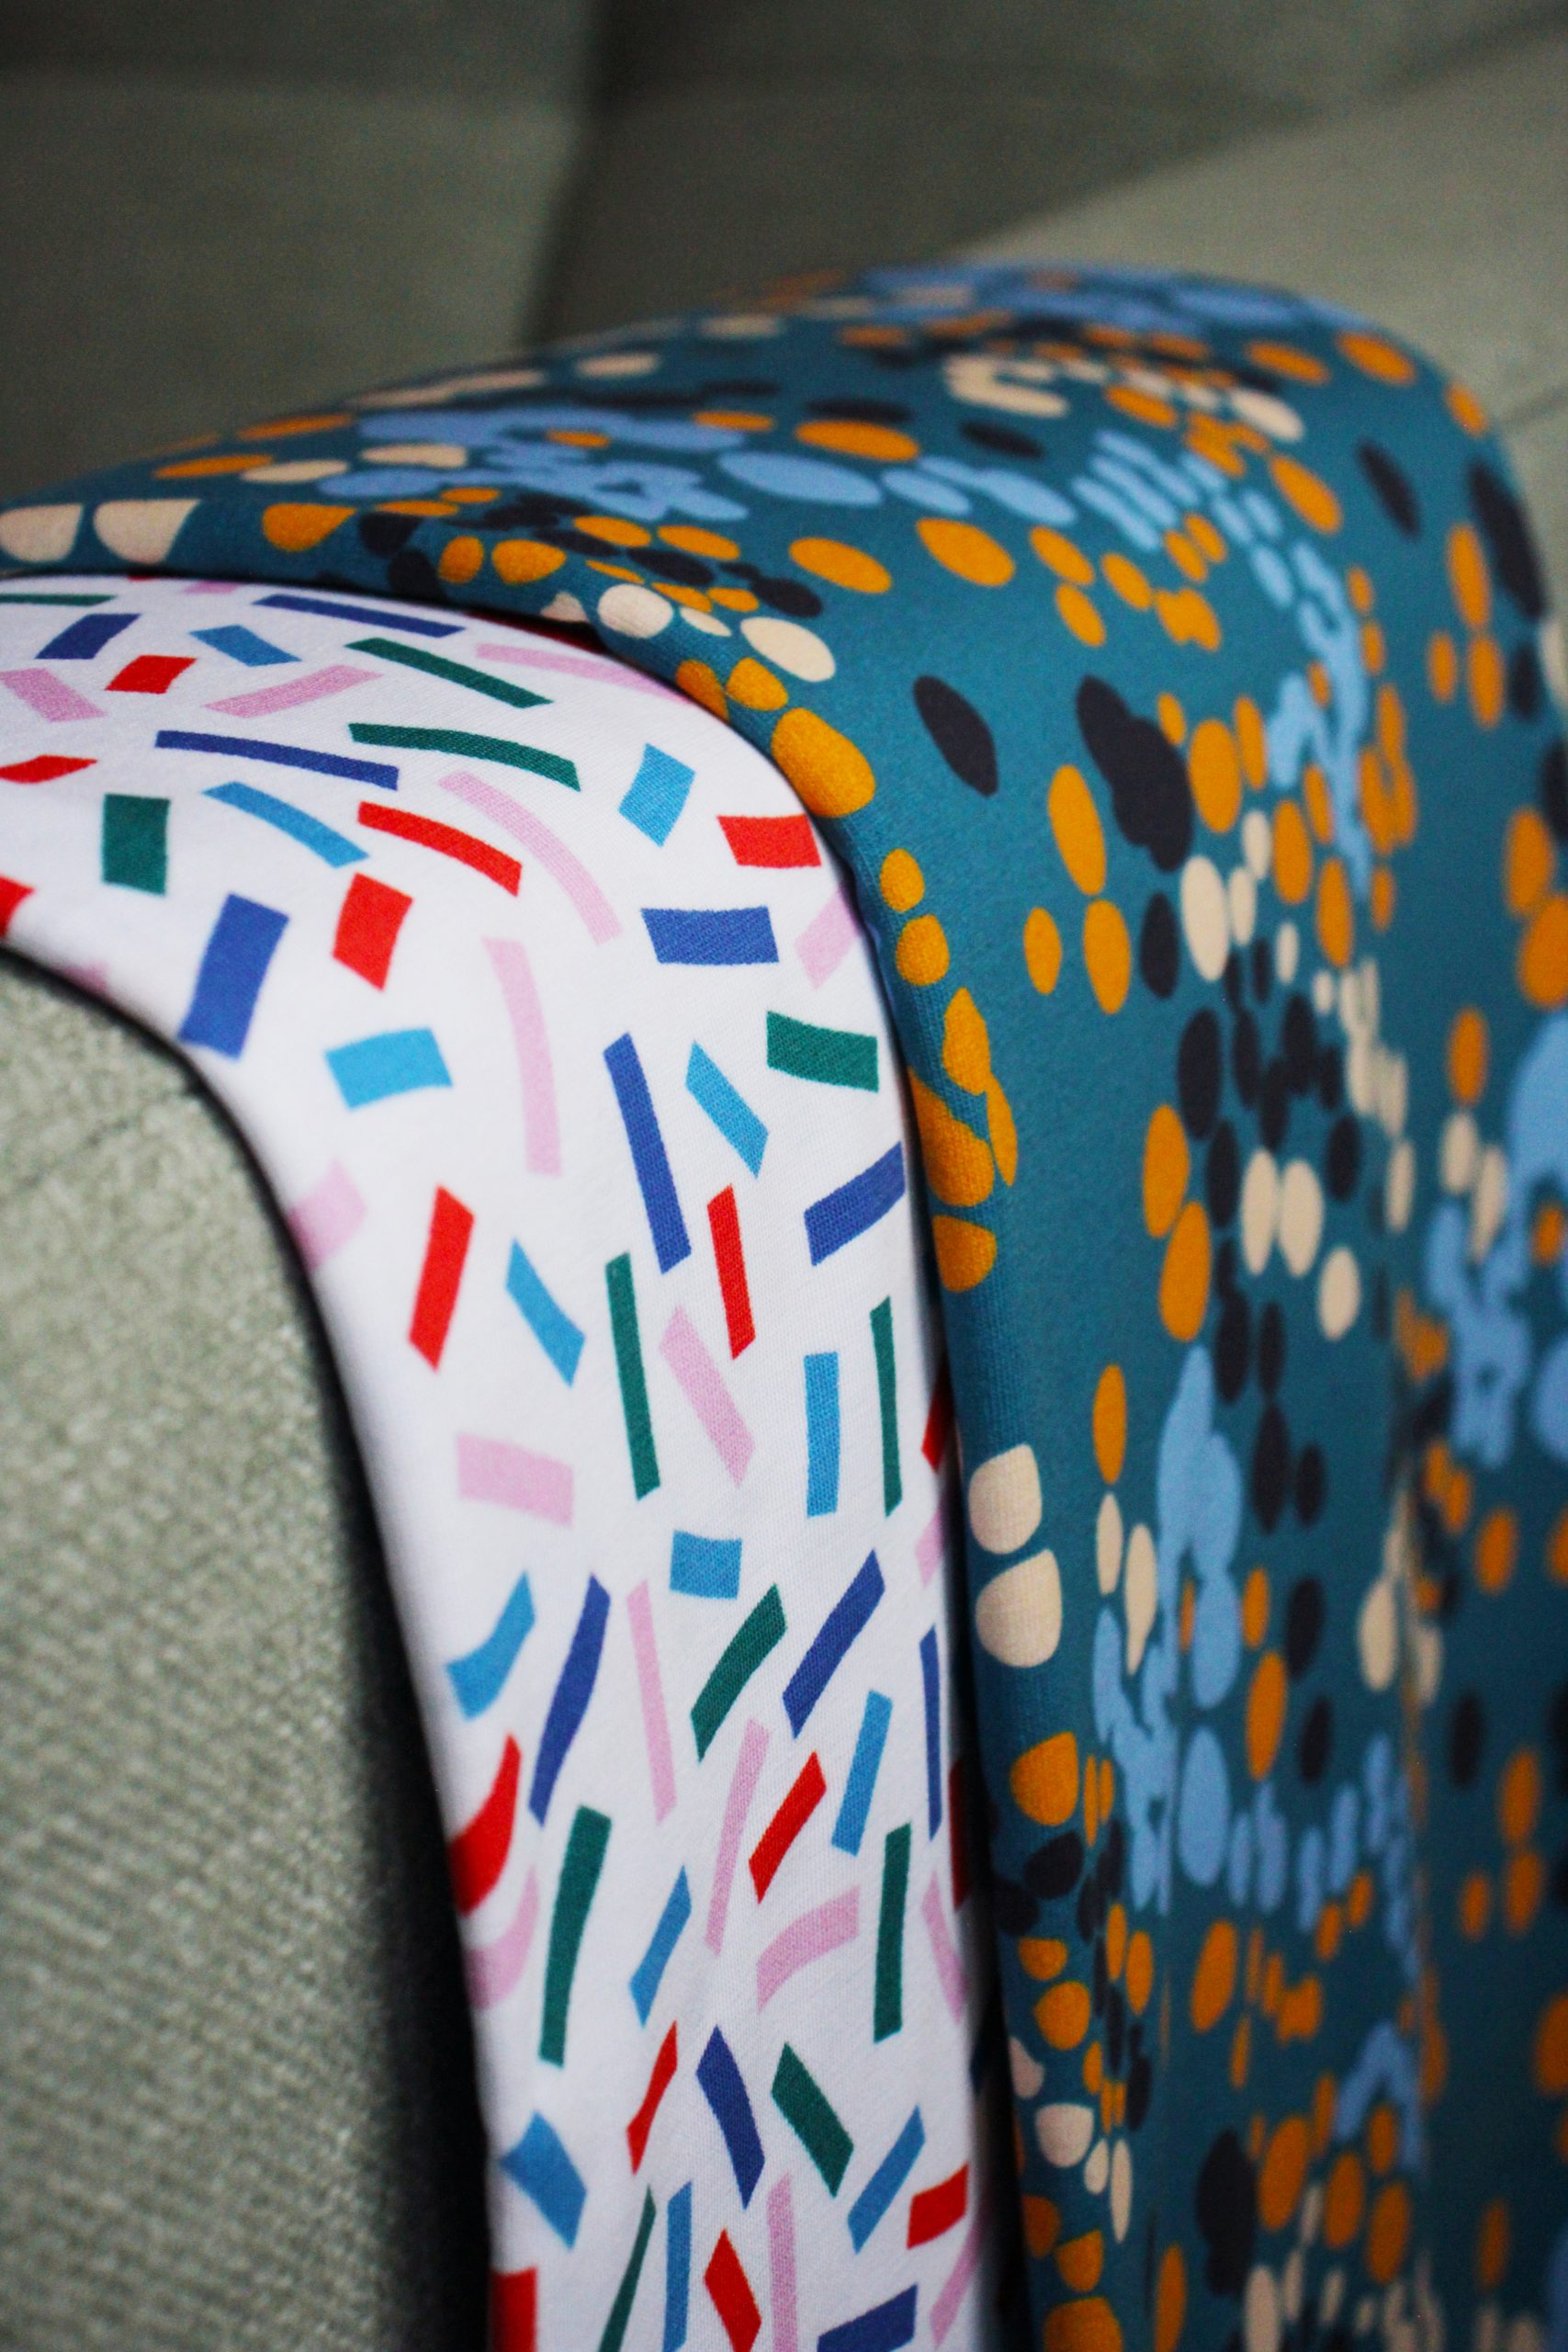
To make the baskets durable, we decided to use Cotton Sateen fabric with colorful designs – Fire, Fish basket, Strips and Charming flowers. You can choose any design you like from our base.
So let’s go!
The list of what you need:
- 100 cm x 145 cm of Cotton Sateen fabric
- Rotary blade or fabric scissors
- Straight edge ruler
- Needle and thread
- Sewing machine
Step 1
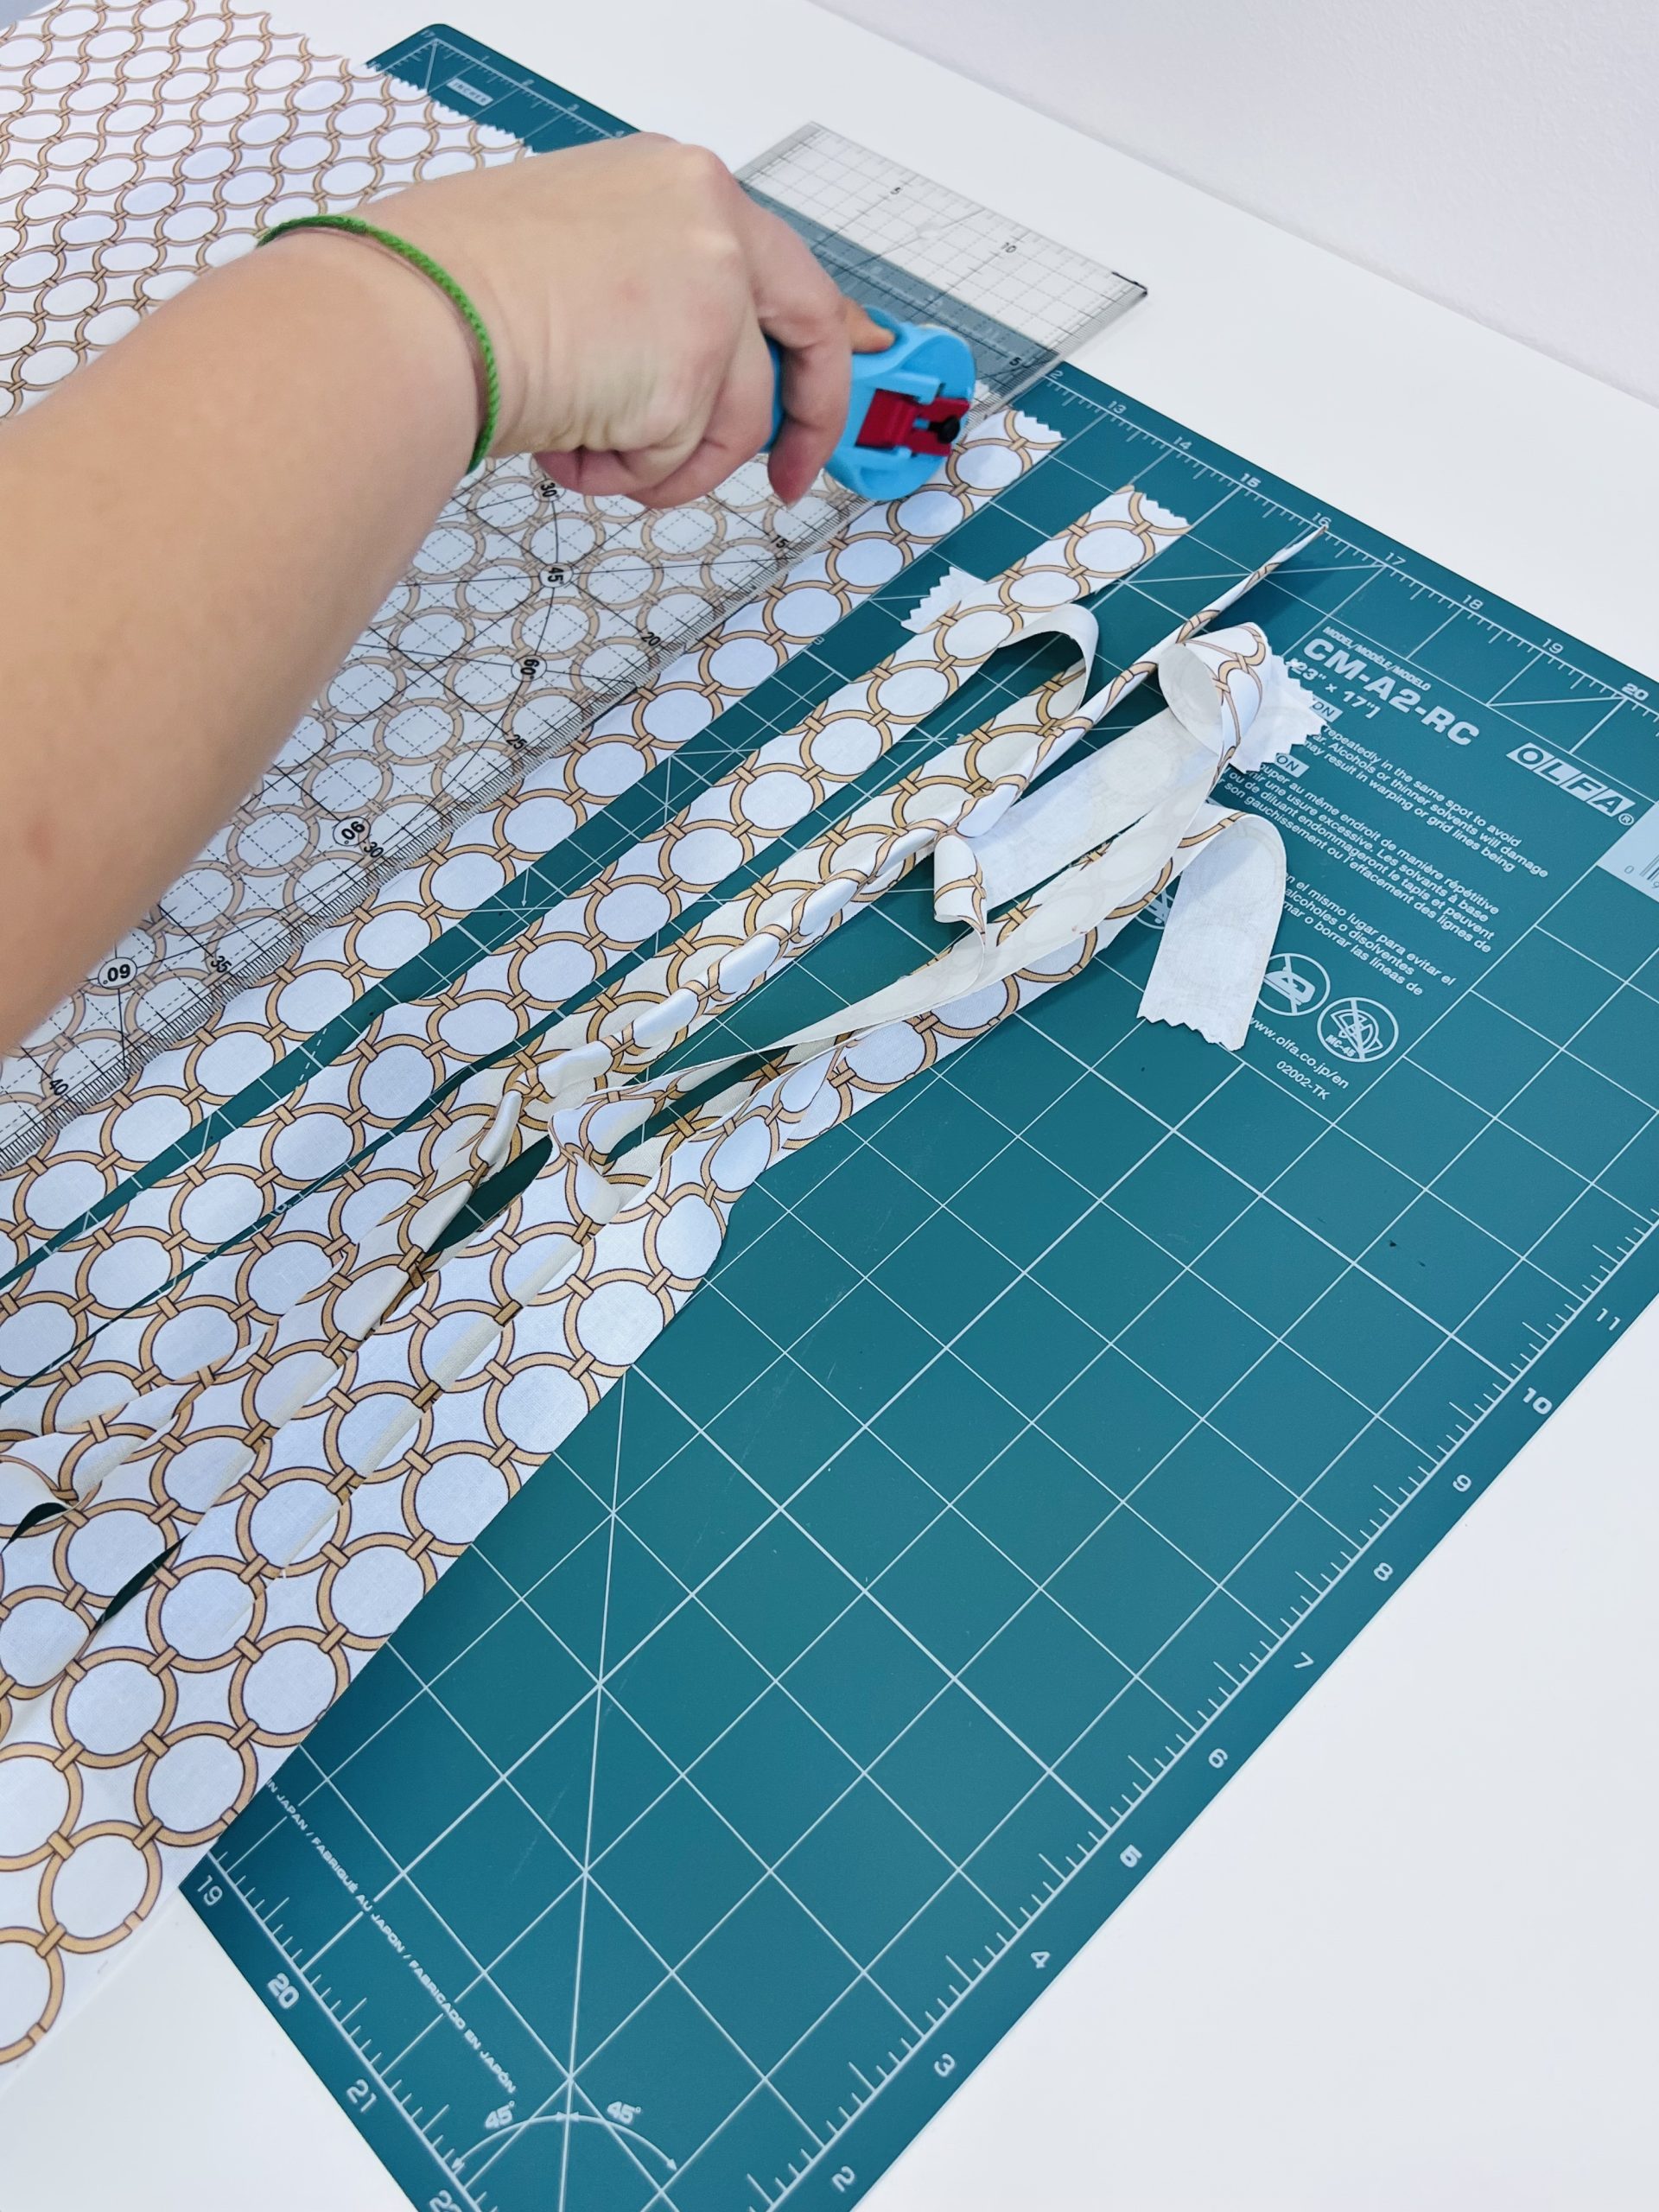
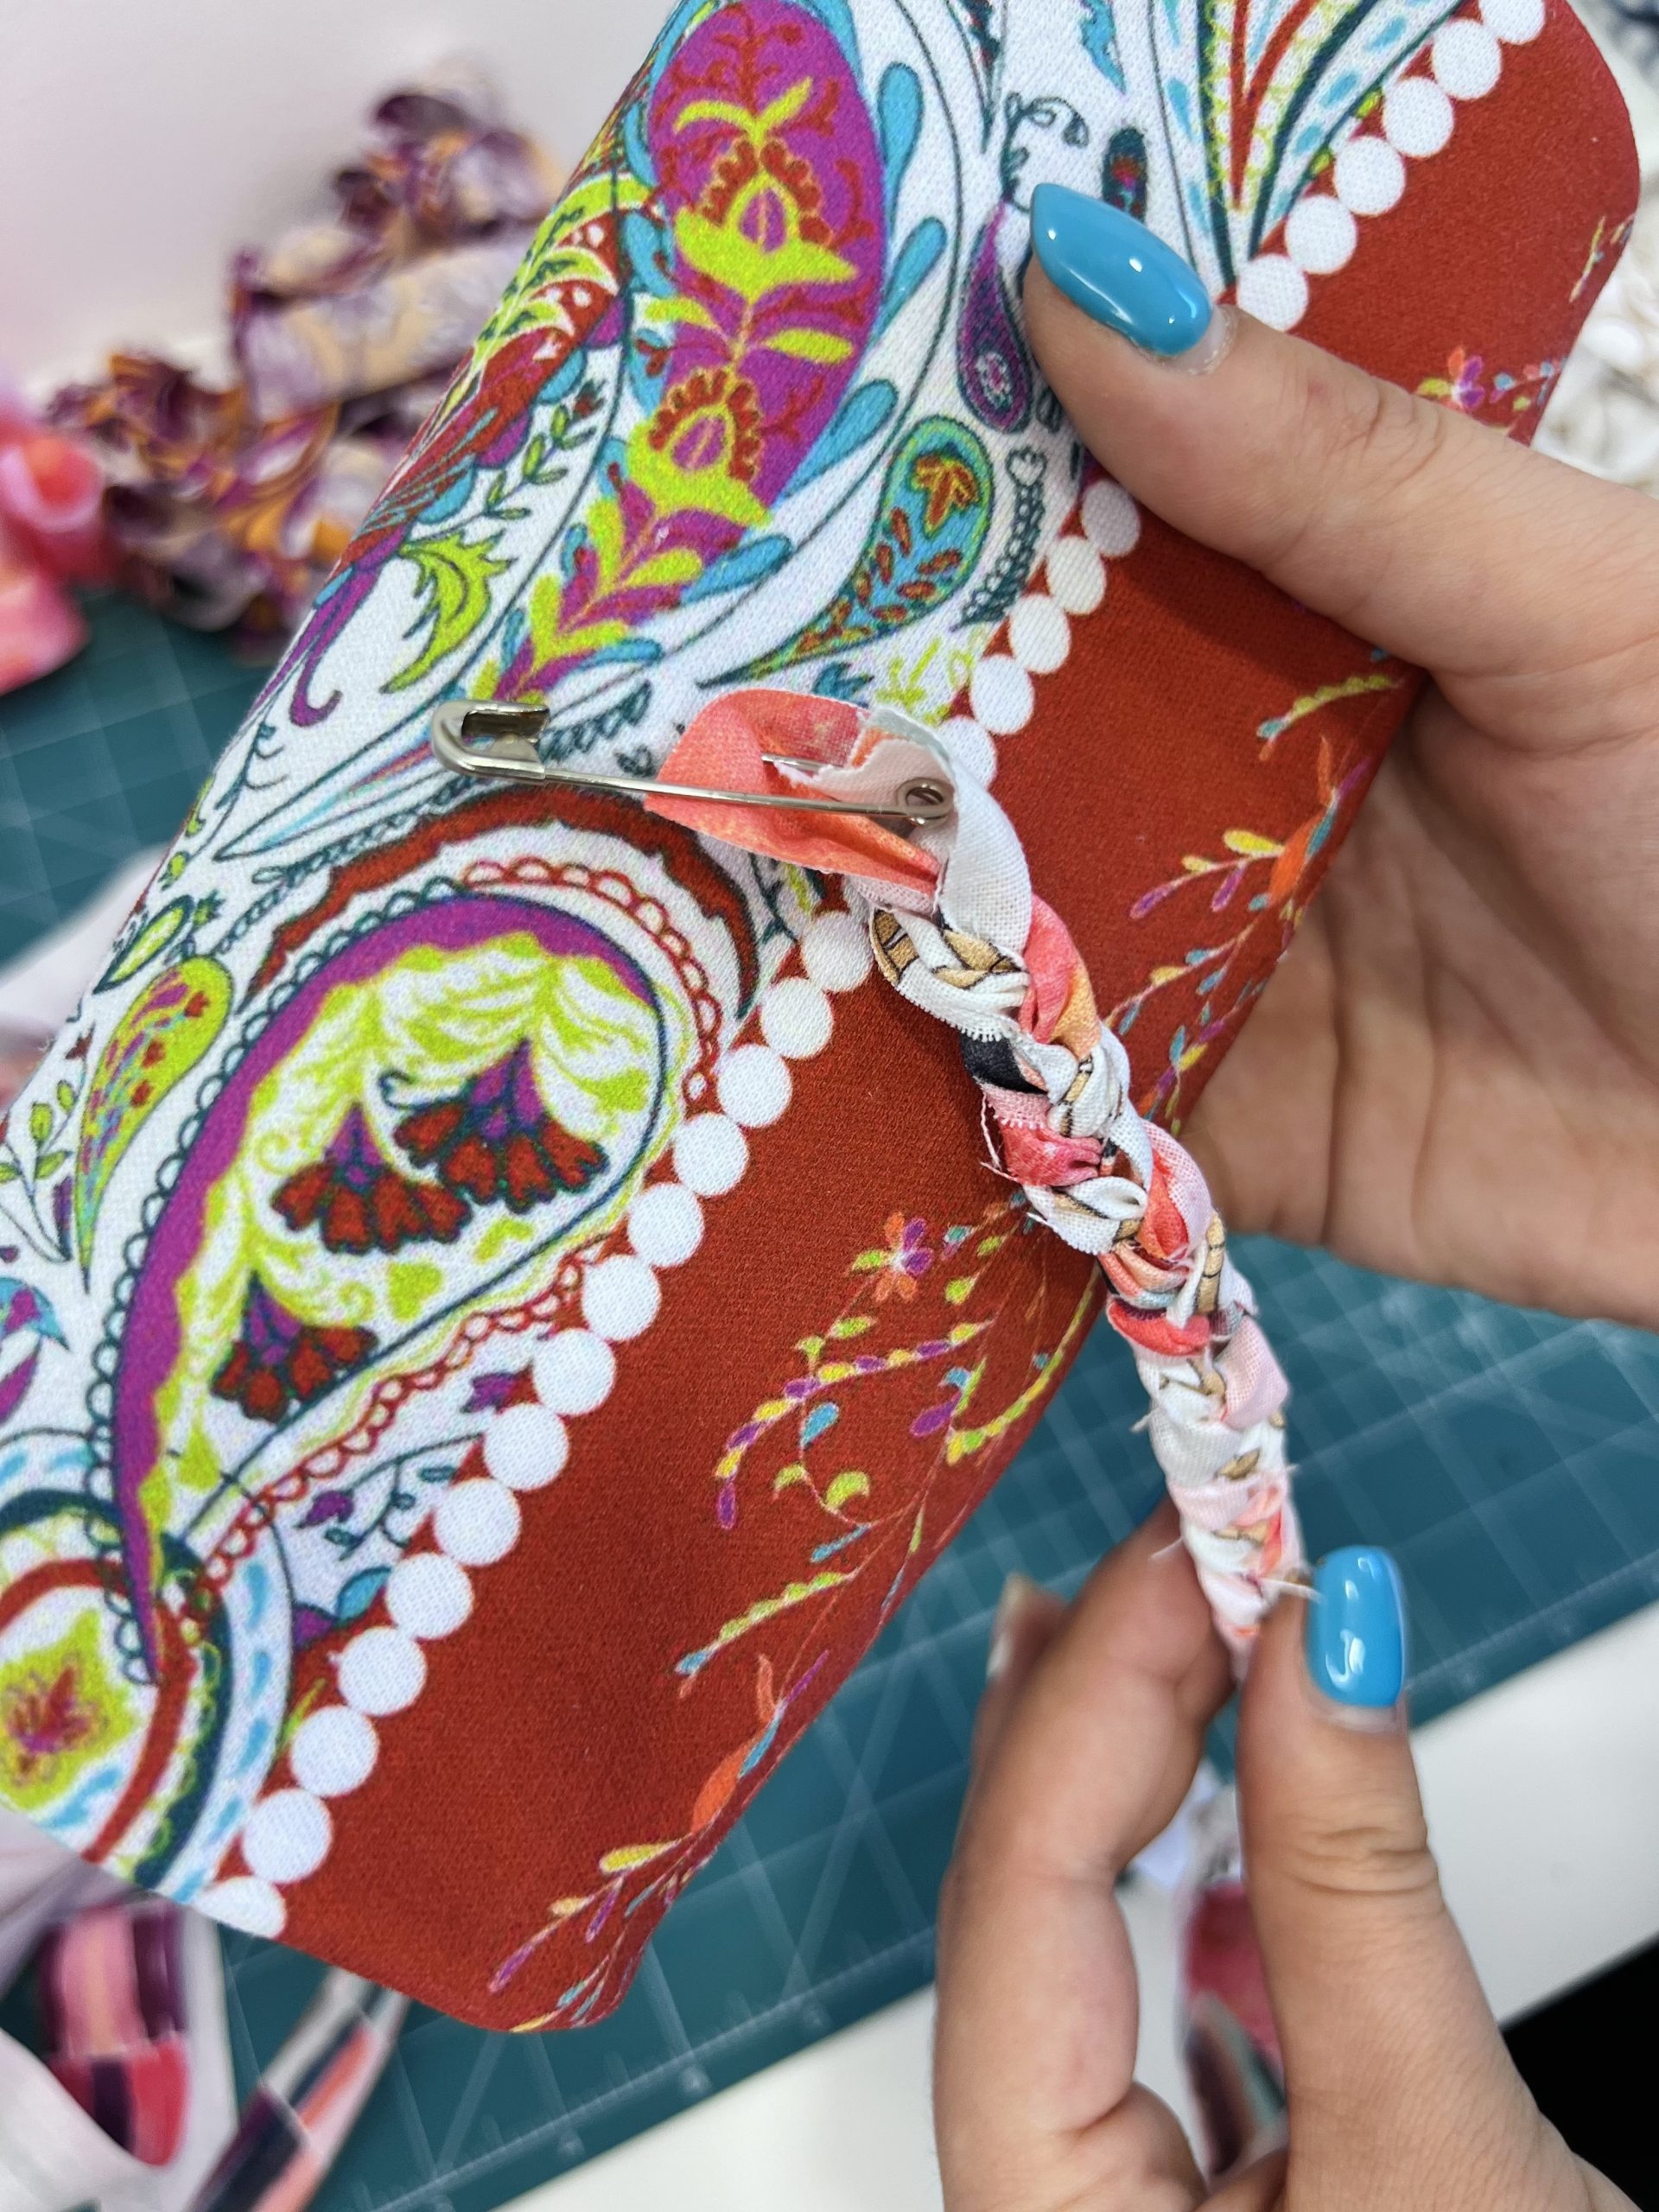
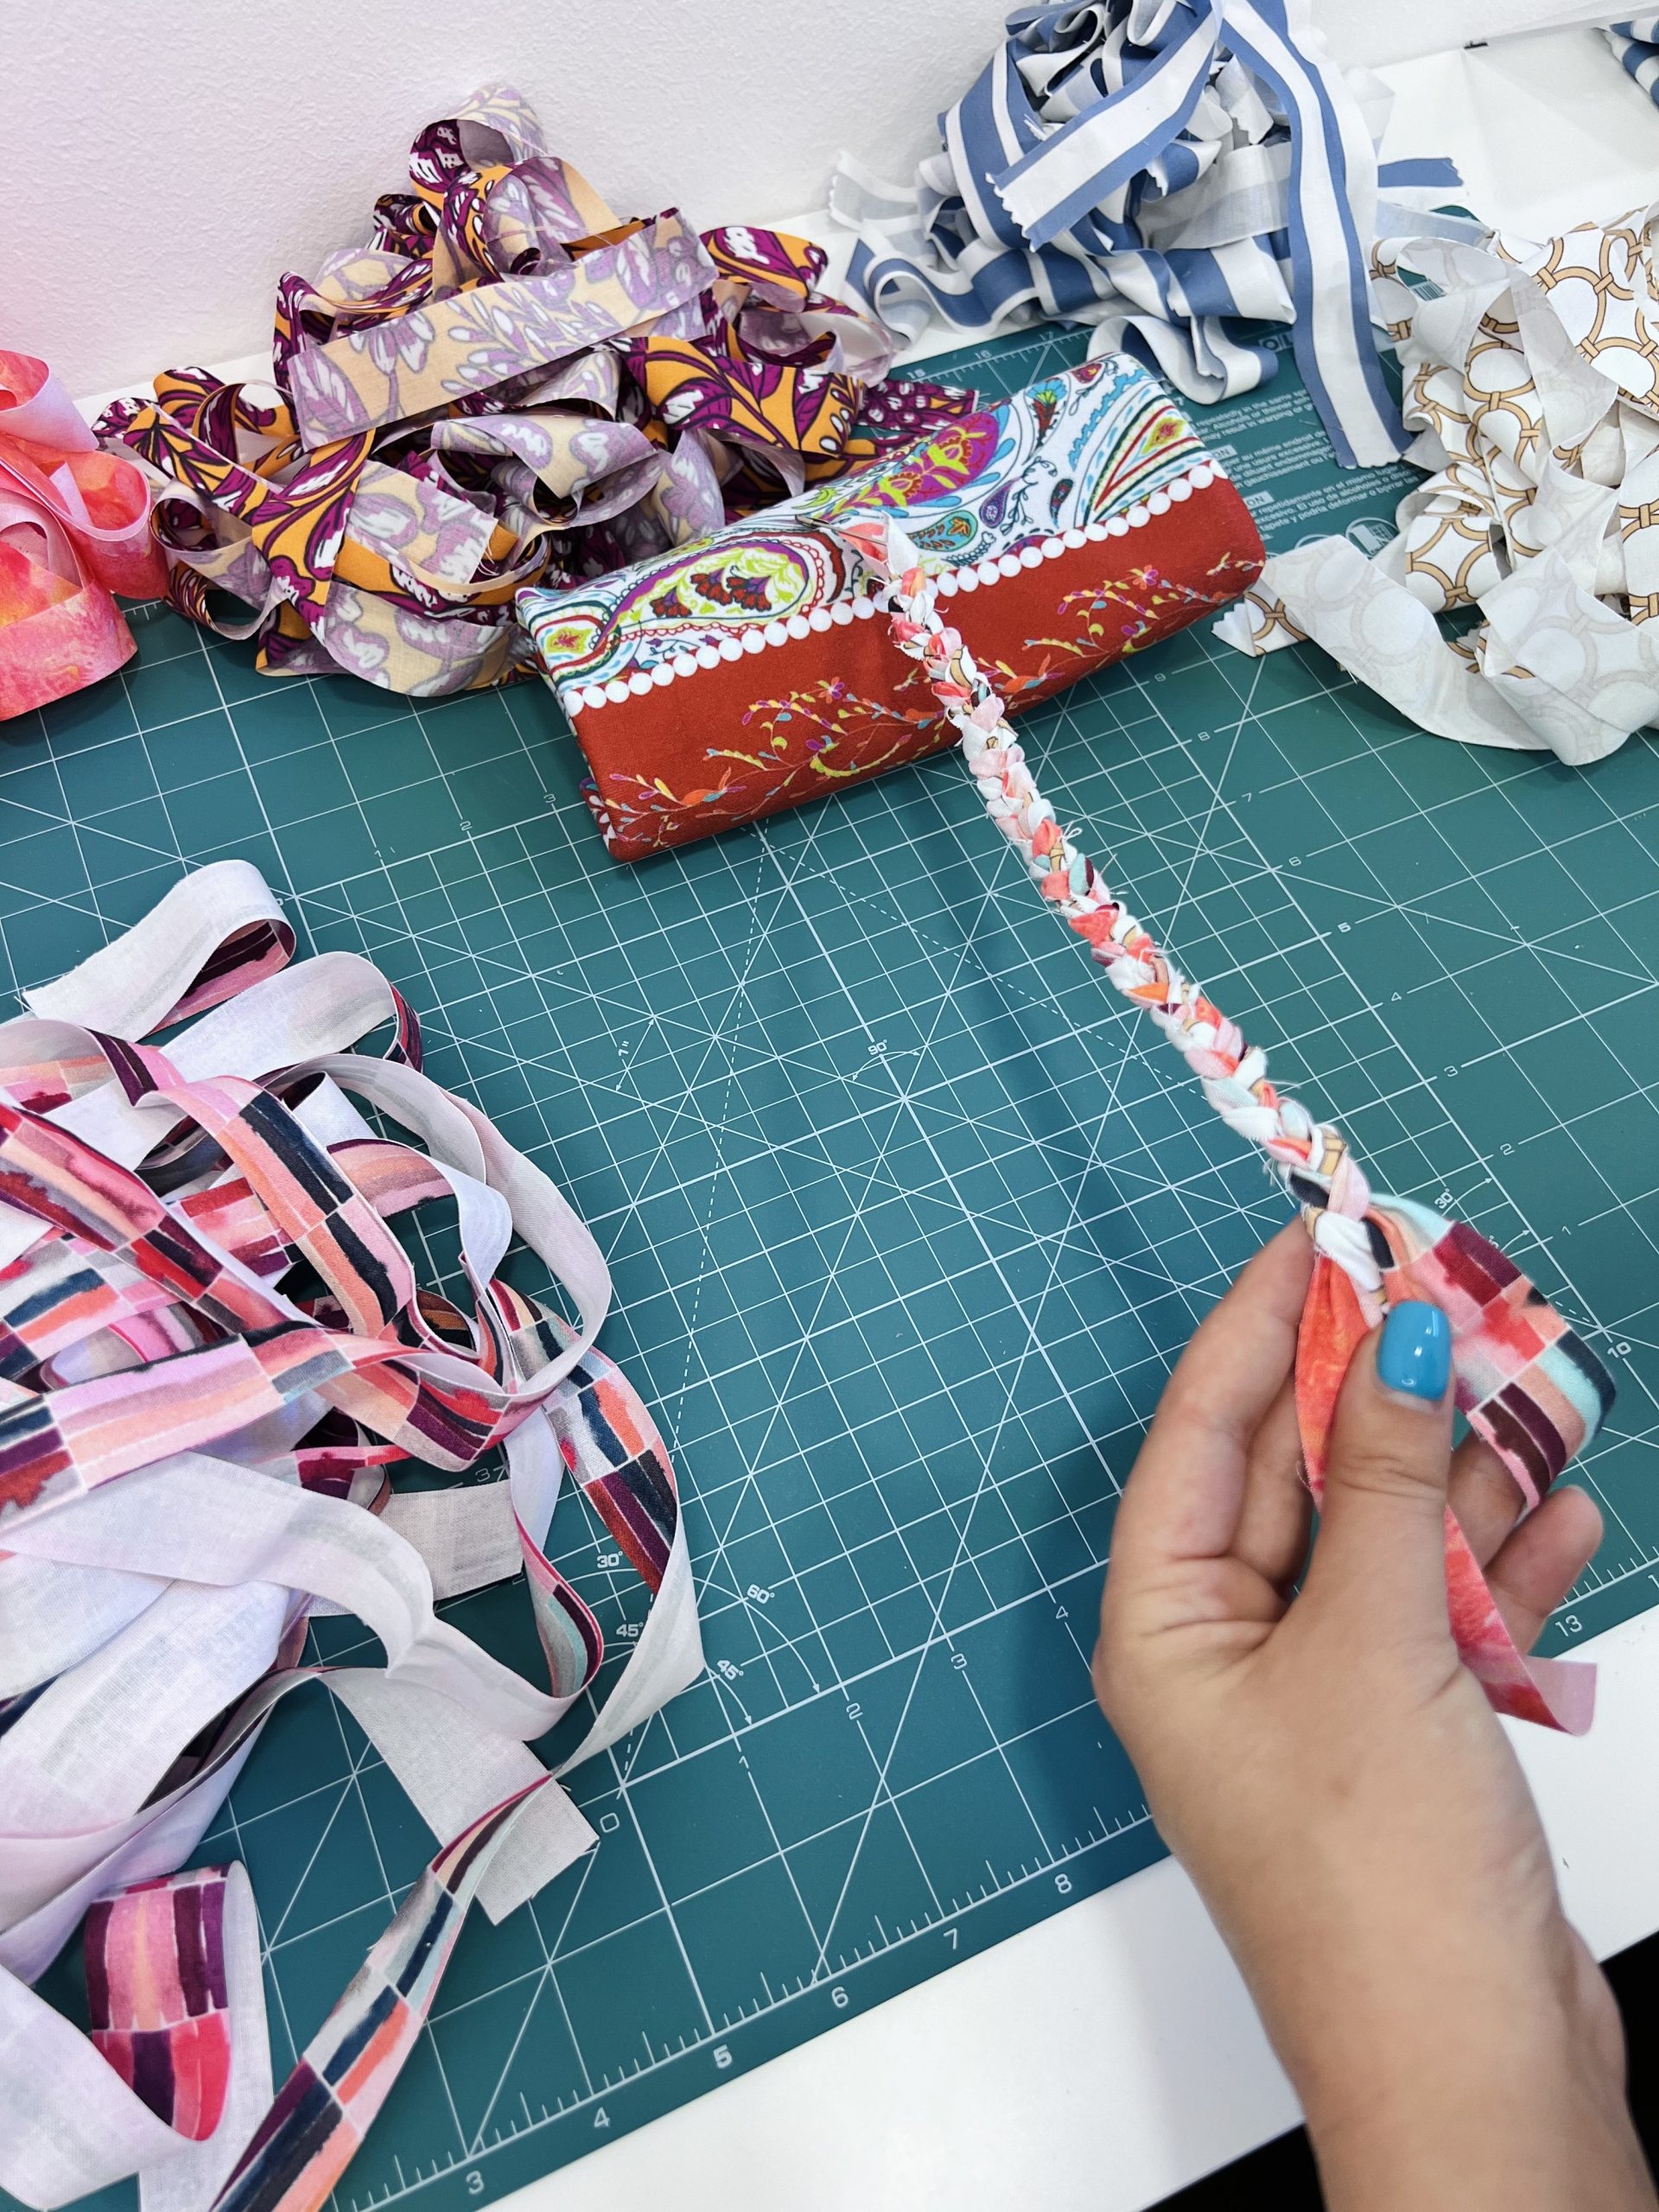
Place the fabric on a cutting mat or if you don’t have it, place it on a table. With the straight edge ruler and rotary blade or fabric scissors cut three strips in width of 2.5 cm.

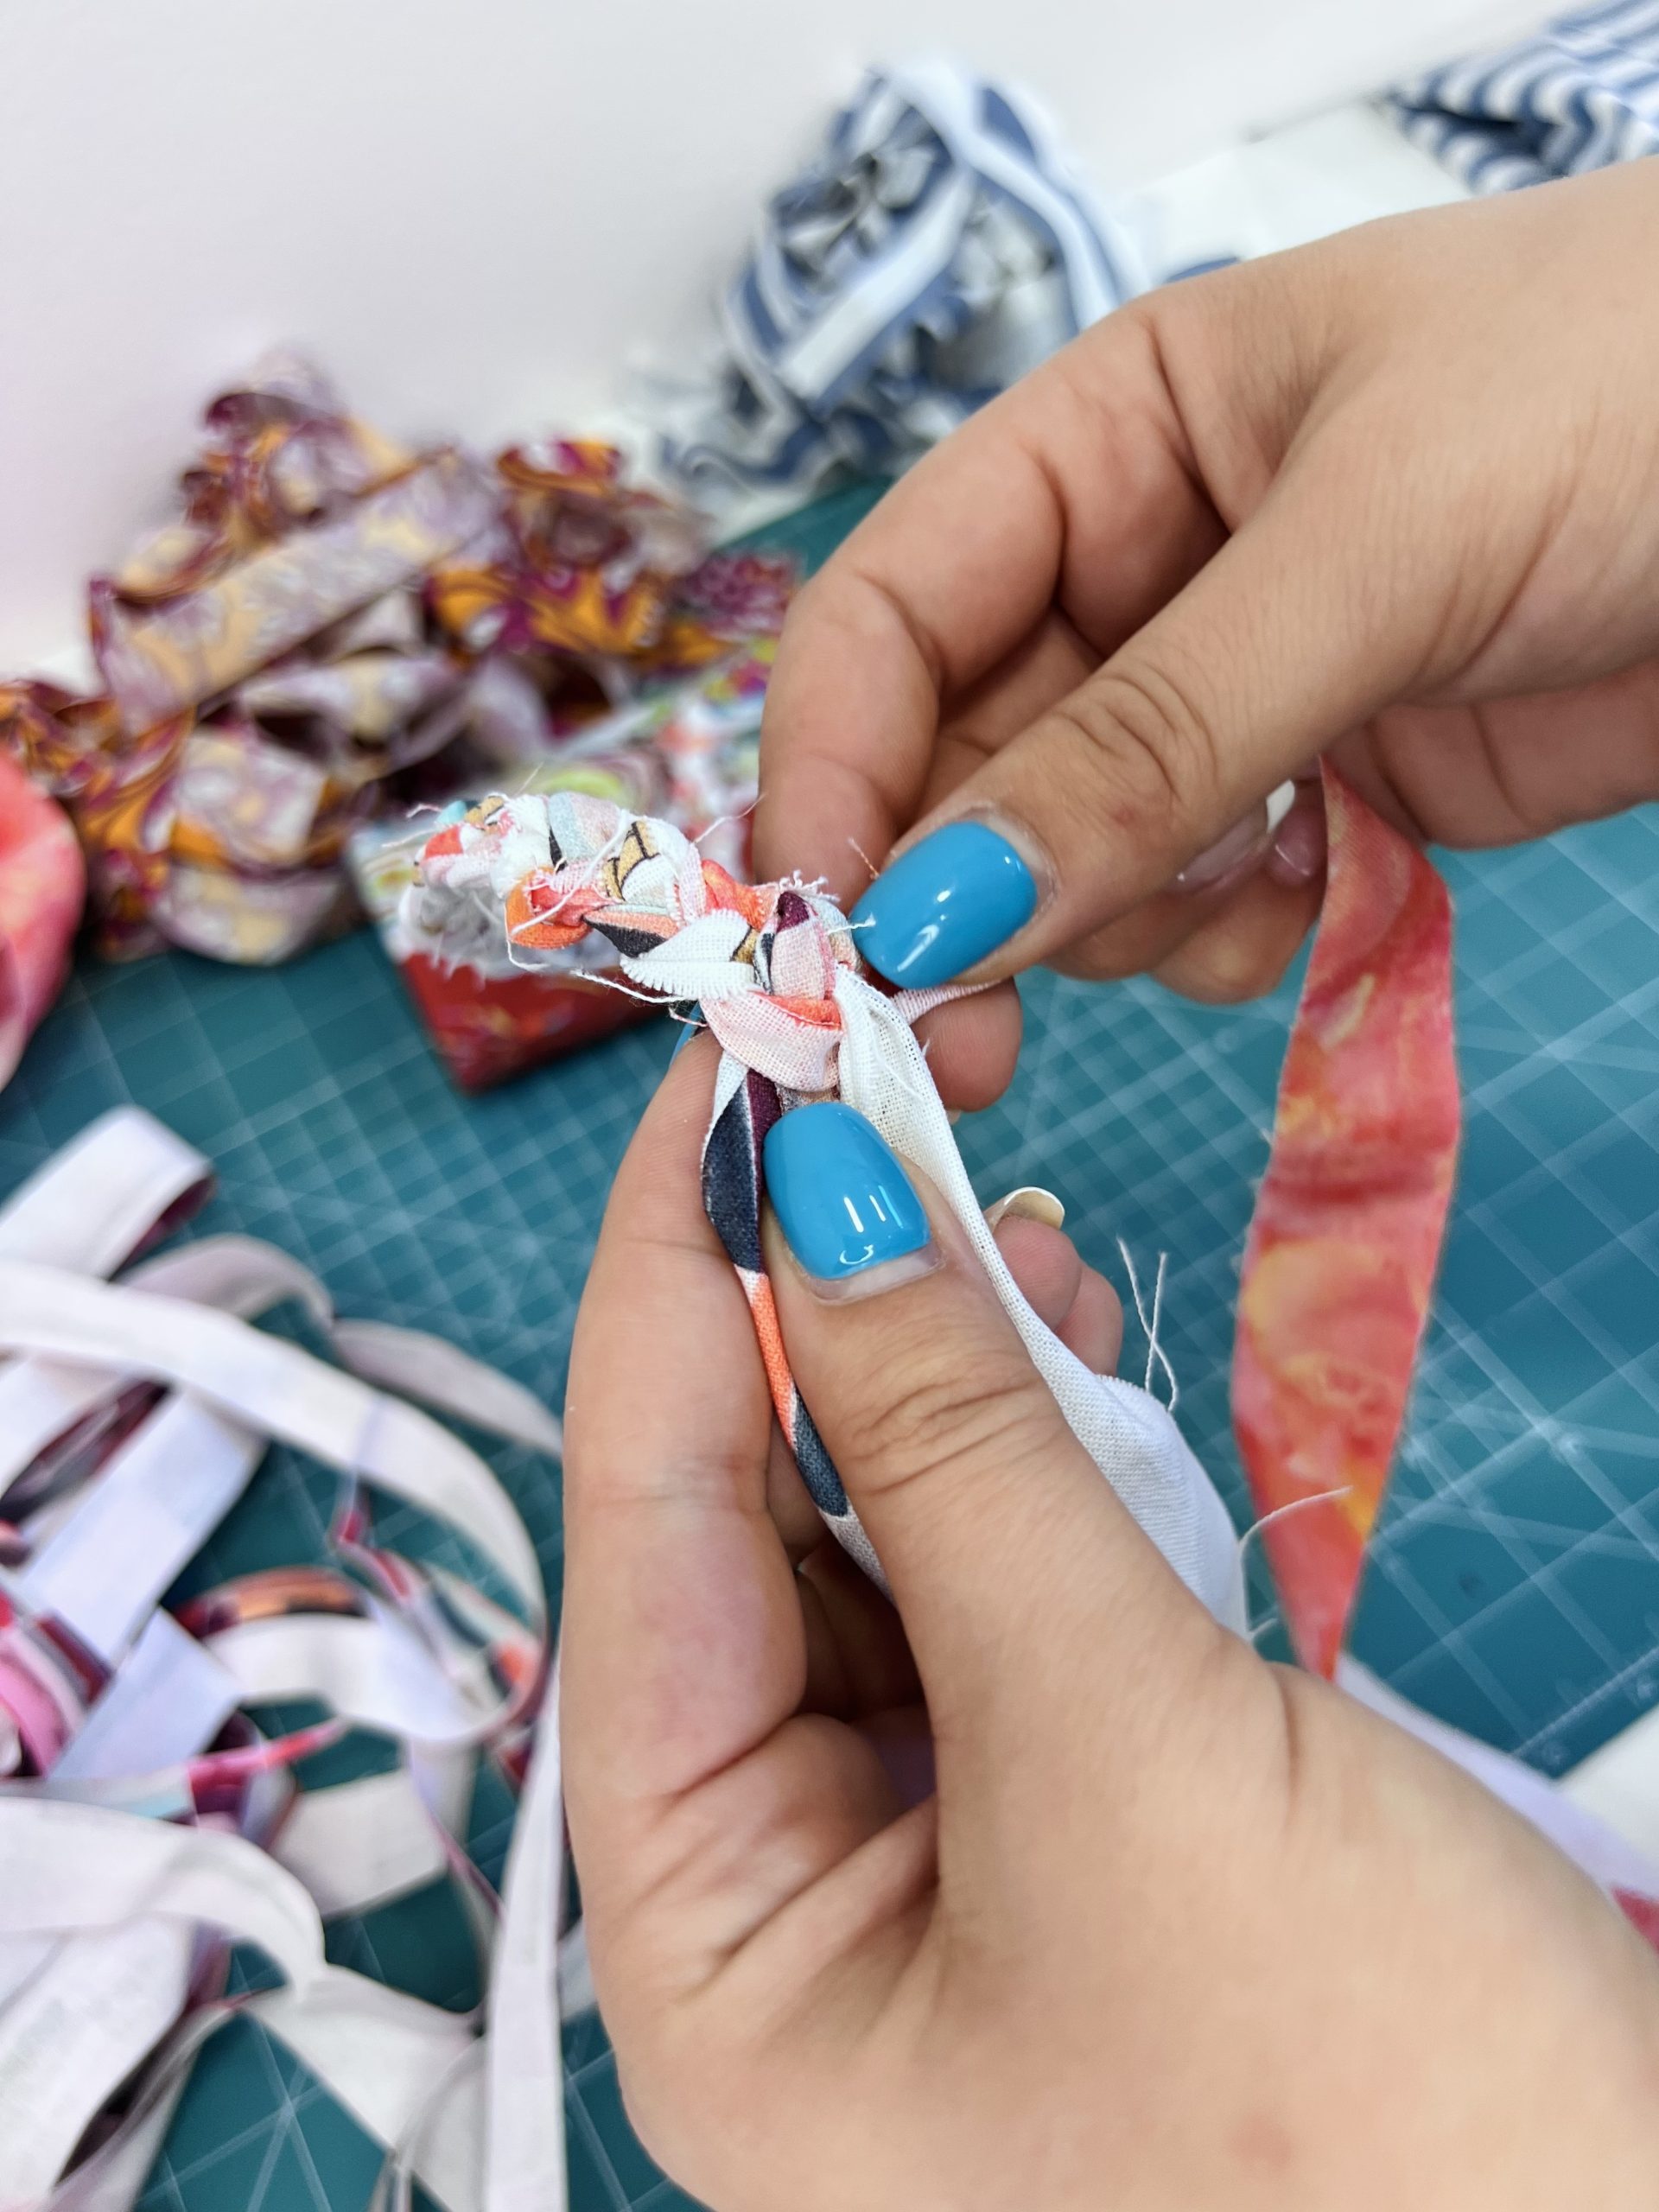
Step 2
Fasten the fabrics with a needle at the top and start braiding. If you run out of strips, add them to the ends of the previous strip and continue knitting.
Step 3
In the last part, it is necessary to sew. Turn the resulting braid around and sew so that the edges bring together. After a few circles, the basket will begin to form.
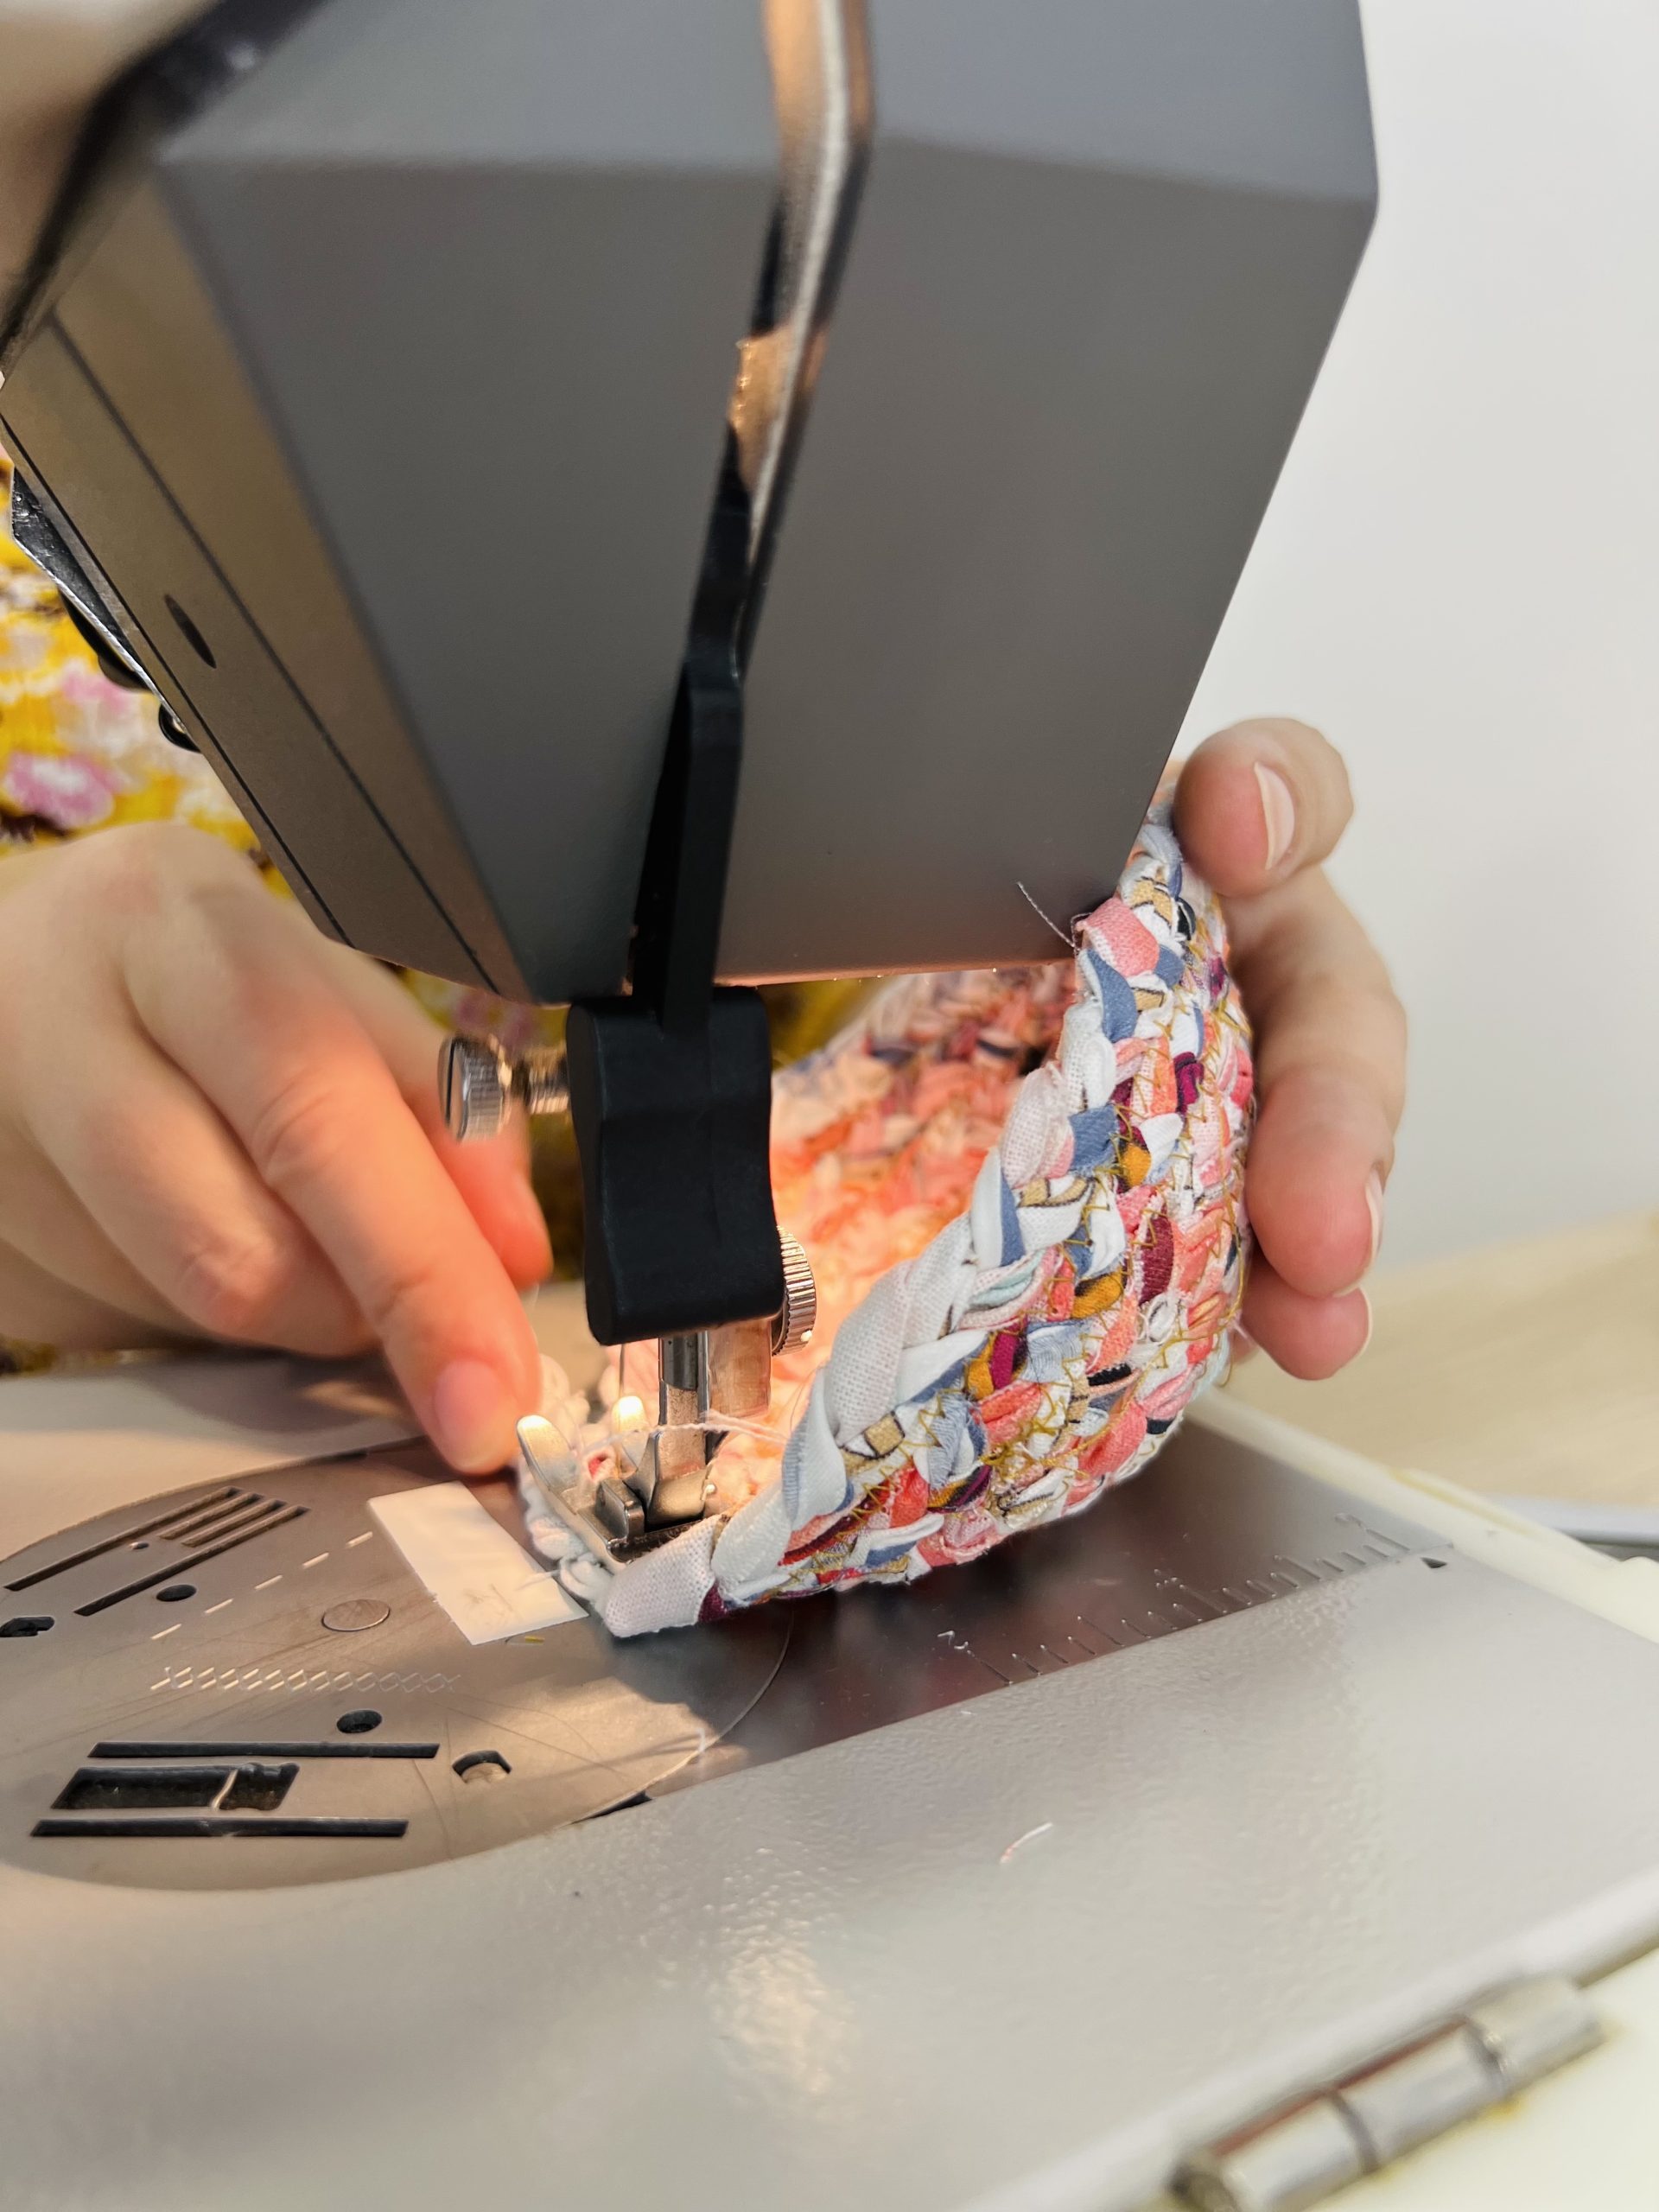
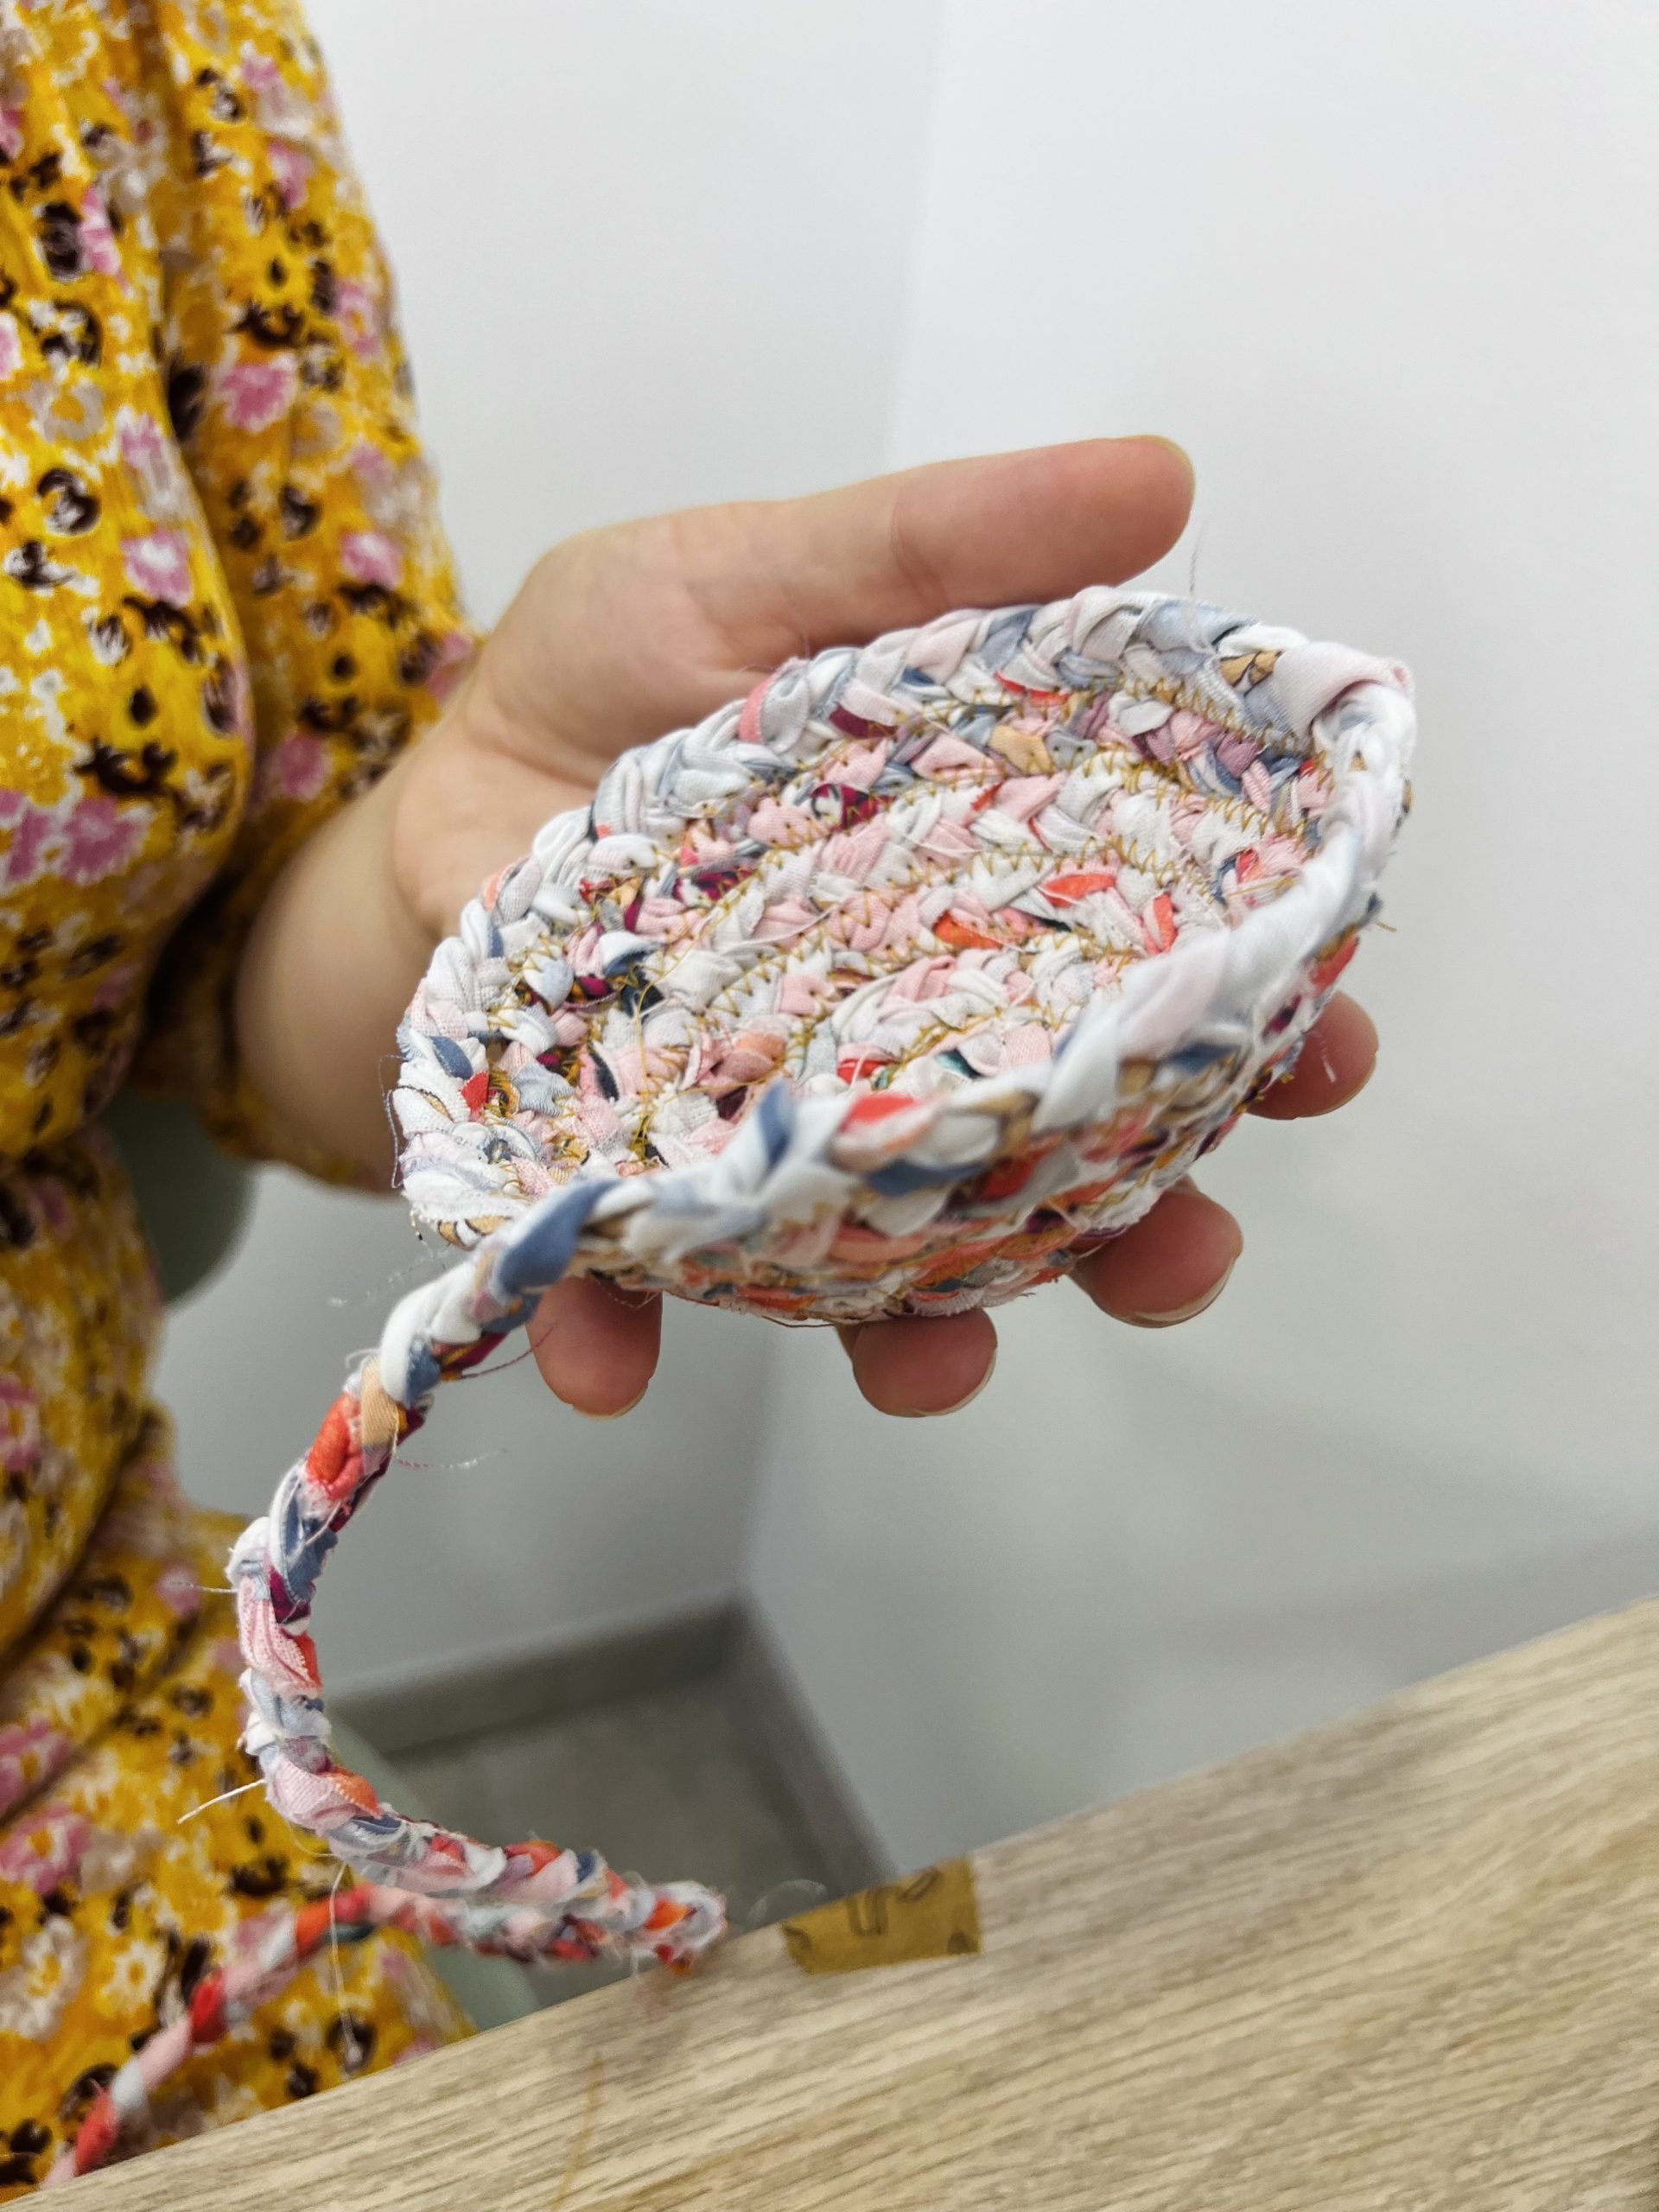
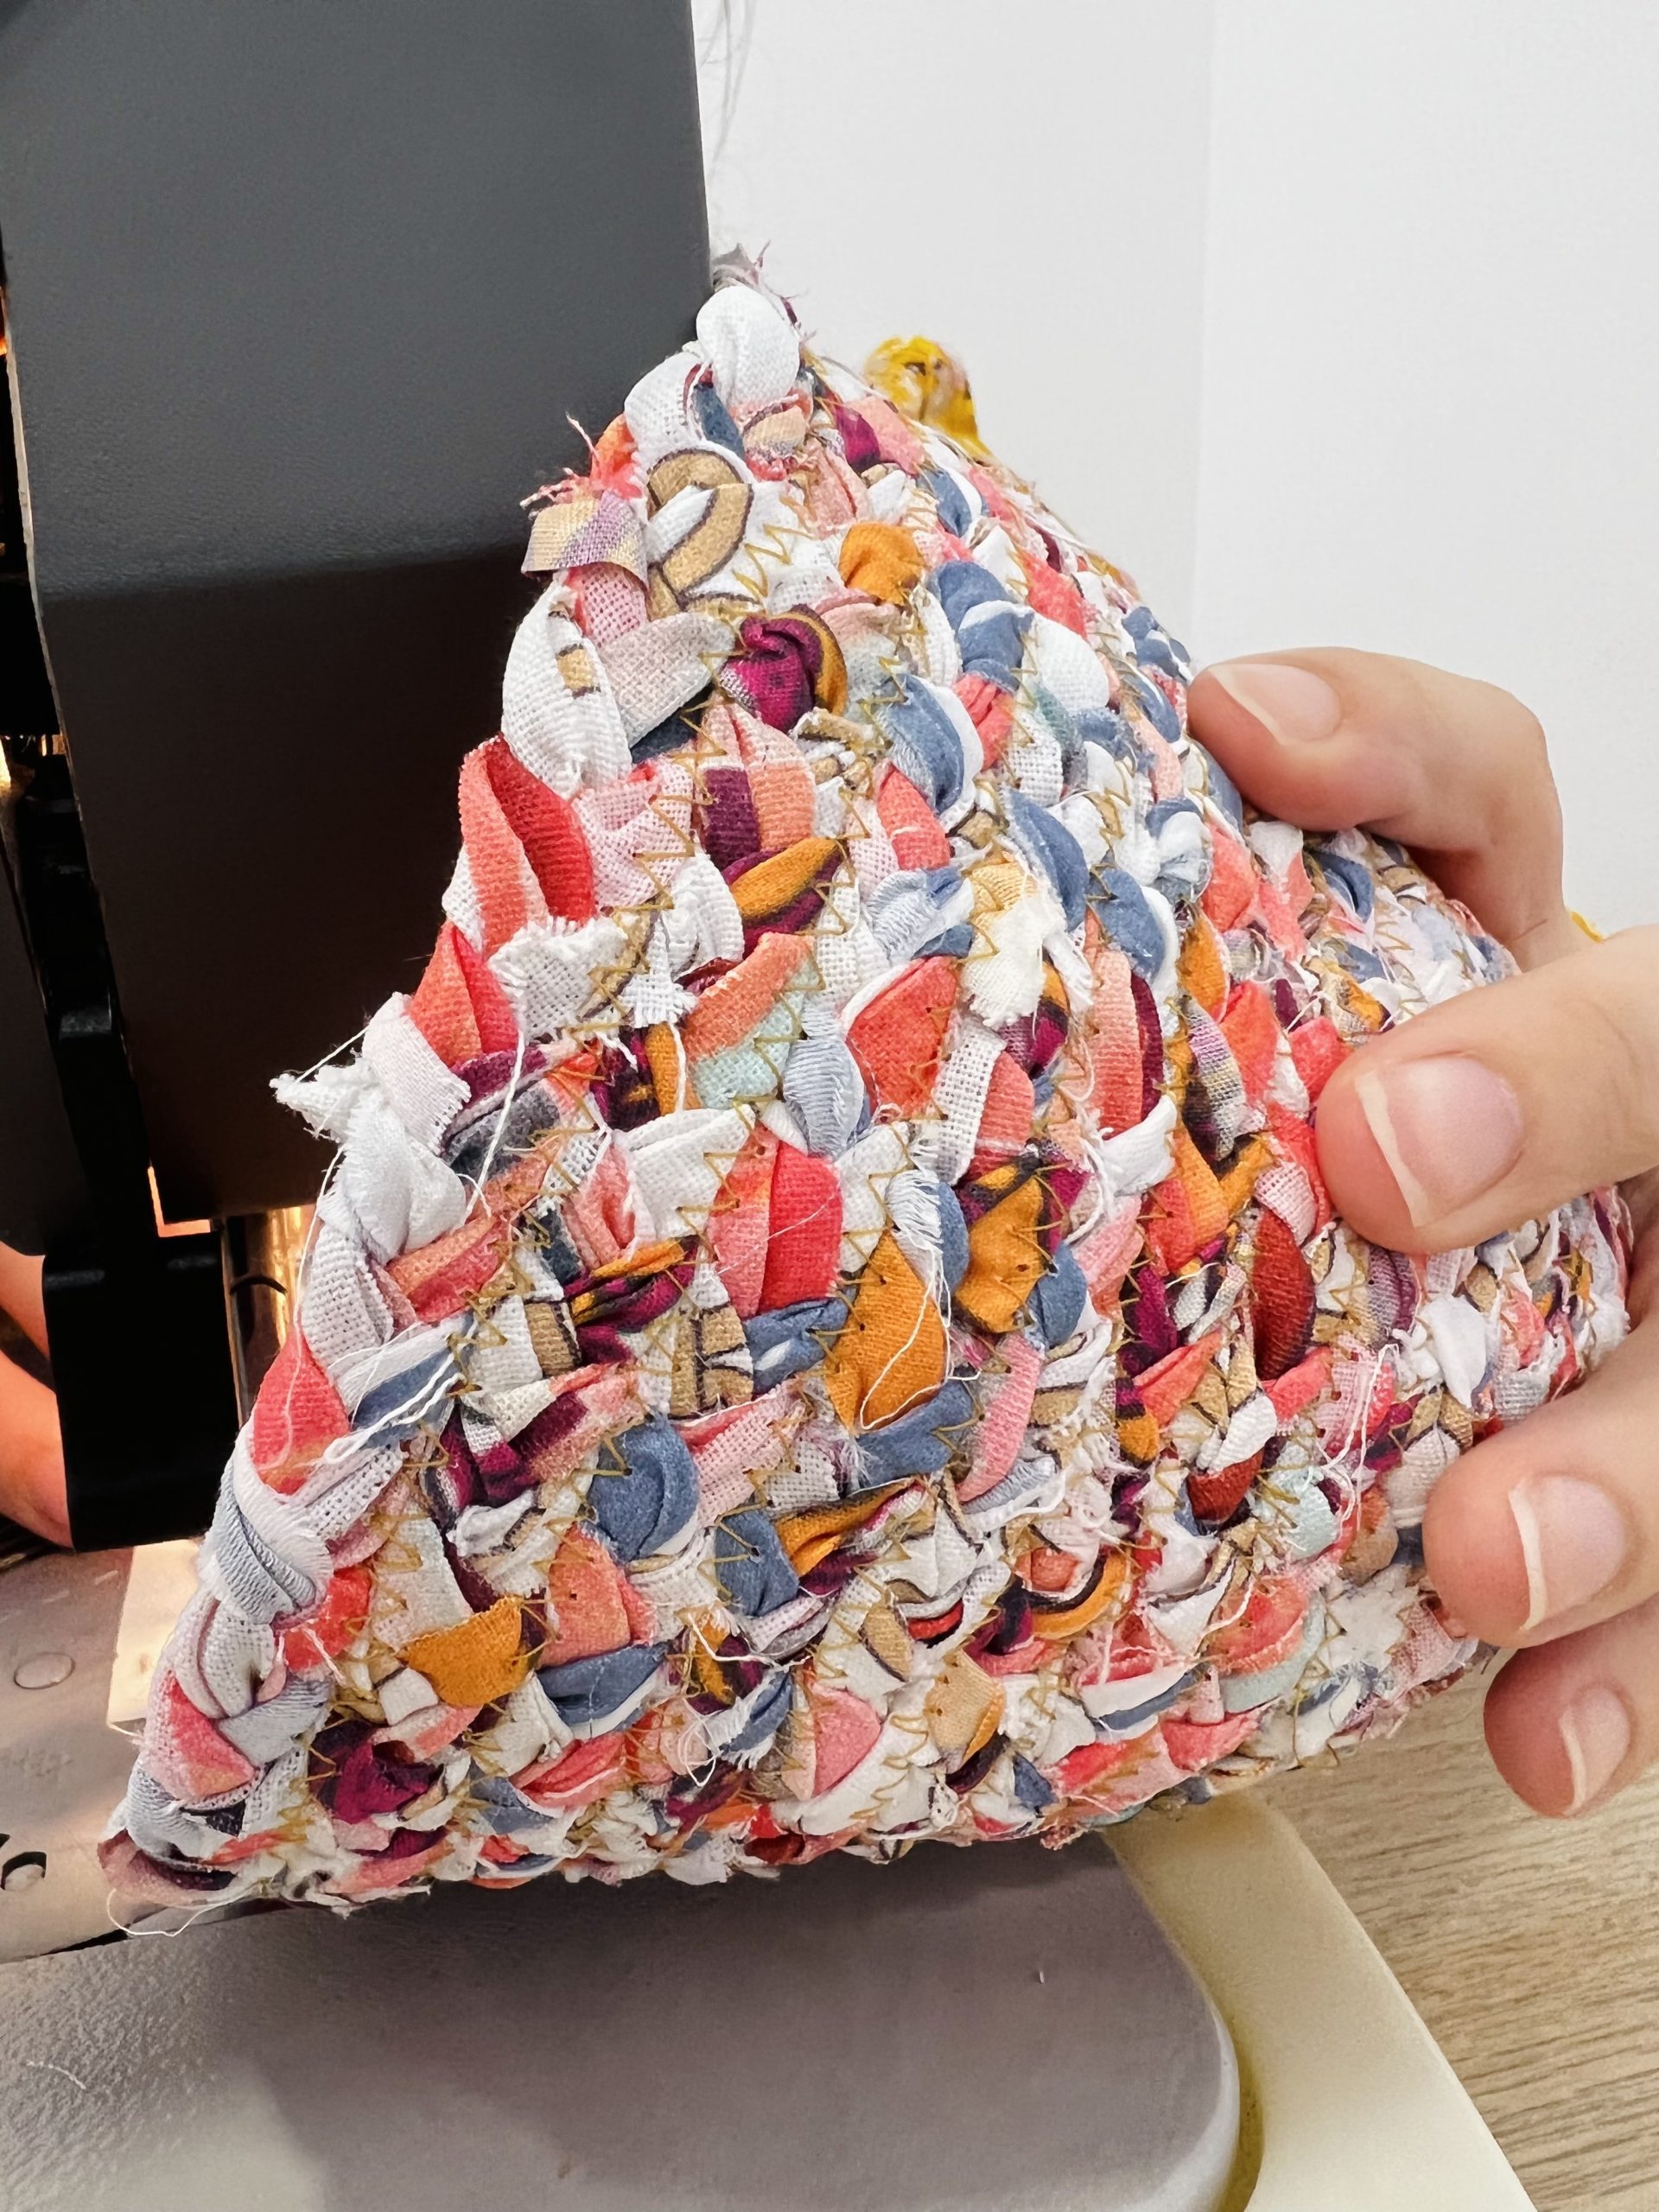
And that’s it!
Now you can make a lot of smaller or larger colored fabric baskets for things we lose easily.
If you want to try this simple and fun DIY project, go to the Fabric Types page and select Cotton Sateen. You can also use Classic Cotton or Cotton Twill fabrics for this DIY project.
Send us pictures and videos of your colorful fabric baskets or post them on Instagram with the hashtag #caspardiy. Can’t wait to see your lovely DIY projects.
Watch the video below to make it easier for you to make fabric baskets.
The post Create Fabric Baskets in 3 simple steps appeared first on Caspar.
]]>The post Classic Cotton T-shirt: The Eternal Style Icon appeared first on Caspar.
]]>Classic, short sleeve cotton shirt.
A piece of clothing everyone has in their closet. It comes as no surprise – you can wear it anytime, anywhere.
Cosy in bed? T-shirt. Walk around the block? T-shirt. Headed to the gym? T-shirt. Going out? T-shirt.
These fashion chameleons can be retro, modern, classic, fancy or casual. They are worn by men, women, children, grandmas and grandpas; they can be classic white or in a thousand colours, with or without print.
T-shirt is a piece of clothing that will always be fashionable, and we wouldn’t want it any other way.

Well then, how did the T-shirt come to be and when? The answer is…
… a long, looong time ago!
How long, you ask? In the Middle Ages!
That’s right, classic white cotton T-shirts first appeared in the Middle Ages as undergarments, their job was to stand between the skin and the rough exterior clothing. They also had these strange tails that were tied between the legs so that the shirt could stay put.
Luckily, 19th century modern technology enabled mass production and simpler sewing processes, which in turn made these models more appropriate for the body and removed the need for those weird tails.
Women were perhaps the luckiest ones when T-shirts appeared as undergarment because they soon replaced those uncomfortable corsets. However, the first ones who wore T-shirts as clothing, and not underwear, were British sailors. Working-class men saw them and decided to follow this trend.
And then, pop culture led the way to a T-shirt boom!
Rebel hunks such as James Dean and Marlon Brando made T-shirt a fashion trend in the 50s and 60s. Female style icons such as Brooke Shields and Kate Moss grew fond of it, it was used to send social activists’ messages, musicians decided to use it as band merch, and today it walks the catwalks around the world.
To sum things up, from Middle Ages undergarment, our classic cotton shirt became a symbol of high fashion. What a time to be alive!


Why cotton?
T-shirts come in many forms and can be made of various materials – cotton, polyester, viscose, well it can even be made of jute if you like such a thing. However, at Caspar we really, really like cotton. Why?
Because it’s so cosy! Because a cotton T-shirt can be worn anytime, anywhere, for any occasion – perhaps it could even make an appearance at a wedding. Unless it was worn by the bride?
In any case, cotton T-shirt is a piece of clothing that is equally loved by both kindergarten children and their grandparents. Still, Caspar likes doing things differently, so we decided to take it to the next level.
Our cotton shirts have GOTS (Global Organic Textile Standard) certificate, labelling the products whose manufacturing process fulfils social and ecological standards. In other words, this is organic cotton that goes through production process in which everyone receives fair wage, and no harm is done to nature.
But we didn’t stop there!
All Over Print
Had today’s technology been present in the 50s, perhaps even Dean and Brando would have had second thoughts about those classic white shirts.
At Caspar, you can choose your model – women’s slim fit, unisex or oversized T-shirt dress – and place your custom print all over its surface!
How? Simply select your model and size, and have fun in our customizer. Don’t worry, we even prepared a blog that will clarify the entire process for you!
T-shirts aren’t the only products that have the all over print option – find more of them in our webshop!
The post Classic Cotton T-shirt: The Eternal Style Icon appeared first on Caspar.
]]>